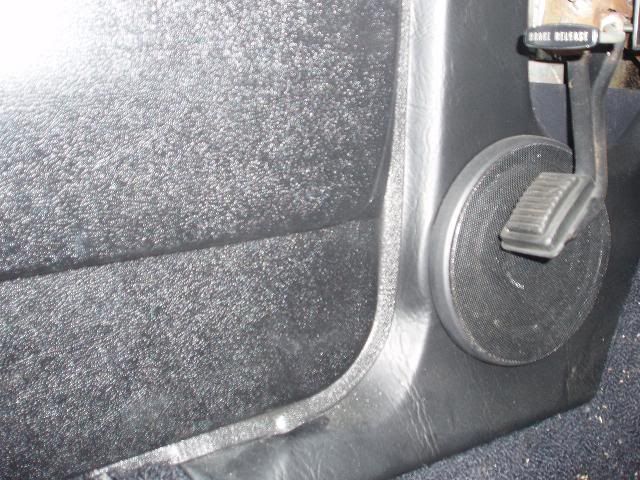
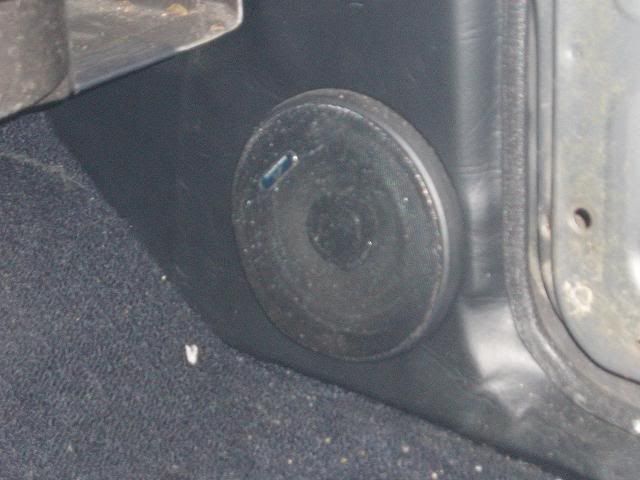
I have created my own kick panels for my Challenger in order to be able to have a four stereo speaker system without altering the original parts of the car to any great degree. The main problem to overcome was speaker depth on the drivers side as the emergency brake pedal severely limits what can be done. Also there is limited space a speaker can be recessed into the body. The only area available is the approximately 5 square opening that gives access to the lower door hinge bolts. I was able to determine that the Power Acoustic XP2K-652 6.5 2-way slim mount speakers required only 1.75 of mounting depth and that the 15oz magnets would fit in the 5 opening. Still I would need to move the E brake pedal inboard approximately 1. I removed the rear most mounting bolt & created a spacer to locate between the body & E mechanism. A longer bolt was then required to re-attach. I had the needed 1 but there was a lot of side play in the pedal and upon release wanted to return to the left. I placed a monkey wrench at the bottom of the brake pedal arm and lifted up and away toward the steering column. The arm moved a little but most importantly the play was reduced eliminating any conflict with the speaker.
Creating the kick panels is fairly simple once you have some basic materials to work with. I did not want to cut up my OE panels so I copied them from flat plastic approximately 1/32 thick stock. I was able to recreate some of the contours by heating and applying pressure with shaped wood and clamps. This was the most tedious & time consuming part of the process. A lot of test fitting, trimming & reshaping. I could not recreate the U shape that covers the door opening. I acquired u-channel molding on-line but found later that a local RV center carries this.
http://www.jcwhitney.com/autoparts/Product/showCustom-0/Pr-p_Product.CATENTRY_ID:2008663/c-10114/Nty-1/p-2008663/Ntx-mode+matchallpartial/N-10114/tf-Browse/s-10101/Ntk-AllTextSearchGroup?Ntt=trimFor thickness I used two layers of dense closed cell foam described as Light Grey 3/8 thick glued together
http://www.knoxfoam.com/cgi-bin/SoftCart.exe/closedcellfoam/closedcellfoam.htm?E+scstoreThis was easy to work with. Outer detail I cut with a coping saw or a bare hacksaw blade. Shaping was accomplished using a small die grinder with small barrel sandpaper. You have to stop short the depth of the u-channel in the area where it is used.
Final finish is stretch vinyl attached with staple gun at bottom back, glued with spray adhesive & staple the perimeter on the back. I discovered after making the passenger side that the trim ring for the speaker stuck out beyond the bevel I had created, I added a small bump out to accommodate. You will notice this looks better on the drivers side as I added during the build rather than after.
I added nylon spacers where the speaker mounting screws go through the foam to maintain thickness. The speaker mounting screws, which I ran into the metal of the car, hold the panel in place. I did add a small screw at the rear-most inside of the u-channel, as it did not want to stay in place especially on the drivers side with the extra metal of the wiring cover located there. The aluminum threshold will cover this screw. The opening for the E brake arm to swing left too much metal showing so I added a small panel of plastic to the backside using spacers & short screws.
If I were to do again I would like to explore a third layer of foam to give a more flush appearance and find vinyl to match the door panels.
I also enhanced the system by utilizing the original center dash speaker mount for two 3.75 piezo horn tweeters I had laying around.
http://ostg.pricegrabber.com/search_getprod.php/masterid=840757/From flat plastic I cut to match the shape of the original speaker. I then cut two openings for the tweeters. Due to depth I had to mount them as far to the left as possible.
QUESTIONS?

