Author Topic: One rust bucket from Finland (small update)  (Read 14426 times)

Offline Jacksboys

  • Sr. Resident
  • ******
  • Posts: 5540
  • Here Since 08/28/06 GEORGIA
Re: One rust bucket from Finland (small update)
« Reply #90 on: October 27, 2007 - 09:30:27 PM »
Sorry to hear about your grandmothers.


The car is looking good.  :2thumbs:
1971 Dodge Challenger:  360/904/3.23
   
Success is the maximum utilization of the ability that you have. - Zig Ziglar


Offline Kapteenikosmos

  • Jr. Member
  • **
  • Posts: 471
Re: One rust bucket from Finland (update 21-04-2009)
« Reply #91 on: January 21, 2009 - 08:32:38 AM »
It's been a quite while from the last update and I thought that I could try to bring the status on my car update. I've been busy at work and also somewhat lazy with the updating.

I have tons of pics from the progress and I'll try to post few of those during the next few days.

The last pics seem to be from the painting of the undercarriage and trunk floor etc so here are how it continued. I'm using photobucket as a source for the pics so these shouldn't disappear.

Firstly the badly rusted trunk lid is primered after repairs.


On the table are the parts that required some maintenance and under the table are parts that were already fixed. At the moment the table is pretty much empty.  :clapping:


For small parts the citric acid is just plain excellent.


Yeah, that's me attacking the roof with my space invader mask.


The roof cleaned and acid etched and ready for por15. For the first layer I used aluminium reinforced por15 and for the second layer normal semi black por15. For the third and last coat I used por15 etching primer which is supposed to be a good foundation for the fill primer and actual top coats.


After the roof was done in terms of primering I cleaned up the door jambs and painted them all the way to the final top coat.


Por 15 as a primer


Etching primer


The firewall was slightly worked with mud and after that whole engine bay was painted with the etching primer


First layer of actual color. No clear coat on this pic if I recall right


Engine bay in color


and insides of the doors in color


The hood after hot pressure wash. The hood came from Tubbed440 (thanks again!) and from the amount of oily goo I washed off from the underside of the hood, it seems that this hood has had somewhat unhealthy engine under it.  :rofl:


Some heavy pitting on the hood front trimp support and there was also small hole on the north east corner of the hood.


Badly rusted areas cutted off


and fixed


Hood sand blasted and cleaned up


It was also missing some of the support glue thingies between the frame on actual hood skin so those were also fixed. I used pieces of wood to tension the hood skin and create bit extra clearance between the frame and hood so that new glue could be added. After it was cured I removed the wood supports. The glue is standard seam sealer type stuff and as you can see it doesn't look as pretty as it came from the factory but it will do it's job. I had to reglue four of five similar places on the hood


underside of the hood painted in body color


I also did the hinges at the same time


That should be enough for one day. I will add more pics tomorrow.

Ville

1967 six banger Mustang
1973 Challenger (under restoration)
1997 Lincoln Mark VIII LSC (daily driver)

Offline sadil340

  • Sr. Member
  • ****
  • Posts: 1562
Re: One rust bucket from Finland (update 21-04-2009)
« Reply #92 on: January 21, 2009 - 01:07:22 PM »

That should be enough for one day. I will add more pics tomorrow.


One day! Man, you're fast!! :rofl: Looking great, you do good work and are saving a TON of money. I know I'm still reeling from my project costs and wish I had the skills...
1970 Cuda 340 4-speed
3:55 SureGrip
Owned since 1974
Bought from original owner

Offline Kapteenikosmos

  • Jr. Member
  • **
  • Posts: 471
Re: One rust bucket from Finland (small update)
« Reply #93 on: January 21, 2009 - 01:39:12 PM »
What skills? More like stubbornness, determination and some  :banghead:
For most parts, this project has been like climbing into a tree with your arse first.  :rofl:
Ville

1967 six banger Mustang
1973 Challenger (under restoration)
1997 Lincoln Mark VIII LSC (daily driver)

Offline Bullitt-

  • Permanent Resident
  • *******
  • Posts: 12167
  • Better Things To Come Member Since 2/16/06
Re: One rust bucket from Finland (small update)
« Reply #94 on: January 22, 2009 - 06:52:40 AM »
, this project has been like climbing into a tree with your arse first.  :rofl:

PLUM CRAZY
comes to mind...Good Work   :thumbsup:
Wade  73 Rallye 340..'77 Millennium Falcon...13 R/T Classic   Huntsville, AL
Screwed by Photobucket!

Offline Topcat

  • C-C.com Expert
  • ********
  • Posts: 15376
  • Member since 9/16/04
Re: One rust bucket from Finland (small update)
« Reply #95 on: January 22, 2009 - 11:35:18 AM »
Nice work KK. For how young you look to be, you sure seem very skilled.
Looks like a vat of Rust Away those parts are in? Great stuff I use it alot.
Mike, Fremont, CA.


Offline Street_Challenged73

  • Sr. Resident
  • ******
  • Posts: 8826
  • '73 FC-7 Challenger..Member since October 20, 2002
    • My '73 Challenger Restoration Page
Re: One rust bucket from Finland (small update)
« Reply #96 on: January 22, 2009 - 03:29:53 PM »
Awesome progress!!! :cheers:  Nice color choice, too. :biggrin: :2thumbs:
1973 Dodge Challenger......................The ongoing project. (00/----\00)
1991 Dodge Stealth R/T Twin-Turbo....The sunny day cruiser (RTBoost)
1990 Toyota Celica GT Liftback...........The new daily & winter driver.
All-American Muscle: 'Cudas and Challengers...Still the Elite and always will be.


Street_Challenged73 from Wisconsin

Offline Tubbed440

  • Jr. Member
  • **
  • Posts: 318
  • Suspension NinJa
Re: One rust bucket from Finland (small update)
« Reply #97 on: January 23, 2009 - 09:48:22 AM »
Awesome progress!!! :cheers:  Nice color choice, too. :biggrin: :2thumbs:

Ditto.  Glad to see you could make use of that hood!
74 Dodge Challenger
500 inch stroker, Full cage, ladder bars,
coil-overs, 4L80E, 325/50 M/T DR's....street car!
(work in progress)

Offline ArcticCuda

  • Full Member
  • ***
  • Posts: 523
    • Pepe
Re: One rust bucket from Finland (small update)
« Reply #98 on: January 24, 2009 - 12:20:19 PM »
Awesome colour! Keep up good work!
Current Vehicles:
Plymouth PPR Cuda 1970 489 cid
Plymouth GTX 1970 RS23V0E


Sorry my bad english...I'm just an european...

Offline PasiR

  • Jr. Member
  • **
  • Posts: 225
Re: One rust bucket from Finland (small update)
« Reply #99 on: January 25, 2009 - 02:02:02 PM »
Awesome colour! Keep up good work!

I agree!

Offline Moparpena

  • Jr. Member
  • **
  • Posts: 148
    • Project Challenger r/t
Re: One rust bucket from Finland (small update)
« Reply #100 on: January 25, 2009 - 05:40:04 PM »
 :iagree: Fc7 is beautiful color.
Dodge Challenger r/t 1970, fc7 car. Restoration link below:
http://penasgarage.blogspot.com/

Offline Kapteenikosmos

  • Jr. Member
  • **
  • Posts: 471
Re: One rust bucket from Finland (small update)
« Reply #101 on: May 03, 2009 - 04:09:14 PM »
Well, time has flied again and I have been lazy in the terms of updating this thread. The work with the car has continued with increasing pace and we have set some kind of deadline for the project. The plan is to drive the car to a local car meeting (Forssa Picknick). It's the largest one day US car event in the scandinavia (~2500 cars). The event is held on the first weekend of august so it's getting kinda hurry  :working: . The good is that my parents already promised to tow us there if the car isn't moving by it's own  :rofl:

The other thing that has caused to set this kind of deadline is that we bought some land and we should start building a house (with a couple of carages!) during fall so the Challenger should be somewhat ready before that. So the target is to get it somewhat road legal during next few months.

Well this is what has roughly happened during last few months:

The heater box has been repaired with fiberglass (and boy, it was in a bad shape). I'm not sure where the before pics are but it was in usualy bad shape overall before fixing it. We applied also few coats of black plastic paint to clean it up a bit.


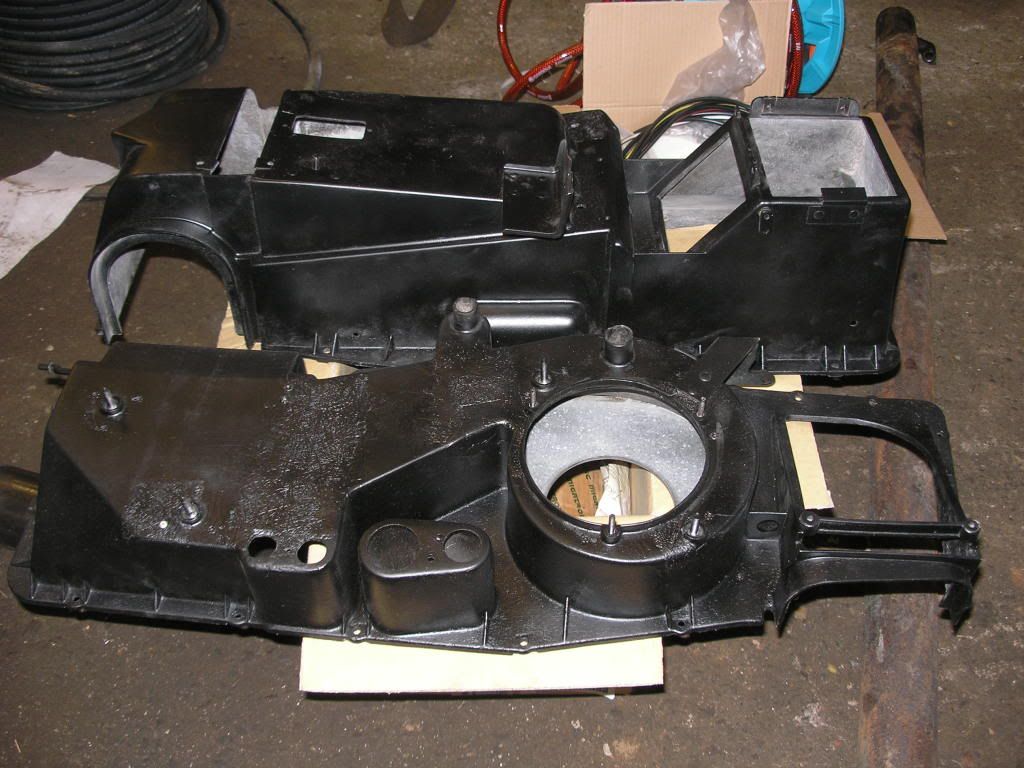
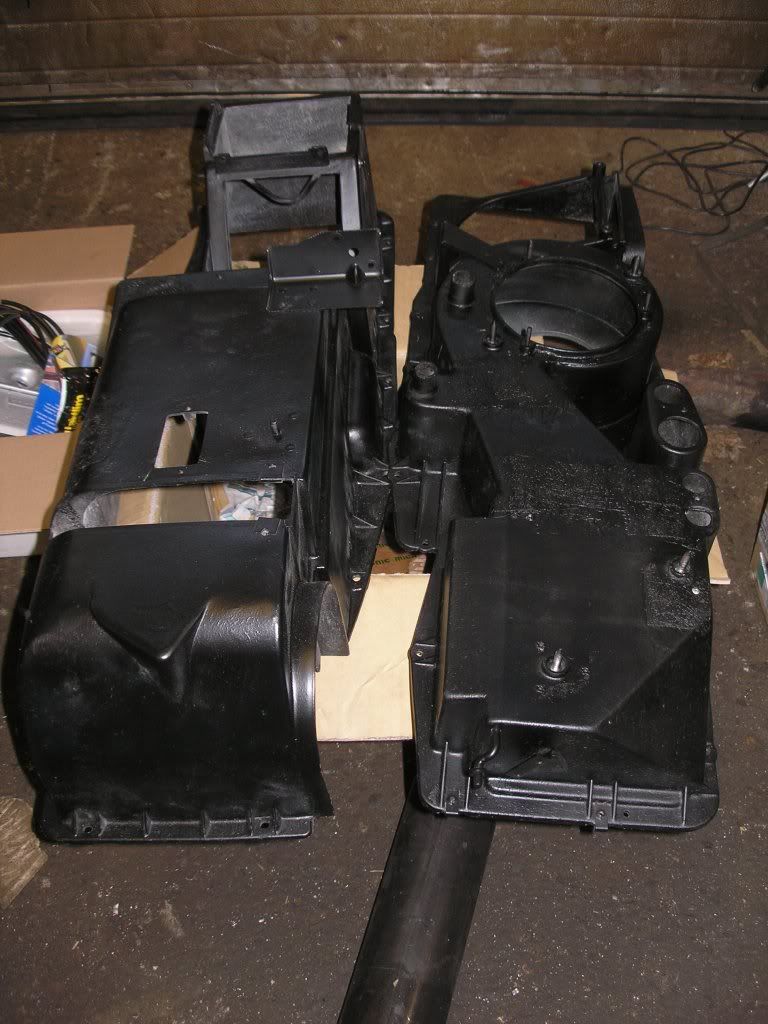
My fiancee has been working with it and the whole box should be ready during next weekend. I had to order a new heater core from Rockauto. The one I got was pretty messed up and needed lots of tweaking, but hey, it was also cheap. The new insulating foams were ordered from detroid muscle cars or something like that.

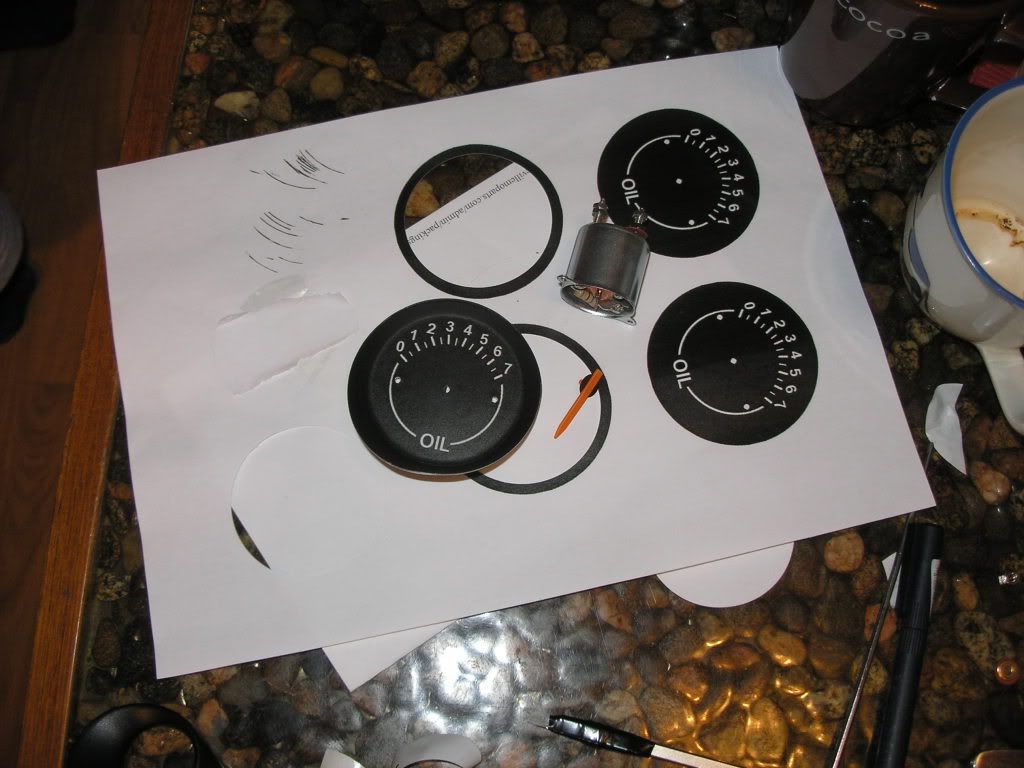
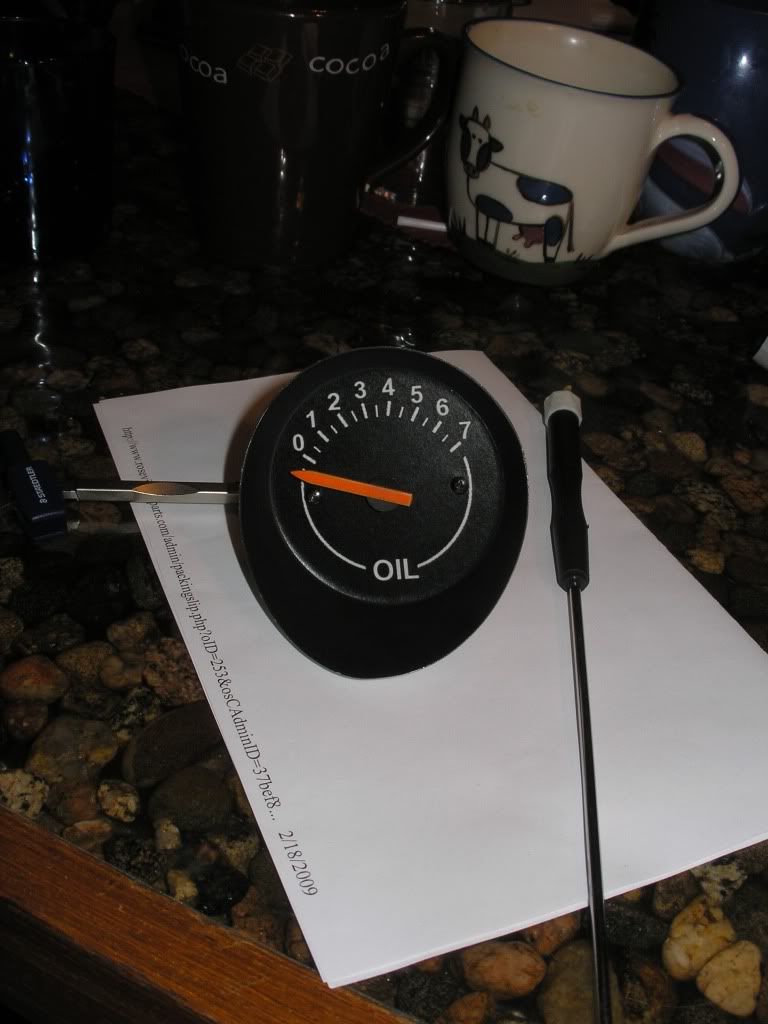
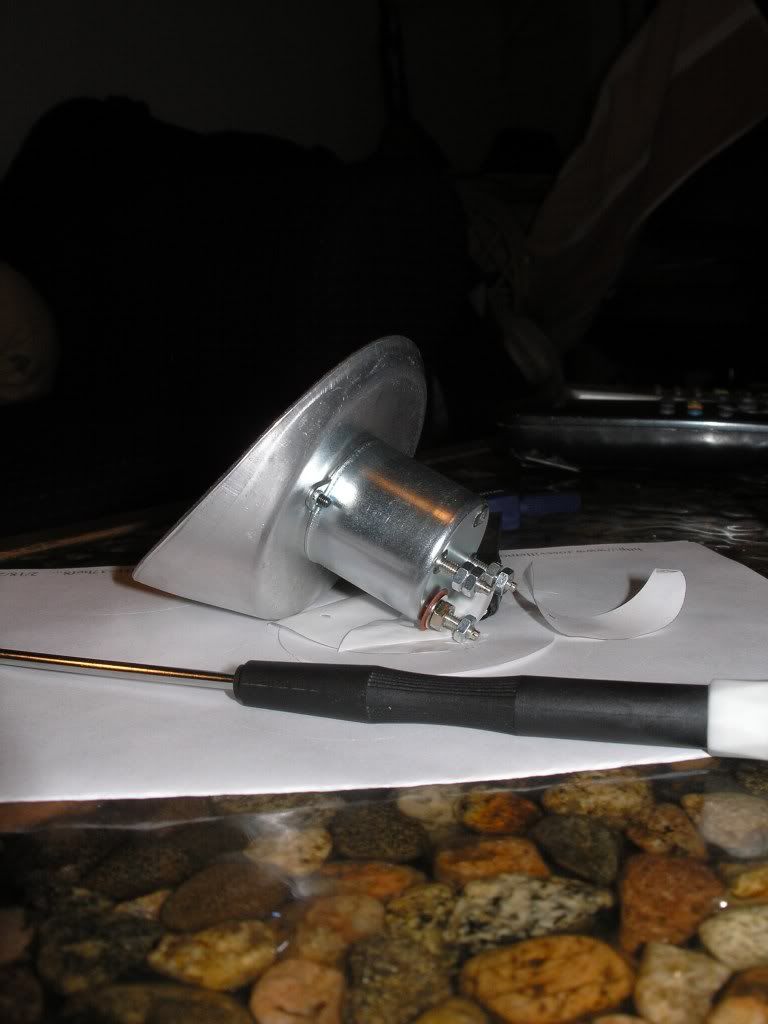
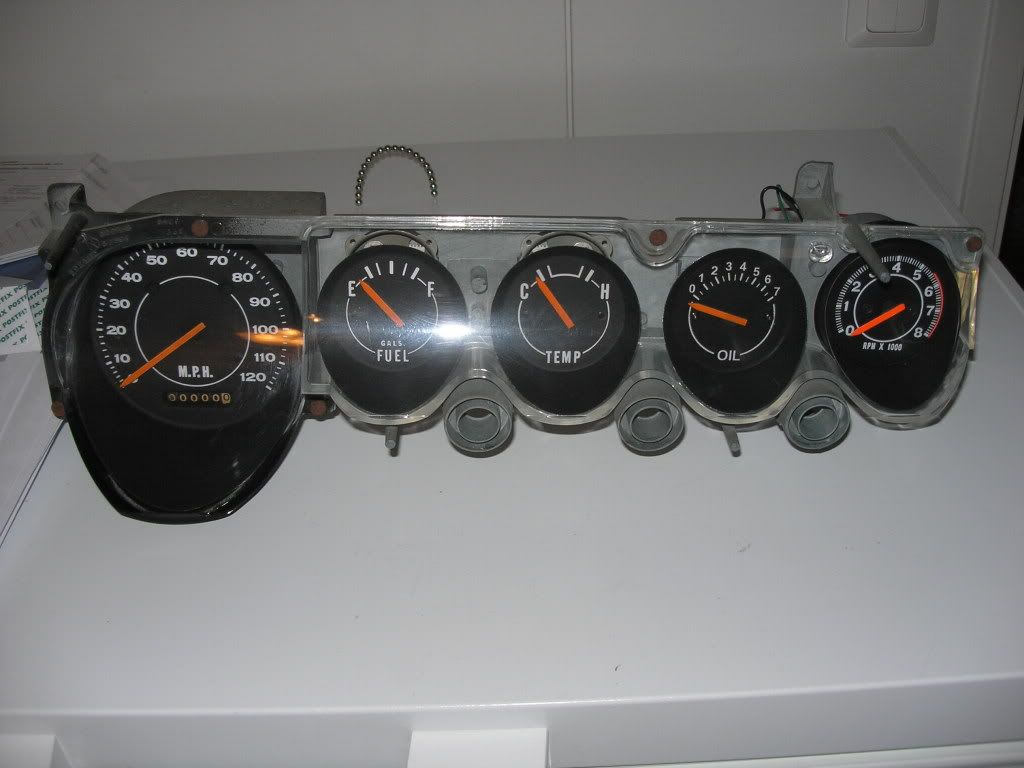
I have had a long term project on the instrument cluster and it's starting to get ready. I ordered a tach meter for non rt cluster and I also converted the original ALT meter into Oil pressure meter. I gutted some (Autogauge) tuning oil meter for the parts needed and fabricated some misc mounts to install it to the cluster. My fiancee designed a custom face plate for the gauge and it was printed on a self adhesive paper.  The face plate was then placed over the original ALT gauge and the end result is shown below. If anyone is interested in some tinkering, I have couple of printed face covers available with the price of shipping. The only mistake I did is that I did the scale in Bars instead of Psis, I even didn't notice it before my friend said that. Well it isn't a huge deal. I did calibrate the meter and it should be accurate enough although the sending unit has huge hysteresis, something like 1 bars.


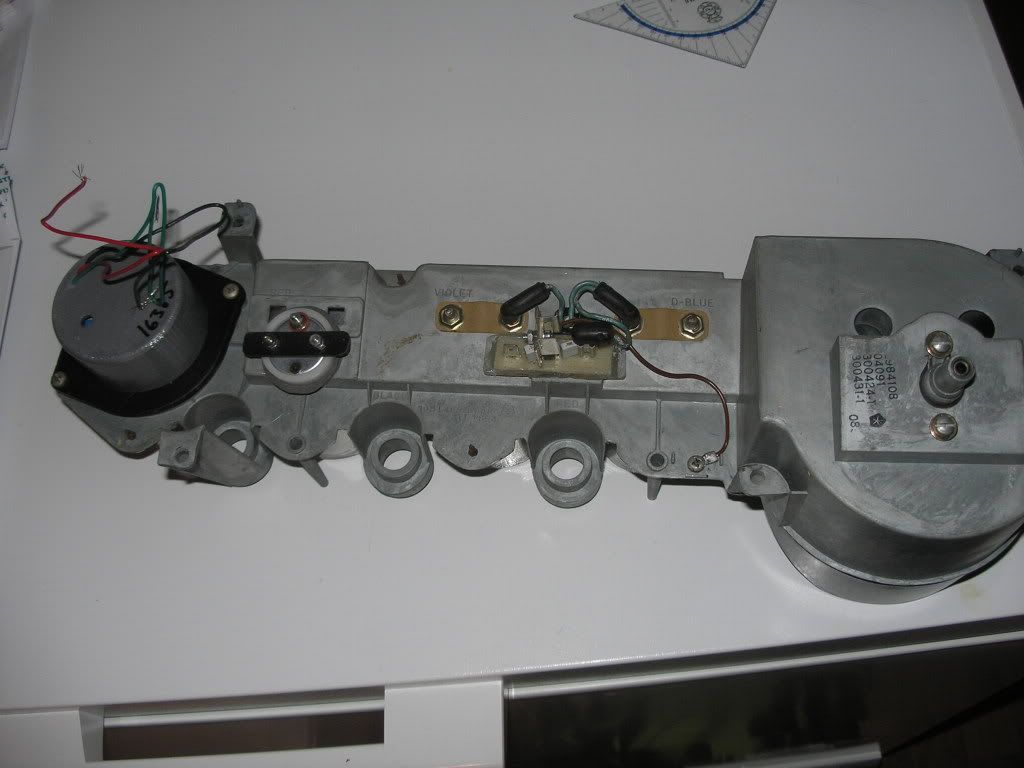
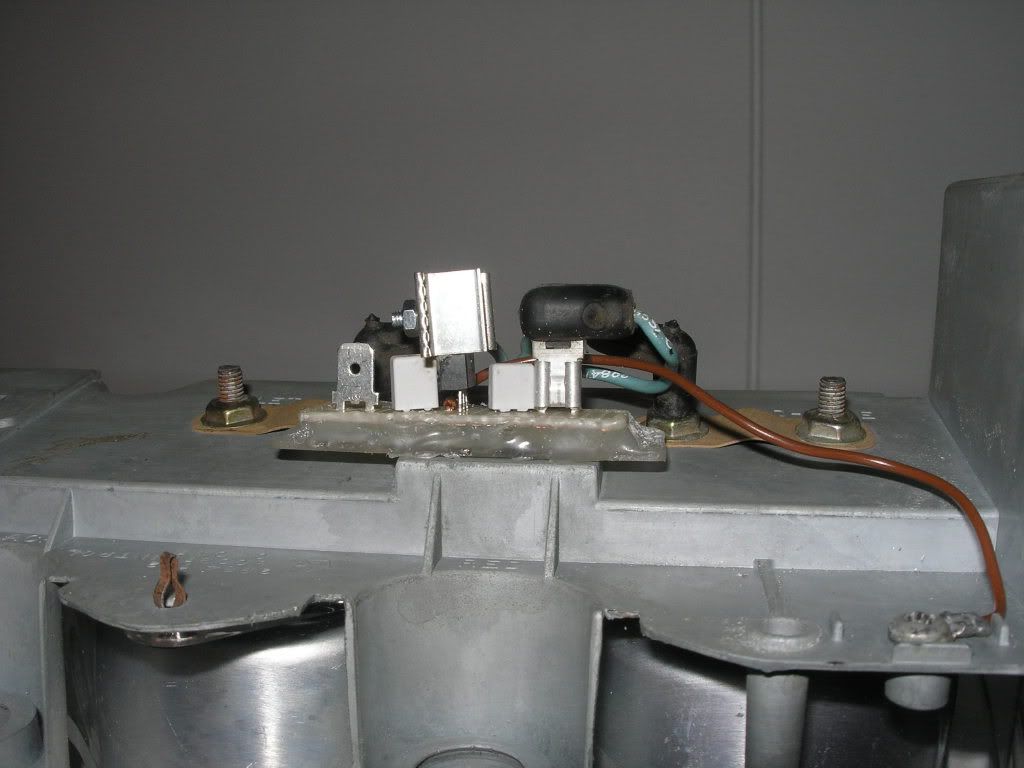
The old mechanical voltage limiter was also tossed away and I did a quick electronic version with few capacitors and modern voltage regulator. It doesn't look very good, but works like a charm and it is hidden behind the gauges anyway.


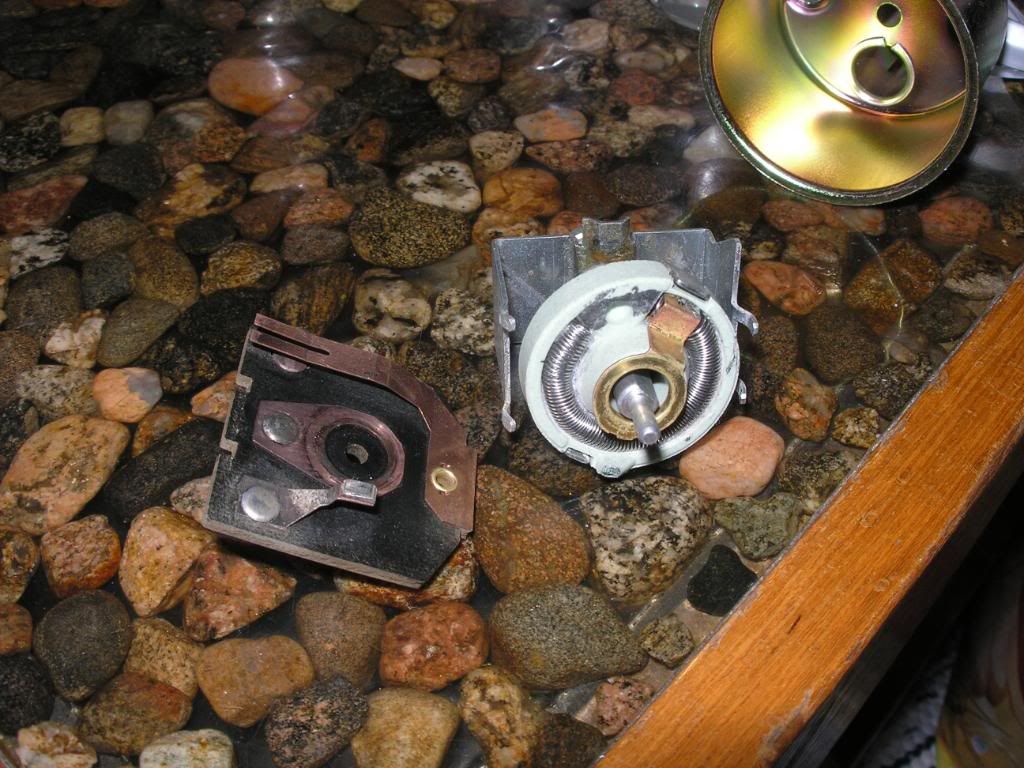
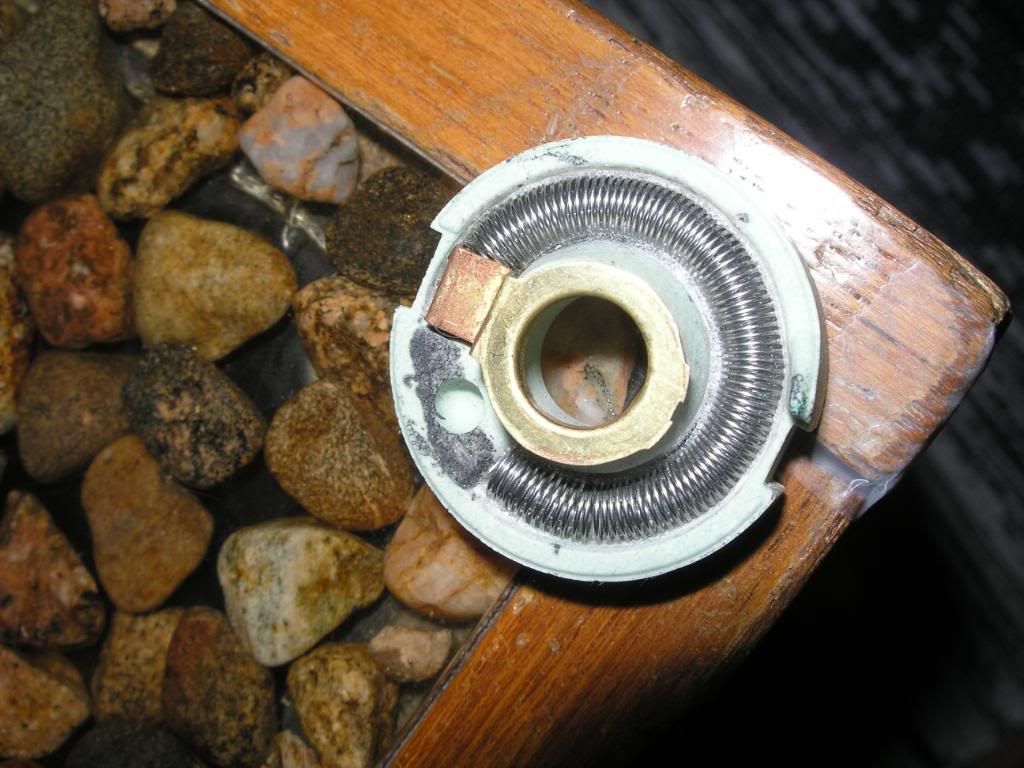
The resistance wire on the old dimmer switch was burned up so I did also fix that one. I had a pretty long search for the right sized kanthal wire and after a long search I found it from ebay. The seller was located in eastern europe, cannot remember where but I got a strip of wire very cheap. I used suitable round bar and lathe to wound the wire into a spring shape. The original wire was "glued" into the housing with some ceramic stuff which I failed to find so I used "waterglass" instead. It's glue like stuff which is used in fireplaces. The superballs are also made from the same stuff with the help of pure ethanol, which ofcourse we had to test at my work place  :droolingbounce:


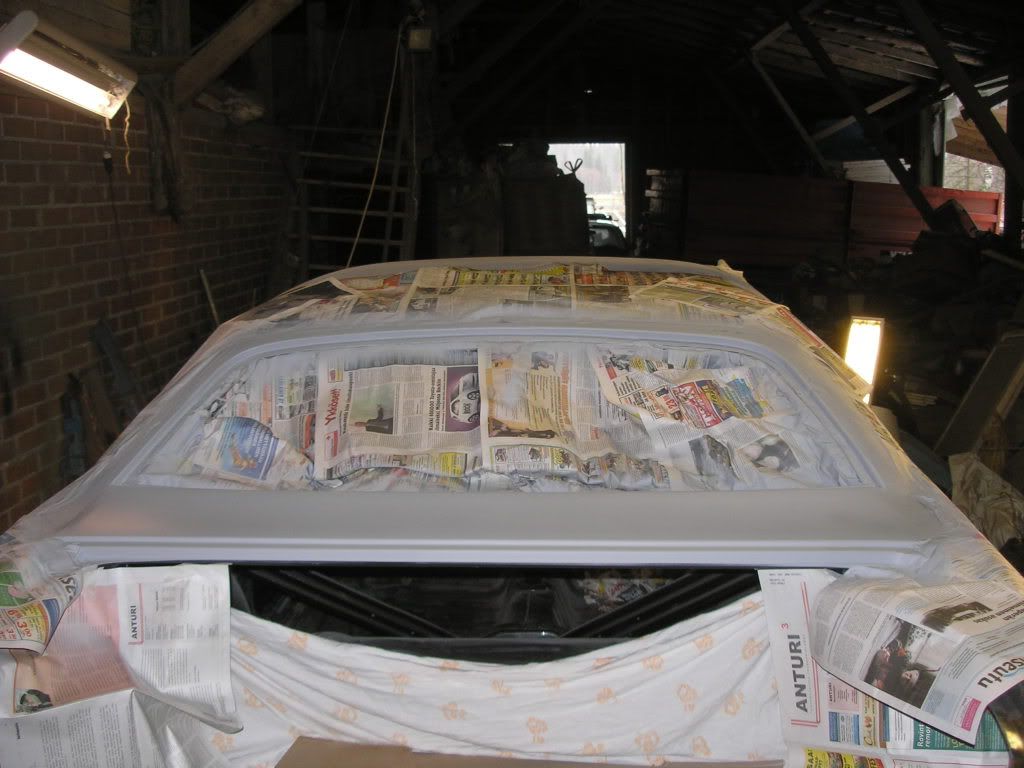
I didn't work with the actual car during the winter because as I have stated probably before, the car is located in our barn and there isn't any heating. When the air warmed up I started working again with the car and the first thing I did was to remove the hideously pathced trunk filler panel I did few years ago and installed a new AMD filler panel. The panel fitted like a glove and it really looks much better now. I did use lead on the side seams which are normally left visible because I like more of the clean look. Passenger side needs some mud because most of the outside cpillar is made from sheet metal and I'm not that good of a panel beater. For the painting I painted the window opening with por 15 first and after that the opening and the filler panel was painted with dp40. I don't have any pics from the actual work because I was kinda hurry during that time but I have one pic after the painting.


After the filler panel was ready I cleaned and fixed the rest of the rear end including the trunk gutters. The gutters and some selected parts of the rear were also painted with por 15 and por etching primer first and the whole thing was covered with dp 40 after that.


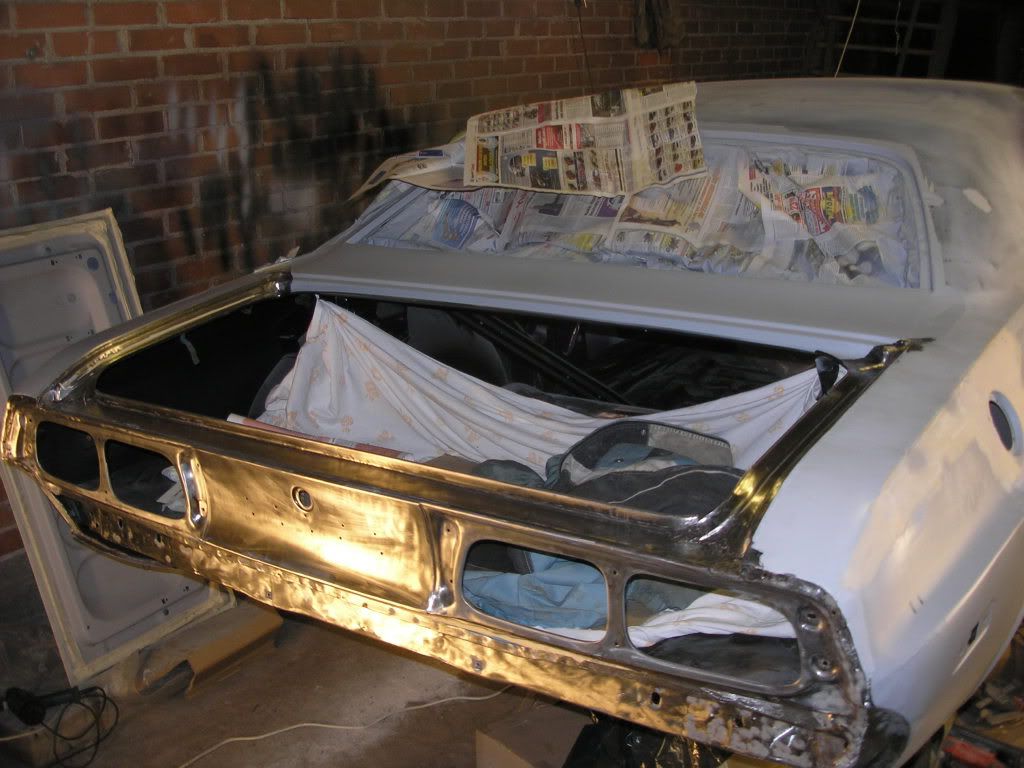
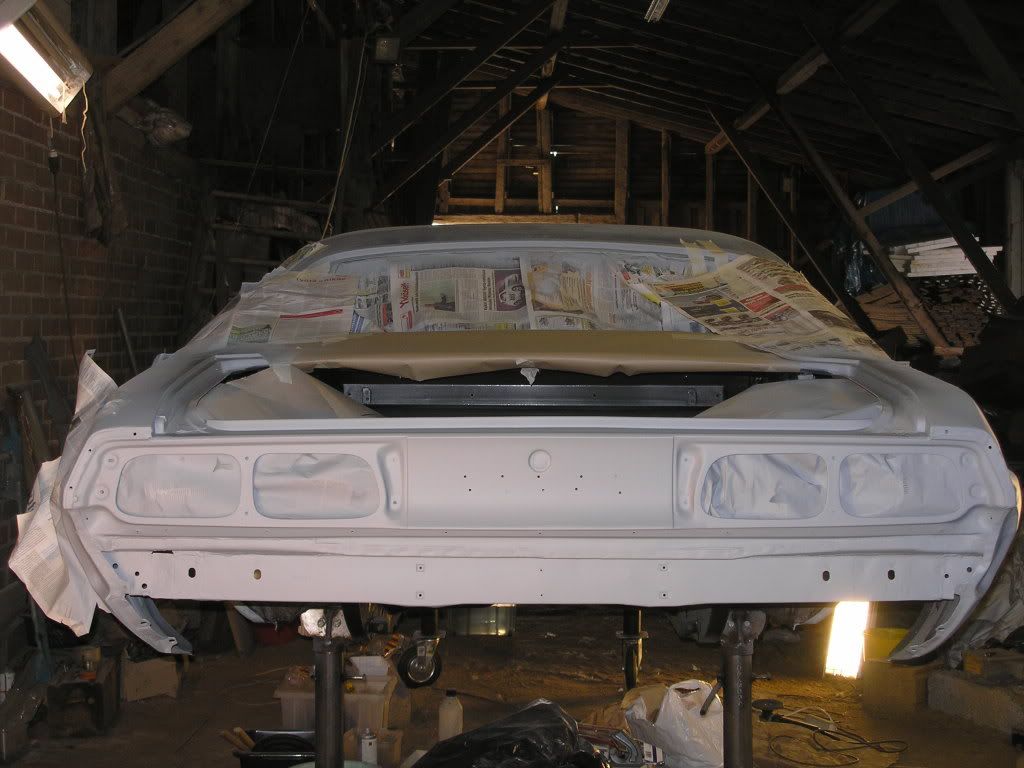
Someone might notice that there is a hole were there shouldn't be any on the rear crossmember. I was bit frustrated when I noticed that I hadn't welded that shut. The rotisserie has probably been in the way during the time I have repaired that area and that's why it is missing some metal and weld. The areas around that hole are painted pretty heavily with por 15 and chassis coat black which made me to decide that I will fill that hole with a seam sealer. The por 15 tends to burn pretty easily and I don't wan't to ruin a perfectly good paint around it. Anyway, it is a new sheet metal covered with paint so it won't rust and the structural integrity it is missing is next to minimal. This sound like I'm trying to convince myself that it is ok to use a sealer there  :rofl:

Well, that's about where the car sits right now body wise. The engine is almost ready, short block is assembled and waiting for the heads. The heads were milled 1.2  millimeters to raise the compression so I had to mill the intake sides of the heads too, which I did today. The port work is about half done with the templates so if everything goes well, I have the head ready during this week.


Ville

1967 six banger Mustang
1973 Challenger (under restoration)
1997 Lincoln Mark VIII LSC (daily driver)

Offline dutch

  • Sr. Resident
  • ******
  • Posts: 6944
Re: One rust bucket from Finland (small update)
« Reply #102 on: May 03, 2009 - 04:23:15 PM »
 :wow:   you`re making some nice progress there  :thumbsup:   I remember how it looked when you started and I think you`re a brave man....  :biggrin:   must be the viking blood....  :aarg:
too bad all older pics are gone.  try to reload them one of these days, they can be very inspiring.... plus it `s nice to look back once in a while.   Keep up the good work and good luck with the deadline  :cheers:
*** Bart ***