71 'Cuda restoration project

Author Topic: 71 'Cuda restoration project  (Read 18701 times)

Offline soundcontrol

  • Sr. Member
  • ****
  • Posts: 1603
Re: 71 'Cuda restoration project
« Reply #60 on: February 16, 2017 - 06:15:21 PM »
Great project Per! Just read the whole thread. Love the bodywork, doing the same with mine, and have another one waiting. Where in Sweden are you? I'm in Alvkarleby/Uppland. Wanna sell me your old tranny? Looking for a a833 for my -73 Challenger.
/ Ken
Restoration thread: http://www.cuda-challenger.com/cc/index.php?topic=102525.0
topic=108917.new#new


Offline redo1973

  • Full Member
  • ***
  • Posts: 549
Re: 71 'Cuda restoration project
« Reply #61 on: February 16, 2017 - 08:35:49 PM »
I too became the master of making holes and filling them with "Bubble gum" like weld.  I learned that I was using the wrong size wire.  Next I discovered the beauty of using gas in addition to wiring the MIG properly :roflsmiley:.  As for the wife, I too have a trooper.  I received plenty of criticism when I kept tearing the car apart and replacing with new.  It became the running joke that I'm not restoring the car but building one.  It quieted down once the wheel and things began making it look like a car.  And then, it had final paint on it.  The only question I got then was, "You're not going to keep those wheels on are you?"  When are you going to buy new wheels?  She's hooked.  Your project is looking solid., :popcorn:

Offline dodj

  • Sr. Resident
  • ******
  • Posts: 6197
Re: 71 'Cuda restoration project
« Reply #62 on: February 16, 2017 - 09:29:13 PM »
in addition to wiring the MIG properly :roflsmiley:
LOL, I started trying to weld with it wired backwards....
Scott
1973 Challenger  440 4 spd 
2007.5 3500 6.7 Cummins Diesel, Anarchy tuned.
Good friends don't let friends do stupid things. ........alone.

Offline soundcontrol

  • Sr. Member
  • ****
  • Posts: 1603
Re: 71 'Cuda restoration project
« Reply #63 on: February 17, 2017 - 05:37:51 AM »
I got a deal with my wife, she decides on animals, I decide on cars. We got 4 animals, I got 2 Challengers and a Harley, so I figure there is room for a Cuda later :)
/ Ken
Restoration thread: http://www.cuda-challenger.com/cc/index.php?topic=102525.0
topic=108917.new#new

Offline John Be

  • Jr. Member
  • **
  • Posts: 13
Re: 71 'Cuda restoration project
« Reply #64 on: February 18, 2017 - 01:35:55 AM »
Assume metal work. I've learned a lot just by looking at your pics.
What wire size did you end up using?
Keep up the great work and please send more pics!

Offline HemiTunis

  • Jr. Member
  • **
  • Posts: 89
Re: 71 'Cuda restoration project
« Reply #65 on: February 18, 2017 - 09:36:22 AM »
Thank you all for all the positive comments! Yes, my wife is a real trooper and super supportive of all the things I do. She has even come out to the garage and used the blasting cabinet a few times.. She has been given quite a few hugs lately :)

soundcontrol: I live in the south of Sweden, near Malmö. Sorry, will not sell my trans or any other parts I will need if I decide to go back to stock.

I started using 0.03 wire for the most part. Switched to 0.023 now when I started working on the fenders. Tried to use it before, but the wire kept binding up in the tube to the gun. Gas shielded of course.

Spent the day media blasting the fenders on the inside. What a mistake that was. It was around 36 F and quite windy. I now have a cold and the wife is upset about that naturally... Will take some pictures when I go outside again.

More pictures to come...
Per from Sweden

Vehicle fleet:
1971 472 Hemi 4-speed Cuda, under restoration

The one(s) that had to go to move forward in life:
1968 Dodge Charger R/T
1970 340 4-speed Cuda, matching numbers

Offline HemiTunis

  • Jr. Member
  • **
  • Posts: 89
Re: 71 'Cuda restoration project
« Reply #66 on: March 24, 2017 - 04:48:05 PM »
I don't update this thread as much as I would like to. Anyway, time for another round of pictures and continuation of the story.

After media blasting, I found some more holes and welded up a couple of holes.


Eventually I spent too much time on the fenders without being sure I could rescue them. I guess in the end it is up to the guy doing the paint to determine if they are good enough to save. All I will do is fix the rust, holes and try to get them as straight as possible.

One of the things I wasted my time on was this part (the one on the right) of the fender were the factory didn't line up the two pieces of sheet metal before welding them together.


A closer look, where it's clear that a piece had to be bent to access the threads under it.


The bottom doesn't look to be out of place as much as the top.


I sure didn't want this, so I spent a few hours fixing it. First separating the parts.


Then sand blasting the rusted areas.


Applying some weld-through primer to both parts.


Then welded it back on.


Per from Sweden

Vehicle fleet:
1971 472 Hemi 4-speed Cuda, under restoration

The one(s) that had to go to move forward in life:
1968 Dodge Charger R/T
1970 340 4-speed Cuda, matching numbers

Offline HemiTunis

  • Jr. Member
  • **
  • Posts: 89
Re: 71 'Cuda restoration project
« Reply #67 on: March 24, 2017 - 05:06:36 PM »
I have a lot more pictures of the fenders, but I'm sure they get quite boring after a while. After working with the fenders for a couple of weeks, I really wanted to start with the body again. The next part was going to be the right quarter panel, which was going to be a simple replace operation... Yeah right...


So the roof needs a little patch where the roof meets the QP.

Cutting away the remaining pieces of the quarter panel.


Had to test fit the new QP  :ylsuper:


Before quarter panel could be installed permanently, the inner structure had to be repaired.


It has rusted away quite a bit and a new piece had to be fabricated.


And finally welded into place


Per from Sweden

Vehicle fleet:
1971 472 Hemi 4-speed Cuda, under restoration

The one(s) that had to go to move forward in life:
1968 Dodge Charger R/T
1970 340 4-speed Cuda, matching numbers

Offline HemiTunis

  • Jr. Member
  • **
  • Posts: 89
Re: 71 'Cuda restoration project
« Reply #68 on: March 24, 2017 - 05:30:37 PM »
Next up was this part over the quarter glass.


So two options to access this area to repair the rust, cut out a piece of the roof or the inner structure. I didn't really want to do either as butt welding a big piece of the roof back would require some skills. On the other hand I didn't really think I could access the damage by going from the inside out. So the roof had to go.

Cutting on the line...


And off it goes. The damage is clearly accessible now. Looks like the drip rail is pretty much rusted away.


First fixing the damaged inner structure. Cutting away the rusted out areas.


Welding some new metal into place.


Finished!


A coat of rust protecting primer.


Onto the drip rail. It is pretty much gone and a new piece is in the making.


I had a bunch more pictures of this on my phone, but they were deleted by mistake. Finally the roof is welded back into place with a perfect fit to the drip rail. I'm really surprised at what I could do  :bigsmile:


Per from Sweden

Vehicle fleet:
1971 472 Hemi 4-speed Cuda, under restoration

The one(s) that had to go to move forward in life:
1968 Dodge Charger R/T
1970 340 4-speed Cuda, matching numbers

Offline redo1973

  • Full Member
  • ***
  • Posts: 549
Re: 71 'Cuda restoration project
« Reply #69 on: March 24, 2017 - 06:31:28 PM »
WOW! Your approach to the B Pillar looked more straight forward than mine.  I fabricated an entire B Pillar piece because my rust ran down onto the outer wheel house.  Fantastic work.  I too was amazed at how much one learns in a project like this.  Congratualtions.  It's very rewarding. Your welds look pretty good.  I learned to use CO2 mixture with a non-shielded .03 wire.  It flows very nicely.

Offline HemiTunis

  • Jr. Member
  • **
  • Posts: 89
Re: 71 'Cuda restoration project
« Reply #70 on: March 26, 2017 - 04:09:55 PM »
Thanks for the positive comments redo1973! I use a gas mixture which I think is something like 20% CO2 and 80% Argon.
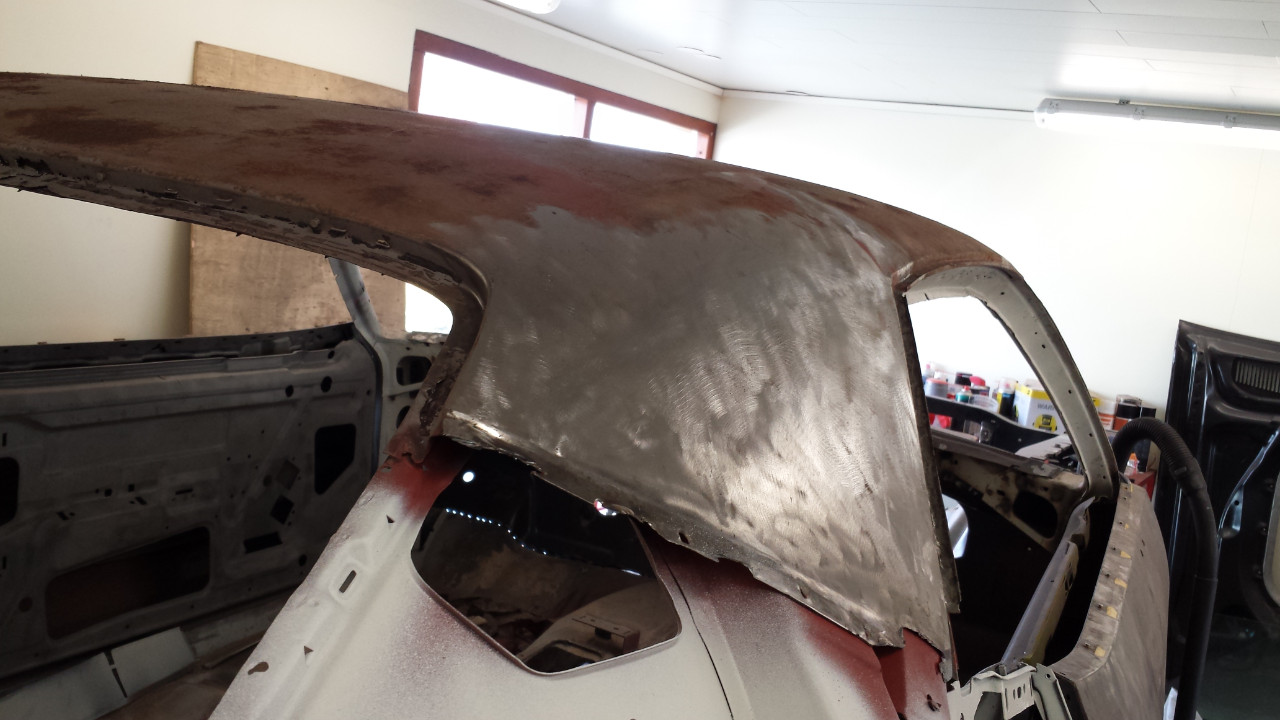
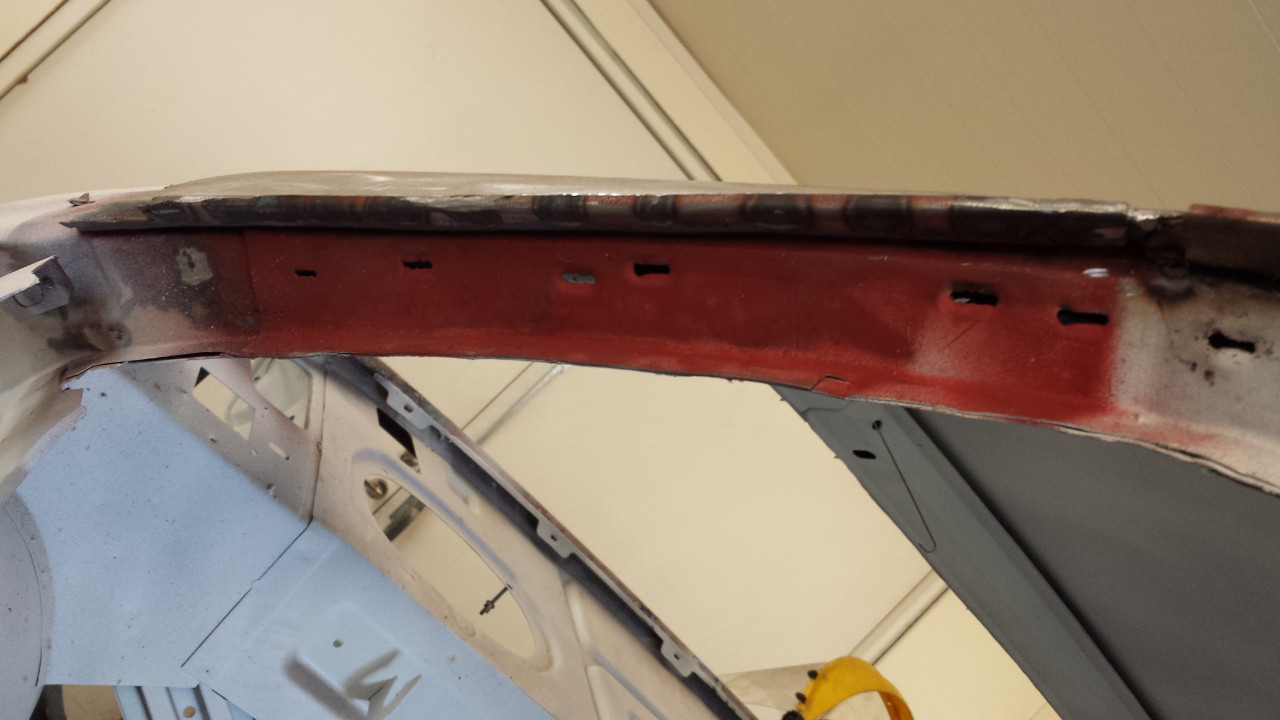
Here are a few fresh pictures of the roof and drip rail after some grinding.


Now I found myself once again with two options; replace the quarter panel first so everything is lined up when the rest of the panels are replaced, replace the trunk pan and extensions first then the fenders and tail light panel. I'm sure there are many reasons to go one way or the other. I wanted to go with the first option, but later decided to do the latter  :clueless: don't know why I switched after a while, but I did..

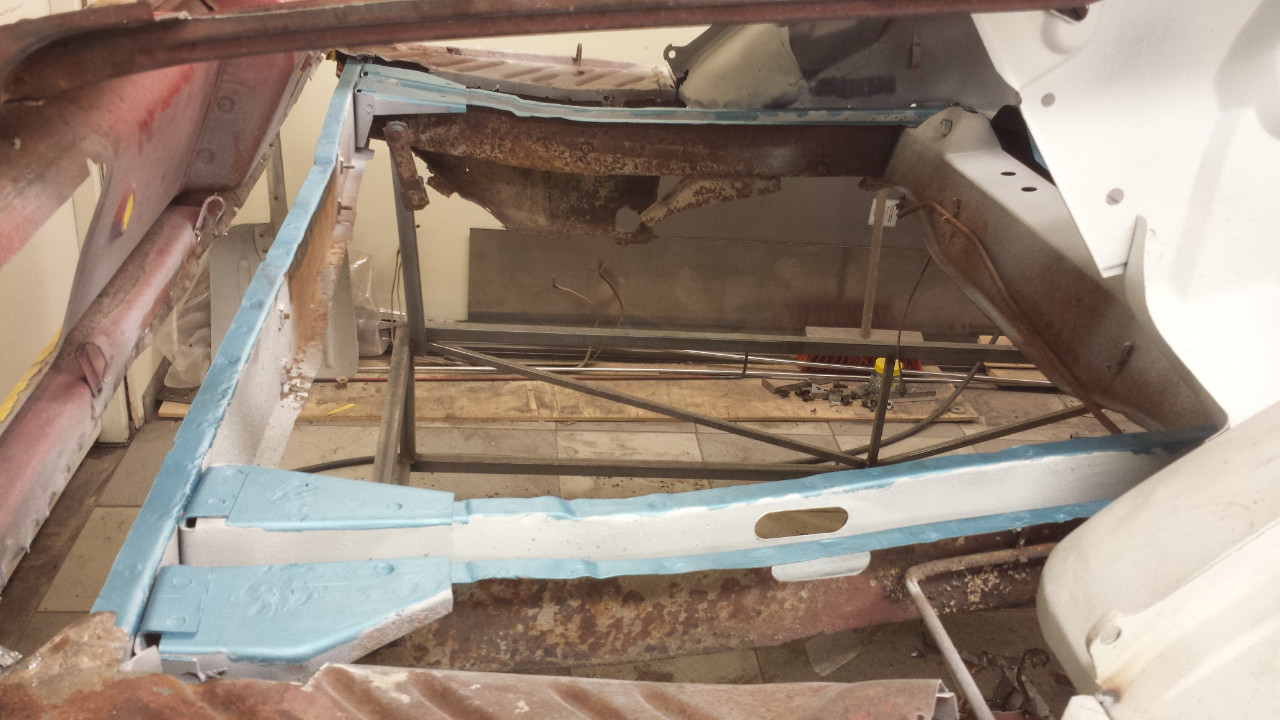
I cut out the trunk pan to get access to the rails, I wanted them blasted and primed before putting the new trunk pan in. Blasting the rails was done a few weeks ago at the same time as I blasted the inside of the fenders. I then applied a coat of epoxy primer to the rails, fenders and some other parts I had prepared.
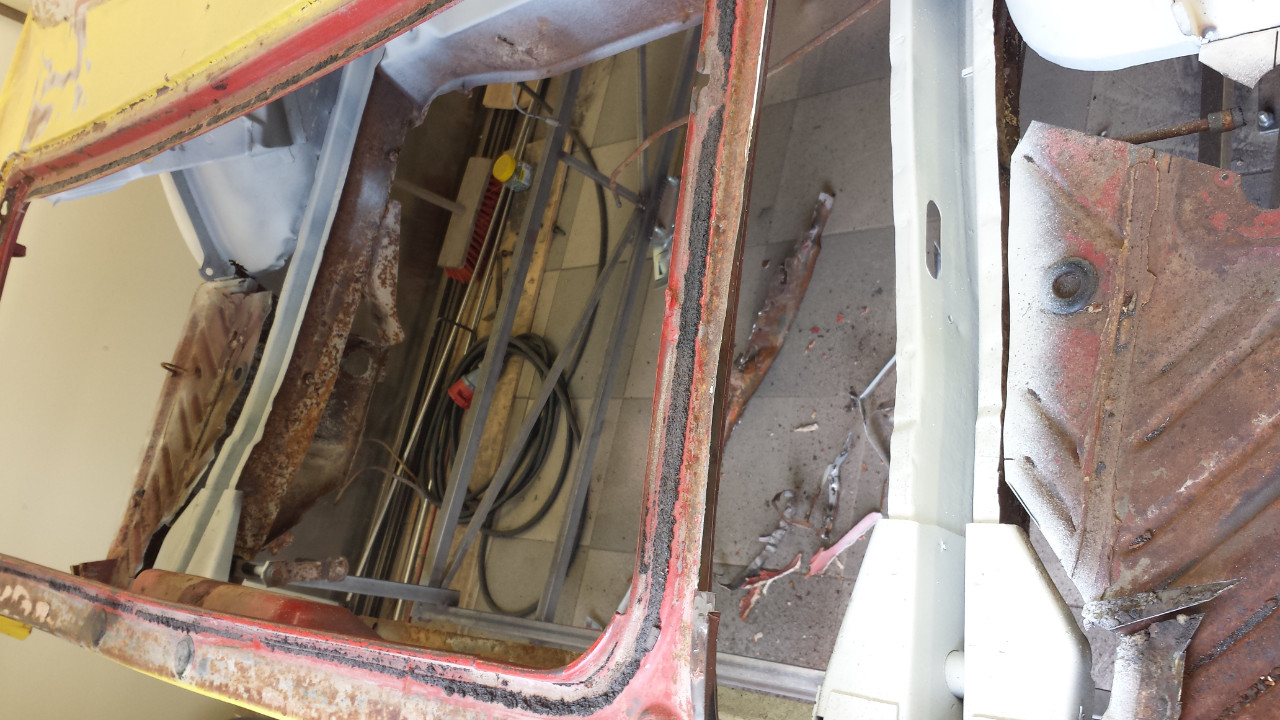


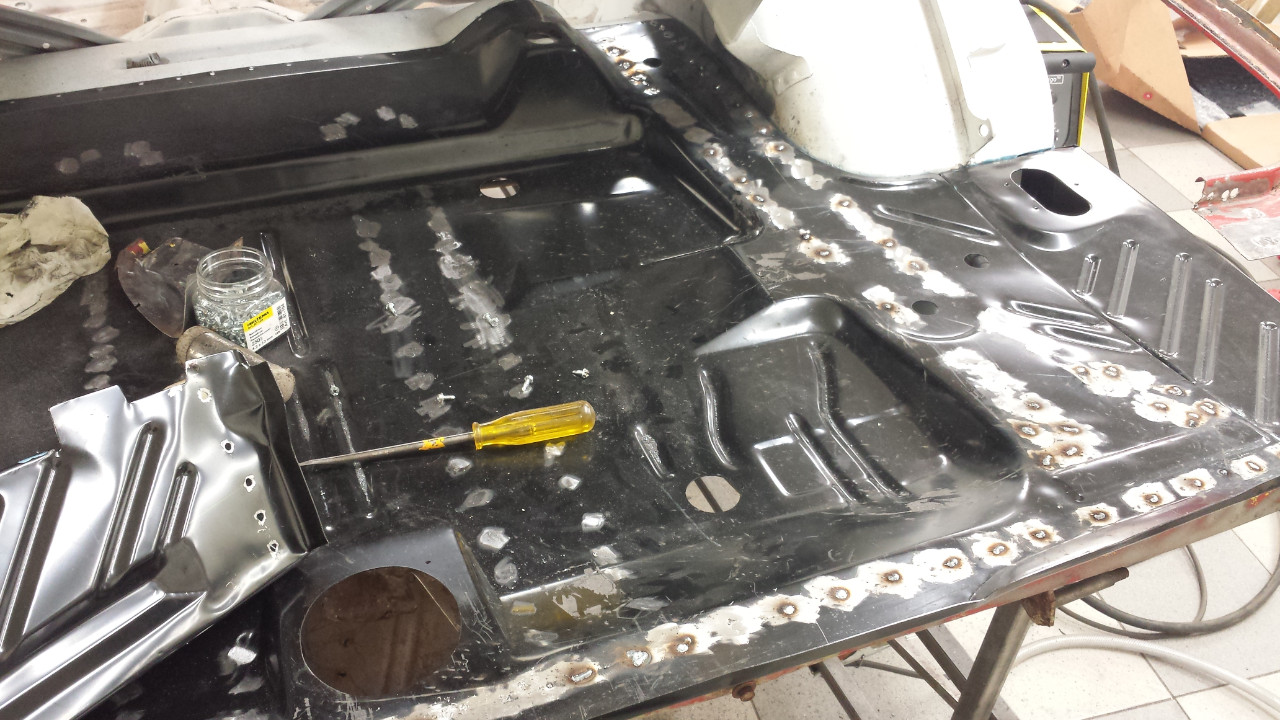
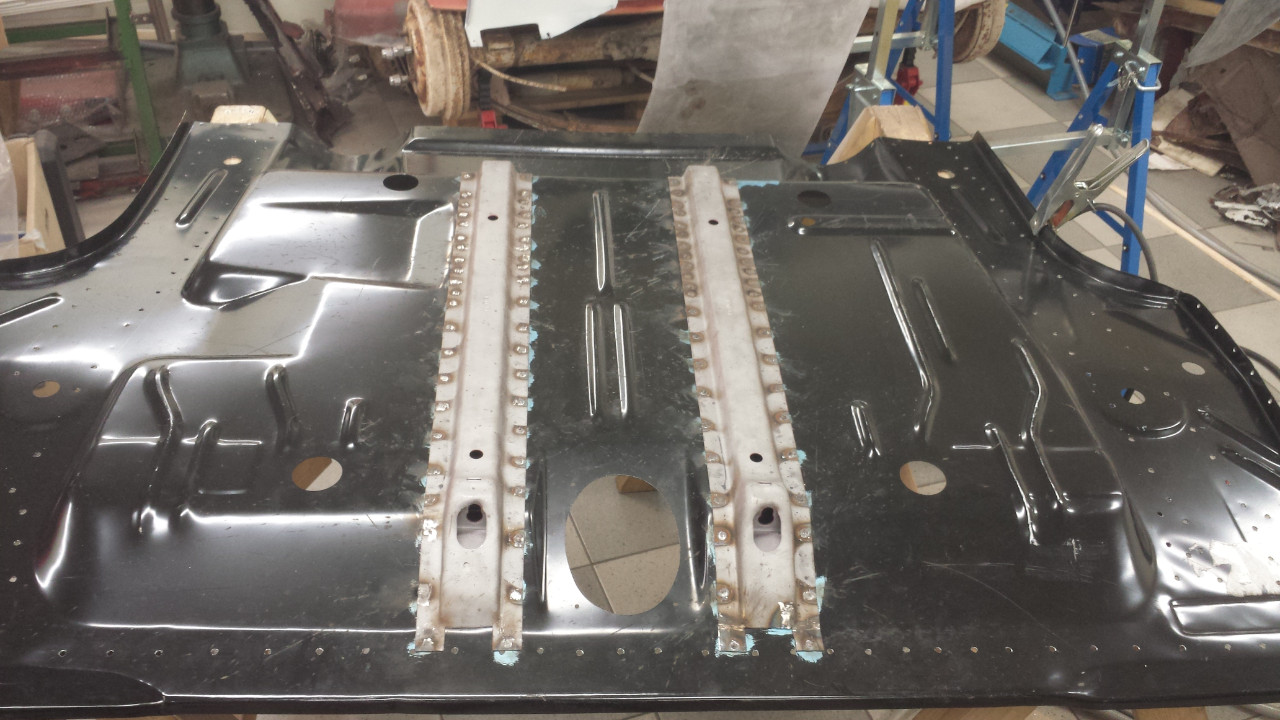
After that I blasted the support rails for the trunk pan and welded them to the underside of the pan. Also drilled a million holes in the trunk pan. It's a lot of hard work doing a restoration..


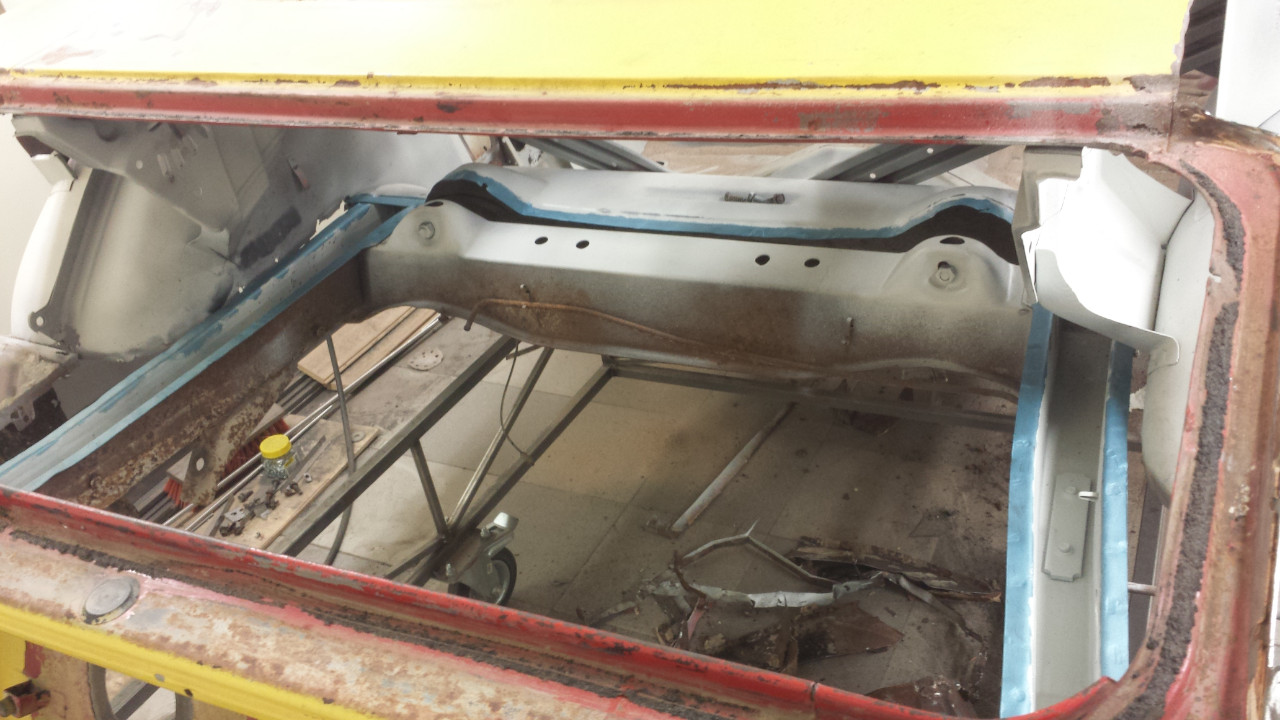
Applied some weld through primer on the rails where I was going to be welding.


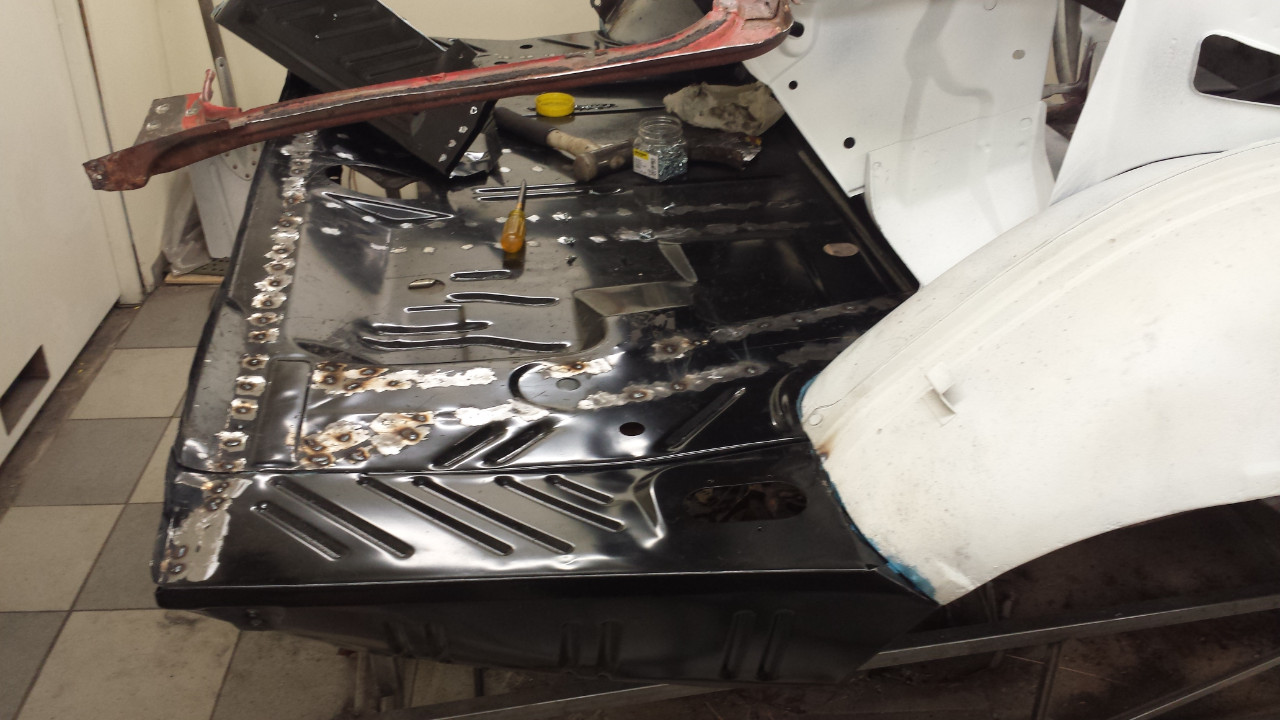
This weekend I started to install the trunk pan with extensions.


And now I'm once again up to date with pictures and progress.  :jumping:

Per from Sweden

Vehicle fleet:
1971 472 Hemi 4-speed Cuda, under restoration

The one(s) that had to go to move forward in life:
1968 Dodge Charger R/T
1970 340 4-speed Cuda, matching numbers

Offline cudamadd

  • Sr. Member
  • ****
  • Posts: 1070
    • cudamad157071@gmail.com
Re: 71 'Cuda restoration project
« Reply #71 on: March 26, 2017 - 06:04:11 PM »
Great work . Its fantastic that you are doing all this work your self . I would hate to think the man hours and labor cost $$$$ .Great photos
Go 4 a spin Ya Why Not.

Offline usraptr

  • Sr. Member
  • ****
  • Posts: 1814
Re: 71 'Cuda restoration project
« Reply #72 on: March 26, 2017 - 08:59:33 PM »
Very impressive work/skills there!  :2thumbs:  Pictures of your truck pan/quarters install looks very familiar as I had the same done to mine.  Only I didn't do the work myself like you.  :ylsuper:
1970 Plymouth 'Cuda.  Matching numbers 440 U Code, 4 speed pistol grip, Rallye dash, AM 8 Track, Shaker hood, 15 inch rallye wheels, Dana 60 4.10, Super Track Pak.  One of 134 - 440 "U" coupes codes built in 1970 and one of 100 - 440 Super Track Paks built in 1970.

Restoration pictures at:  http://spanks4thememory.smugmug.com/Cars/70-Cuda/7240639_M24oi#465274575_2MBqW
(Edited 8-1-17)

"usraptr" = United States raptor - bird of prey = United States Bald Eagle.  FYI, somebody else thought of it first so I had to drop the "O" in raptor.

Offline HemiTunis

  • Jr. Member
  • **
  • Posts: 89
Re: 71 'Cuda restoration project
« Reply #73 on: March 27, 2017 - 02:05:09 AM »
Thanks guys! :) I only have this option of doing it myself , I couldn't possibly afford to pay someone to do it. But it takes so much time. When I started in September I thought I could get it on the road this summer... I'm now glad if I have it ready for next summer.
« Last Edit: March 27, 2017 - 03:33:58 AM by HemiTunis »
Per from Sweden

Vehicle fleet:
1971 472 Hemi 4-speed Cuda, under restoration

The one(s) that had to go to move forward in life:
1968 Dodge Charger R/T
1970 340 4-speed Cuda, matching numbers

Offline soundcontrol

  • Sr. Member
  • ****
  • Posts: 1603
Re: 71 'Cuda restoration project
« Reply #74 on: March 27, 2017 - 05:21:21 PM »
Hey Per, that blue weld thru primer you use, is that Volvo's? If so, where do you get it? I tried to get some, but they told me they don't sell that anymore. Got some other zinc based brand, and that one was no good, my welder did not do well with it.
/ Ken
Restoration thread: http://www.cuda-challenger.com/cc/index.php?topic=102525.0
topic=108917.new#new