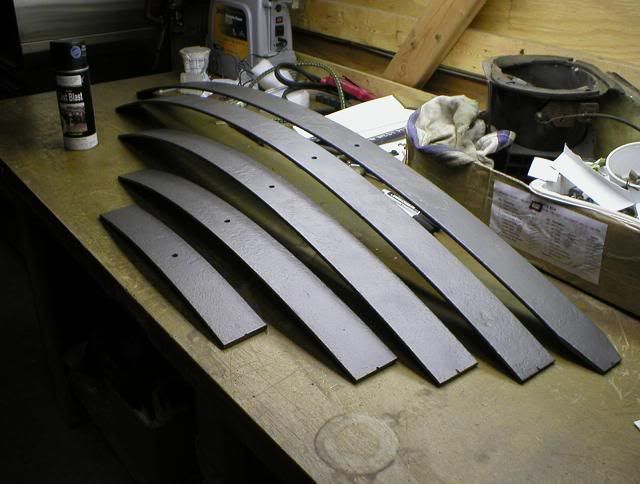
Author Topic: Rear Leaf Spring - Correct Finish  (Read 4542 times)

Offline 70challengersix

  • Jr. Member
  • **
  • Posts: 170
Rear Leaf Spring - Correct Finish
« on: May 24, 2008 - 10:10:12 PM »
Does anyone know the correct finish for the rear leaf springs for a 70 challenger R/T.  I see some have them painted satin black and then I see others that are left in a stainless "natural" finish.  What is correct?  If the natural stainless look is correct - what kind of paint/protection is recomended?


Offline matt63

  • Sr. Member
  • ****
  • Posts: 1855
Re: Rear Leaf Spring - Correct Finish
« Reply #1 on: May 24, 2008 - 10:40:18 PM »
I'm not sure but I was wondering too as I plan on buying a new set of springs soon.  I thought I saw an article that said they were crudely dipped in some heavy black paint.  I would go with a satin/low glass back.  If you go natural you can spray them with a satin clear or perhaps a cast iron paint to keep them looking good.  I painted my gearbox with the cast iron stuff and I really like it.
Matt in Edmonton

'68 Valiant
'73 Cuda 340 4 speed (408) SOLD

craigsmytcudas

  • Guest
Re: Rear Leaf Spring - Correct Finish
« Reply #2 on: May 25, 2008 - 05:58:39 PM »
Minor rust pitts kill springs ,that said mopar used a very tacky enamel base each part was dipped then assembled .on my oem cars or loosely put a matching #s car would have the springs re arched you can do this yourself then use a plastic tub filled with one gallon of rustoleum or like kind .Then slide the springs through the tub and let drip dry .Also look at the new  mopar springs good reference, most guys never think about the spring #s as part of a matching car .i like the cast blast finish by semans found at many engine rebuilders supply.good luck

craigsmytcudas

  • Guest
Re: Rear Leaf Spring - Correct Finish
« Reply #3 on: May 25, 2008 - 06:06:18 PM »
i forgot one other thing if any racing is involved put teflon strips between each spring it helps loosen up the rebound ,this seems over kill but its free horse power .

Offline js27

  • Sr. Member
  • ****
  • Posts: 1380
  • MOPAR OR NO CAR
Re: Rear Leaf Spring - Correct Finish
« Reply #4 on: May 26, 2008 - 04:59:31 PM »
When I restored my R/T I talked to Roger Gibson and he said they came both ways black and natural. I found traces of black paint on mine so that is how I restored mine.
JS27
1967 GTX
1970 Dodge Challenger R/T Conv.

craigsmytcudas

  • Guest
Re: Rear Leaf Spring - Correct Finish
« Reply #5 on: May 26, 2008 - 09:13:14 PM »
js very nice what shocks did you use .also im in a pickle im looking to start on my black v code cuda and im torn between over restore on the floors or the over spray look im leaning to over kill yours is perfect  :2thumbs:

Offline autoxcuda

  • Full Member
  • ***
  • Posts: 572
    • Spring Fling
Re: Rear Leaf Spring - Correct Finish
« Reply #6 on: May 27, 2008 - 04:31:20 AM »
js very nice what shocks did you use .also im in a pickle im looking to start on my black v code cuda and im torn between over restore on the floors or the over spray look im leaning to over kill yours is perfect  :2thumbs:


I think the original look of the primer with overspray makes a nice contrast. Spray them primer with color overspray and re-undercoating in the same patterns your car had pre restoration. Clean everything nice and carefull and you'll find lots of paint mark and stamps.

Even if you don't replicate everything. Just take lots and lots of pics to document everything.

Here's Troy @Westoaks MP resto he just did in his garage:


Spring Fling XXX
April 22 & 23 2016

at Woodley Park Van Nuys, CA.
Special 30th Anniversary Event!
600+ Mopars, 300+ swappers,  50+ manf. midways.
Thrus: Mopar Track Day at Willow Springs Raceway
Fri: Caravan & Cruise
Sat: Mopar Cruise-In

craigsmytcudas

  • Guest
Re: Rear Leaf Spring - Correct Finish
« Reply #7 on: May 27, 2008 - 04:09:49 PM »
auto thanks that looks good .craig

Offline autoxcuda

  • Full Member
  • ***
  • Posts: 572
    • Spring Fling
Re: Rear Leaf Spring - Correct Finish
« Reply #8 on: May 29, 2008 - 12:08:16 AM »
auto thanks that looks good .craig

Here's a completed picture of Troy's car. He did everything except the paint the bare shell. Notice the contrasts in colors of the cast and not cast parts like on the driveshaft.

This is NOT my car.

x
« Last Edit: May 29, 2008 - 12:21:32 AM by autoxcuda »
Spring Fling XXX
April 22 & 23 2016

at Woodley Park Van Nuys, CA.
Special 30th Anniversary Event!
600+ Mopars, 300+ swappers,  50+ manf. midways.
Thrus: Mopar Track Day at Willow Springs Raceway
Fri: Caravan & Cruise
Sat: Mopar Cruise-In

Offline Old Moparz

  • Jr. Member
  • **
  • Posts: 334
  • Larks' Tongues In Aspic
Re: Rear Leaf Spring - Correct Finish
« Reply #9 on: May 29, 2008 - 12:42:37 PM »
Minor rust pitts kill springs ,that said mopar used a very tacky enamel base each part was dipped then assembled .on my oem cars or loosely put a matching #s car would have the springs re arched you can do this yourself then use a plastic tub filled with one gallon of rustoleum or like kind .Then slide the springs through the tub and let drip dry .Also look at the new  mopar springs good reference, most guys never think about the spring #s as part of a matching car .i like the cast blast finish by semans found at many engine rebuilders supply.good luck


Same here with me, the cast blast finish is my favorite too.  :thumbsup:

As for re-arching, I have had 3 sets of original leaf springs re-arched by the same spring shop over the years on 3 different cars. The first was my '69 Satellite over 20 years ago, & still in excellent shape. The second, was my wife's '75 Duster that she drove over another 100,000 miles on the re-arched springs before we sold the car. The 3rd set on my '71 Scamp, only lasted 2 years before they sagged back to where they were before I had them re-arched.

I had a custom set of springs made to replace them by a local shop that are now about 15 years old & still great, except they look awful from surface rust & scale. There are six leaves on each side & each one is thicker than stock. I asked the guy who made these why the other re-arched sets lasted & not this set. He said it could have been that they were subjected to different condtions over the years, or as simple as the original metal composition just not as good as the others.

I forget what I paid to have them re-arched, but it was substantially less than new ones. Anyway, here is what the cast blast finish by Seymour looks like.....

One side almost done after disassembly, wire wheel stripping, & painting. The toughest part about the cast blast finish is not being able to tell where the bare metal ends & the paint is while spraying.   :lol:


One last crusty leaf with 5 finished ones before the rear swap:
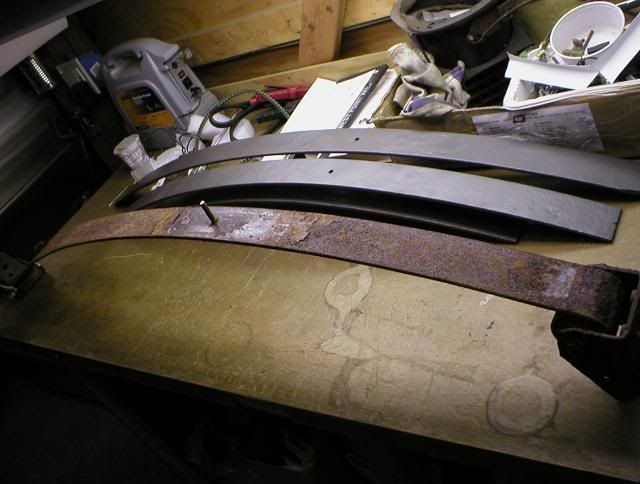
« Last Edit: May 29, 2008 - 01:08:23 PM by Old Moparz »
Newburgh, New York - 12550

  Walking is good for you. It's documented that for every minute you exercise, you add a minute to your life. This enables you to spend an additional 5 months in a nursing home at $5000 per month.

Offline sadil340

  • Sr. Member
  • ****
  • Posts: 1562
Re: Rear Leaf Spring - Correct Finish
« Reply #10 on: May 29, 2008 - 01:56:45 PM »
I had my springs re-arched for $65 in Springfield Mass. It did not include reassembling the springs which I did with a kit.
1970 Cuda 340 4-speed
3:55 SureGrip
Owned since 1974
Bought from original owner

Offline js27

  • Sr. Member
  • ****
  • Posts: 1380
  • MOPAR OR NO CAR
Re: Rear Leaf Spring - Correct Finish
« Reply #11 on: May 29, 2008 - 07:32:14 PM »
js very nice what shocks did you use .also im in a pickle im looking to start on my black v code cuda and im torn between over restore on the floors or the over spray look im leaning to over kill yours is perfect


Thanks for the compliment but to answer your question I used a set of good old fashion Monroe Air Shocks. I wanted the option of raising the back end up a bit if needed. I run 45 lbs and that is just perfect.
JS27
1967 GTX
1970 Dodge Challenger R/T Conv.

Offline rallyechall

  • Jr. Member
  • **
  • Posts: 390
Re: Rear Leaf Spring - Correct Finish
« Reply #12 on: July 28, 2008 - 12:17:54 PM »
I am about to restore mine so I figured this is a good thread to ask. When you took the springs apart, what was your process? Do you have to clamp them before removing the bolt? Are they under "spring tension" before the bolt is removed, or do the leaves fit "flatly" against one another and the bolt just keeps them all together? does anything ahve to be added to the paint to keep it from cracking, or peeling when the springs are flexed?

Offline Chryco Psycho

  • Administrator
  • C-C.com Guru
  • *****
  • Posts: 36620
  • 70 Challenger R/T SE 70 tube Chassis Cuda now sold
Re: Rear Leaf Spring - Correct Finish
« Reply #13 on: July 29, 2008 - 01:10:53 AM »
there is pressure between the leaves , you generally need to clamp them together or use a long bolt & cut the bolt short once tightened into place to put them back together

Challenger - You`ll wish You Hadn`t