Author Topic: 440 Build Starts Today!  (Read 63161 times)

Offline RDF

  • Sr. Member
  • ****
  • Posts: 1840
  • The pain that greets me is the stick that beats me
Re: 440 Build Starts Today!
« Reply #105 on: August 15, 2012 - 11:58:23 AM »
Decided to try and shave my markers last night....got one semi-done:

Warning: My welds are awful  :smilielol:

Prep:


The plate:


I put it in place to see how it would look:


Then tacked it in place:


Then welded the rest and used my grinder to get it down - this is my first pass with the welder:


I noticed I missed a bunch of spots so went back at it again and again, between the welder and the grinder to where it was finally too late (at night) to do anymore.  I know it looks like a big chunk is taken out in this first picture but it's just the lighting:


I've got to finish it up later...maybe hit it with a mess abrasive grinding wheel or something (suggestions?) cause the one I have seems to be too rough and it takes off too much of the weld once I get down close.

Lessons learned:
  • I needed to make the plate a little bigger to fill those gaps a bit more.
  • Definitely should have taken off more paint during the prep
  • Need to be more aware of the natural crease in the fender and be sure not to mess with it

STILL getting used to welding and the heat thing.  I noticed when I would start welding (after taking a break), the welds seems to pop and be all over the place, but then it seemed once the plate got heated up, the welds went nice and smooth and hardly any issues.  Here's the welder I'm using:


Gasless, but my brother is hooking me up with all the stuff I need to use gas, so looking forward to that when it comes in the mail!  :2thumbs:

At any rate, I'll be back at it tomorrow night to do another marker and hopefully things will go a bit better with the things I learned this time around. Suggestions/comments are always welcome.  :)
Bob

1973 'Cuda

If we never drown we'll never know how well it tastes....So tell me how it tastes and I'll know just how well you drowned.

My build:
http://www.cuda-challenger.com/cc/index.php?topic=45749.0


Offline Chryco Psycho

  • Administrator
  • C-C.com Guru
  • *****
  • Posts: 36620
  • 70 Challenger R/T SE 70 tube Chassis Cuda now sold
Re: 440 Build Starts Today!
« Reply #106 on: August 15, 2012 - 12:19:37 PM »
can you go to a smaller wire , .028 or so ?

Challenger - You`ll wish You Hadn`t

Offline RDF

  • Sr. Member
  • ****
  • Posts: 1840
  • The pain that greets me is the stick that beats me
Re: 440 Build Starts Today!
« Reply #107 on: August 15, 2012 - 12:30:00 PM »
can you go to a smaller wire , .028 or so ?

Actually, I could...never thought of that  :clueless:.  I'll try that out and see how it works.  Thanks Neil  :2thumbs:
Bob

1973 'Cuda

If we never drown we'll never know how well it tastes....So tell me how it tastes and I'll know just how well you drowned.

My build:
http://www.cuda-challenger.com/cc/index.php?topic=45749.0

Offline Chryco Psycho

  • Administrator
  • C-C.com Guru
  • *****
  • Posts: 36620
  • 70 Challenger R/T SE 70 tube Chassis Cuda now sold
Re: 440 Build Starts Today!
« Reply #108 on: August 15, 2012 - 03:55:41 PM »
the smaller wire takes less power to burn & is less likely to burn through the sheet metal

Challenger - You`ll wish You Hadn`t

Offline 72cudamaan

  • Resident
  • *****
  • Posts: 3248
Re: 440 Build Starts Today!
« Reply #109 on: August 15, 2012 - 04:55:03 PM »
the smaller wire takes less power to burn & is less likely to burn through the sheet metal

But if you set the machine for the same amperage, the larger wire will retain more of the heat thus
resulting in a cooler weld. At least that is my theory and it worked great for me. It looks as though you really
 need the gas set-up. It's the only way to go.
It also sounds like you need to clean up your ground clamping surface as well
If I cant fix it, it's broke
 
Andy  (phukker whither)

Offline 67vertman

  • Sr. Resident
  • ******
  • Posts: 5125
  • Member since 9-23-2005
Re: 440 Build Starts Today!
« Reply #110 on: August 15, 2012 - 08:34:57 PM »
You don't need to be an expert welder.......just an expert grinder.  :2thumbs:  :smilielol:

Looking good.


Ron - Born and raised in Southern California

I got the 1970 Cuda, but still need the hot blonde to ride shotgun!

First car -1969 Road Runner 383 4sp

Current ride - 1970 Barracuda 440-6 4 sp Dana 60  (4:10)

Offline RDF

  • Sr. Member
  • ****
  • Posts: 1840
  • The pain that greets me is the stick that beats me
Re: 440 Build Starts Today!
« Reply #111 on: August 20, 2012 - 10:41:36 AM »
But if you set the machine for the same amperage, the larger wire will retain more of the heat thus
resulting in a cooler weld. At least that is my theory and it worked great for me. It looks as though you really
 need the gas set-up. It's the only way to go.
It also sounds like you need to clean up your ground clamping surface as well
yeah, I have the gas kit coming from my brother up in MA...hopefully it will be here soon....'till then, I have to make due with what I've got.  Does the grounding clamp need to be on the metal that I'm welding or can I use any metal on the car?  For instance, when welding the markers, do I have to have the ground on the fender or will the radiator frame rail work?  I've been using the frame, radiator frame rail, etc. because they are clean, right down to the bare metal.

You don't need to be an expert welder.......just an expert grinder.  :2thumbs:  :smilielol:

Looking good.
Thanks vertman....you've got that right about the grinding.... :2thumbs:

Did some more work this weekend and took some pic...will try to post soon.  I looked for the .28 wire but after some research, found out .30 is the lowest available in flux core (at least that's what I'm aware of).  So I worked with the .30 and got 2 more markers done and the directional holes on top of the fender as well.  I also got a 120 grit sanding wheel which worked a lot better and made the welds grind down a lot smoother.....I also found a 7" rotary sander in my garage (forgot I had it) so I need to get some higher grit discs to put the finishing touches on these markers.

I think I'm getting better with welding....I've noticed my "beads" are not as "large" as before and I'm getting used to when the metal is too hot or cold and when to "hit it" and when not to.  Definitely takes patience's to get a good bead!
Bob

1973 'Cuda

If we never drown we'll never know how well it tastes....So tell me how it tastes and I'll know just how well you drowned.

My build:
http://www.cuda-challenger.com/cc/index.php?topic=45749.0

Offline RDF

  • Sr. Member
  • ****
  • Posts: 1840
  • The pain that greets me is the stick that beats me
Re: 440 Build Starts Today!
« Reply #112 on: August 21, 2012 - 12:38:14 PM »
Here's the pix as promised....there's not a whole lot of room in my garage so once I get the car rolled out into the street, I will take a full side shot to show you how it looks.

Antennae and fender directional holes....


This is the driver's side directional...I will do the passenger side tonight:


Here's the antennae hole....this was a pain....I didn't have any welding magnets to hold the metal up to the hole so I used my free hand and tacked it as best I could before letting go.  I got called into the house about 3/4 the way through this so I will finish this tonight as well:


Can anyone tell me how to get this decal off?  There's no pins through the back of the trunk like I thought there would be... :clueless:
Bob

1973 'Cuda

If we never drown we'll never know how well it tastes....So tell me how it tastes and I'll know just how well you drowned.

My build:
http://www.cuda-challenger.com/cc/index.php?topic=45749.0

Offline Chryco Psycho

  • Administrator
  • C-C.com Guru
  • *****
  • Posts: 36620
  • 70 Challenger R/T SE 70 tube Chassis Cuda now sold
Re: 440 Build Starts Today!
« Reply #113 on: August 21, 2012 - 01:21:10 PM »
Adhesive tape is all that holds it on , you can try soaking it in Goo Gone or silicone spray to loosen the glue

Challenger - You`ll wish You Hadn`t

Offline 72cudamaan

  • Resident
  • *****
  • Posts: 3248
Re: 440 Build Starts Today!
« Reply #114 on: August 21, 2012 - 07:28:17 PM »
yeah, I have the gas kit coming from my brother up in MA...hopefully it will be here soon....'till then, I have to make due with what I've got.  Does the grounding clamp need to be on the metal that I'm welding or can I use any metal on the car?  For instance, when welding the markers, do I have to have the ground on the fender or will the radiator frame rail work?  I've been using the frame, radiator frame rail, etc. because they are clean, right down to the bare metal.
Thanks vertman....you've got that right about the grinding.... :2thumbs:

The ground clamp should be as close as practical to the surface being welded.
If I cant fix it, it's broke
 
Andy  (phukker whither)

Offline RDF

  • Sr. Member
  • ****
  • Posts: 1840
  • The pain that greets me is the stick that beats me
Re: 440 Build Starts Today!
« Reply #115 on: August 22, 2012 - 03:44:30 PM »
Adhesive tape is all that holds it on , you can try soaking it in Goo Gone or silicone spray to loosen the glue

 :2thumbs:

The ground clamp should be as close as practical to the surface being welded.

Ok, I will keep that in mind next time!

I finished up the markers and such last night, here's the passenger side fender directional:


and the antennae hole:


Got some DuraGlass coming tonight as well as etching primer and a few other things so I can finish my engine bay.  I had to reweld a few spots so they'll need grinding tonight before I start the cleansing process.

Overall happy with the progress thus far and am thinking it will go up to the body shop next week to have him spray it!  ;)
Bob

1973 'Cuda

If we never drown we'll never know how well it tastes....So tell me how it tastes and I'll know just how well you drowned.

My build:
http://www.cuda-challenger.com/cc/index.php?topic=45749.0

Offline RDF

  • Sr. Member
  • ****
  • Posts: 1840
  • The pain that greets me is the stick that beats me
Re: 440 Build Starts Today!
« Reply #116 on: August 27, 2012 - 11:05:03 AM »
Loads of work done this weekend....I probably spent close to 20 hours doing everything, trying to get it ready for the paint shop this week.  All markers and directional holes have been welded and ground/sanded down as well as the antennae hole.  I also took apart the front and rear bumpers and sanded those down as well....LOTS of rust on them bumpers!  I also washed, degreased, and cleansed (with phosphoric acid) them which took a long time....


One thing that really ticked me off was I bought 2 cans of Self Etching Primer from Advanced Auto and when I went to use it, it sprayed for all of 3 seconds then got clogged.....then the same thing happened with the other can!  I hope I can find a can with a good nozzle to use...I'd like to prime the engine bay before I send it up there.

I found some more rust on the driver's side fender, next to the hood latch, so I stripped off all the rust and was able to seal up that hole. 


Got some of the engine bay sealed up as well but I have to work in small sections cause the prep takes a bit.....I'll try to get some pix tonight or tomorrow of the DuraGlass and how it came out. I also pulled all the interior out of the car as well...floors are in great shape but I may need to replace the carpet...looks kinda beat-up!
« Last Edit: August 27, 2012 - 11:08:03 AM by RDF »
Bob

1973 'Cuda

If we never drown we'll never know how well it tastes....So tell me how it tastes and I'll know just how well you drowned.

My build:
http://www.cuda-challenger.com/cc/index.php?topic=45749.0

Offline RDF

  • Sr. Member
  • ****
  • Posts: 1840
  • The pain that greets me is the stick that beats me
Re: 440 Build Starts Today!
« Reply #117 on: August 29, 2012 - 10:41:23 AM »
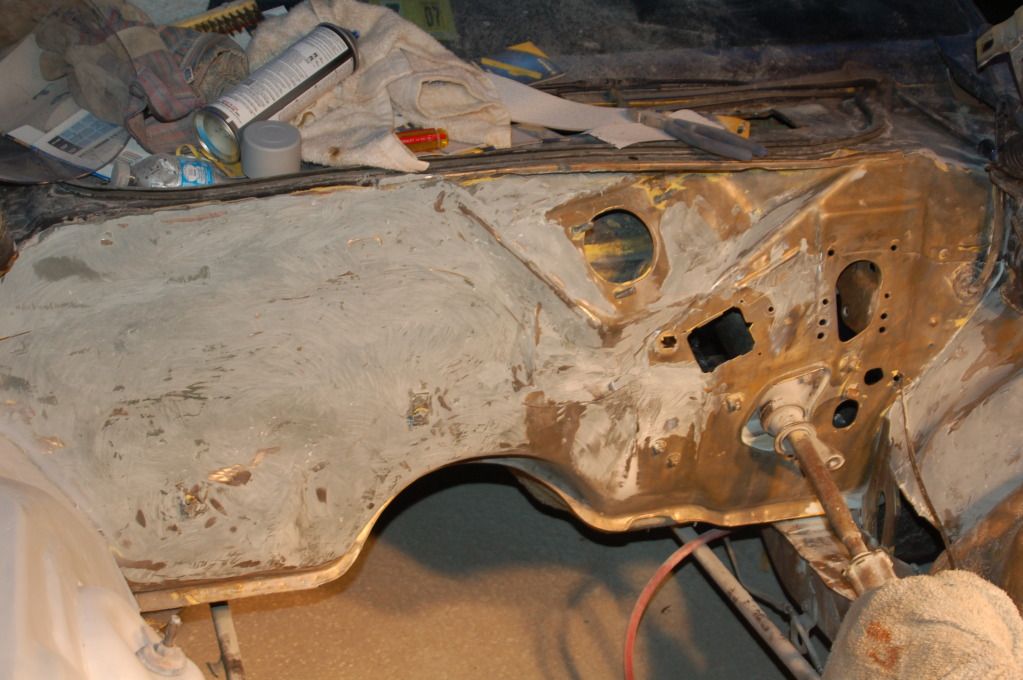
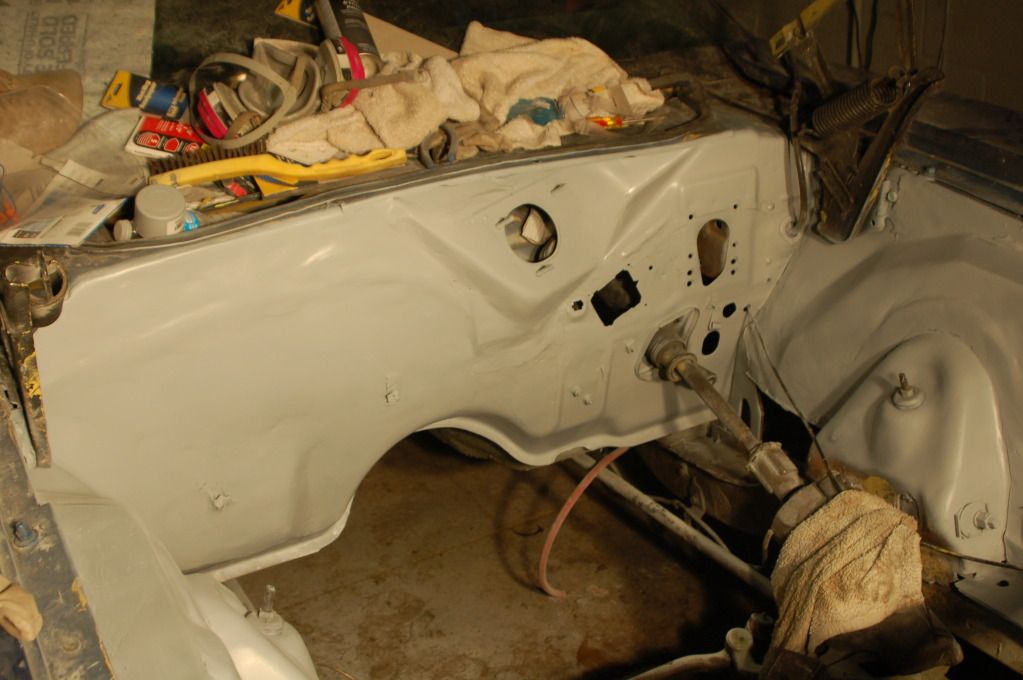
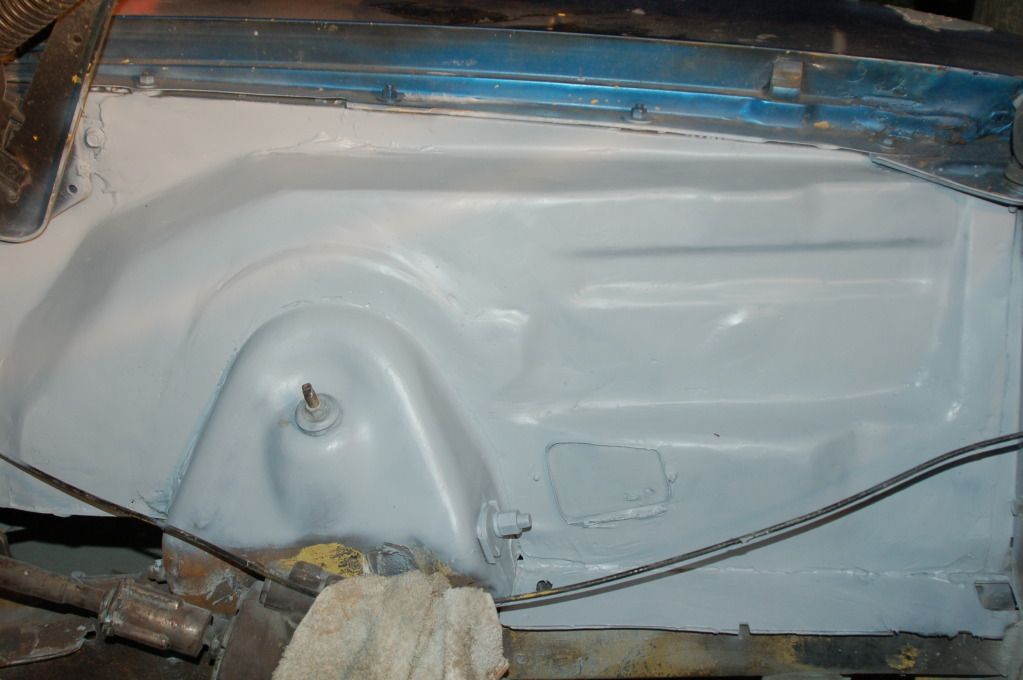
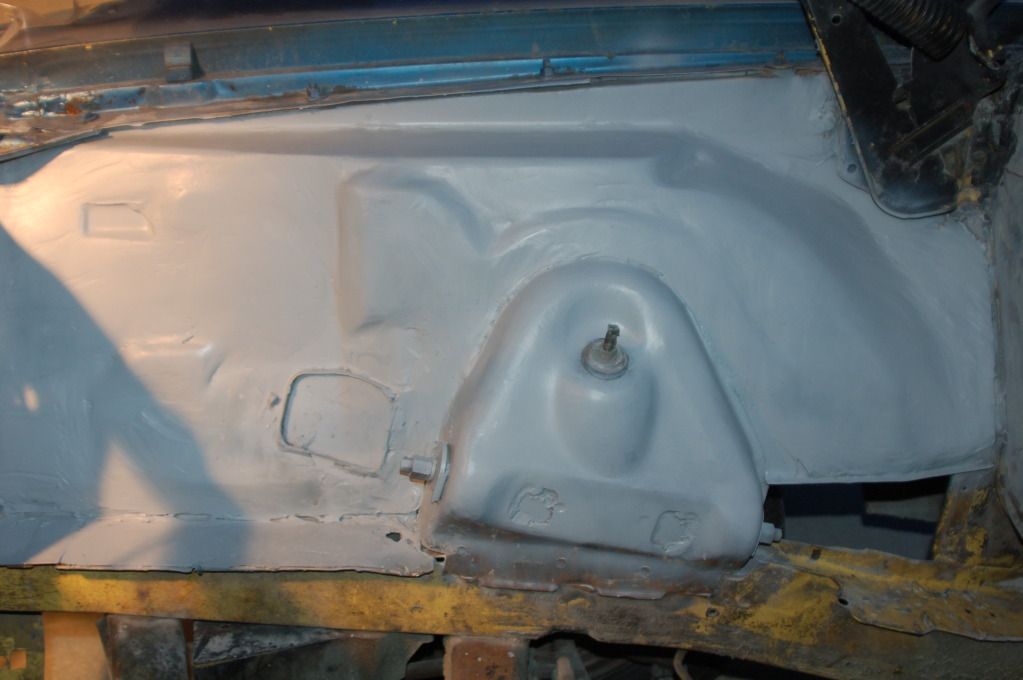
What started off as a really bad Monday night turned into something good;  I got the http://malwaretips.com/blogs/live-security-platinum-removal-guide/']"Live Security Platinum"[/url] virus on my pc about 10pm, so I stayed up till 3:30am removing it....needless to say, I didn't go to work yesterday....but after some rest I jumped on the 'Cuda and got some more work done!  Was able to pull the wiring harness back through the firewall and finished cleaning and sealing the engine bay (coats are ROUGH but sanding is next!), I also shaved the trunk lock, primed the bumpers and did a bunch of misc. things that kept me busy till late last night.

Here's some pix:


Engine bay before being prepped:


and after (squeaky clean!):


Sealed:


Bumpers:


Did a little sanding but looks like a bit too much here (antennae hole):


Directional on top of fender:


Side marker:


Trunk lock hole:


Plate for hole:


Sealed up (2nd shot is a side view):


I felt I got better with the sealer as time went on....the trunk lock came out perfect....I was worried about getting the same curve as the tail panel but I used a really flexible putty knife and it came out good (IMO).

Getting close to being ready for the paint shop on Friday.  :jumping: Tonight will be sanding....still have to decide the best way to approach this; either by hand (may take forever), angle grinder with sanding attachment (speed may be too high), or electric rotary sander (don't know if I have enough discs).....or all 3, lol.  We shall see.

Does anyone know how I can get the hood release cable off?  I looked at where it connects on the hood latch and it appears that the cable is looped around a post and clamped to itself.  Not too sure how it comes off though  :clueless:
Bob

1973 'Cuda

If we never drown we'll never know how well it tastes....So tell me how it tastes and I'll know just how well you drowned.

My build:
http://www.cuda-challenger.com/cc/index.php?topic=45749.0

Offline RDF

  • Sr. Member
  • ****
  • Posts: 1840
  • The pain that greets me is the stick that beats me
Re: 440 Build Starts Today!
« Reply #118 on: September 04, 2012 - 08:23:10 AM »
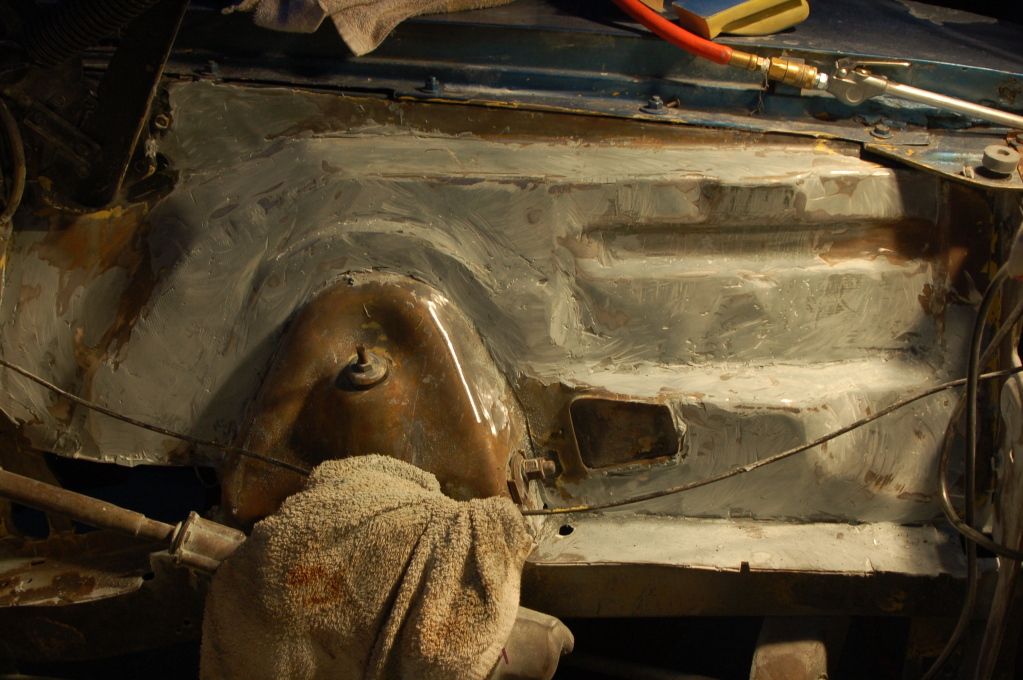
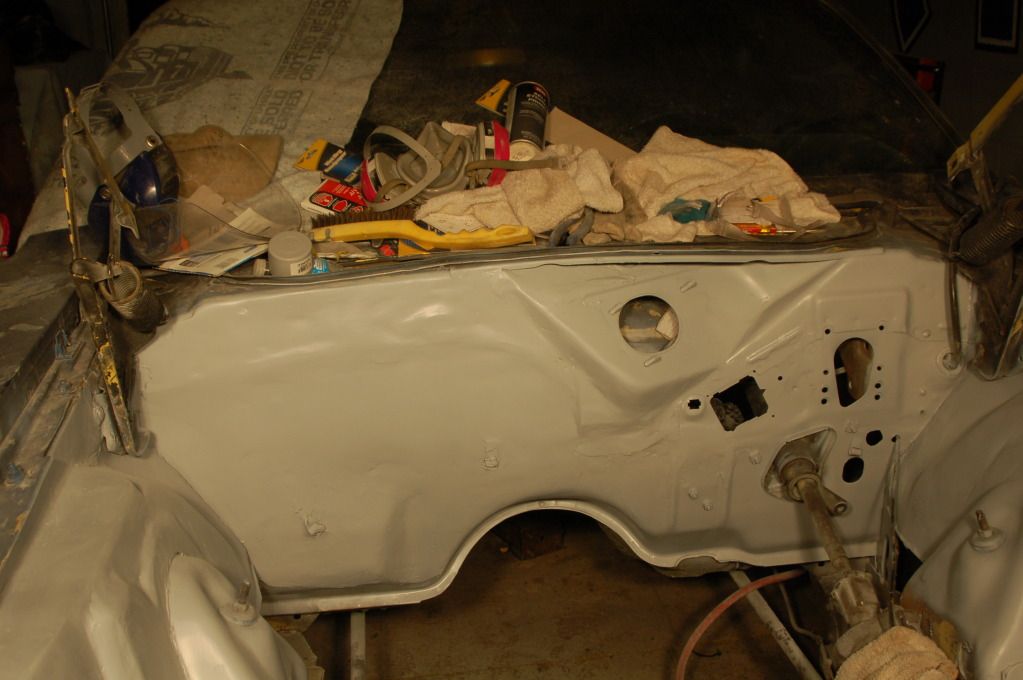
Well, I was able to put myself into overdrive and finish up the car Thursday evening/Friday morning and get it loaded and off to the body shop!  I spent the entire evening on Thursday hand sanding everything down as smooth as I could get it... I don't know what I was thinking, lathering on that DuraGlass so thick and choppy like I did  :screwy:, but I paid the price that night and my delts were on FIRE from all the sanding.  I did a mixture of using my electric sander to hit the high, thick areas and then used a small block sander to get the rest.  I had some air pockets that I missed and wasn't able to smooth out completely, but for the most part, it came out ok....at least it's sealed up and now I can go back and touch up the areas as needed without feeling like the car is rusting away as each night passes by.

Here's some mid-sanding pix:


And here's it done and primed...again, still not perfect but it'll do for now:


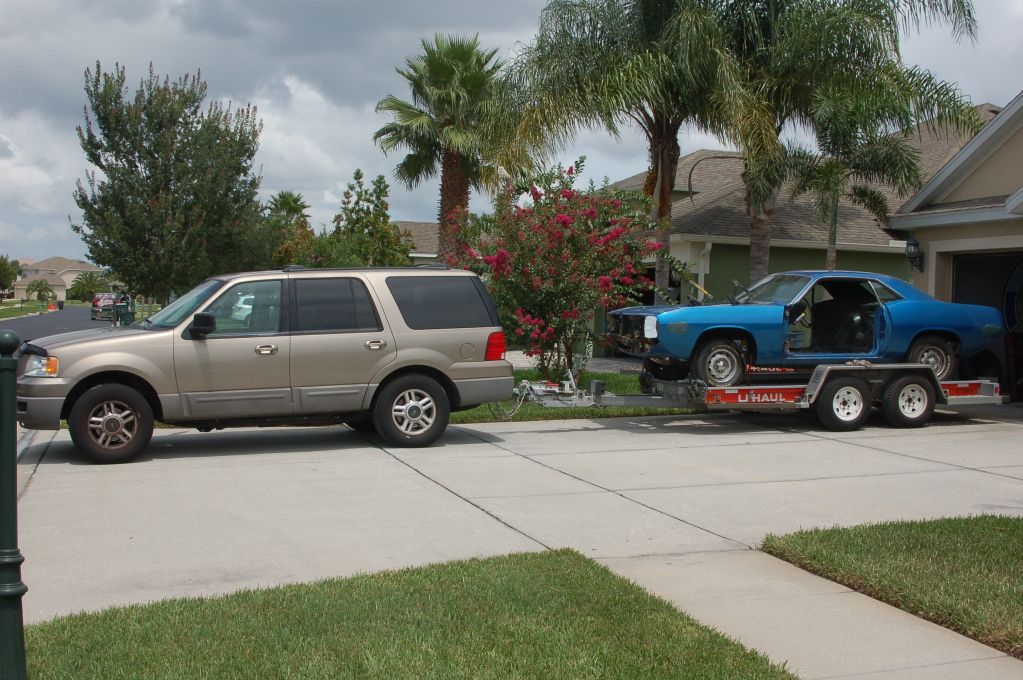
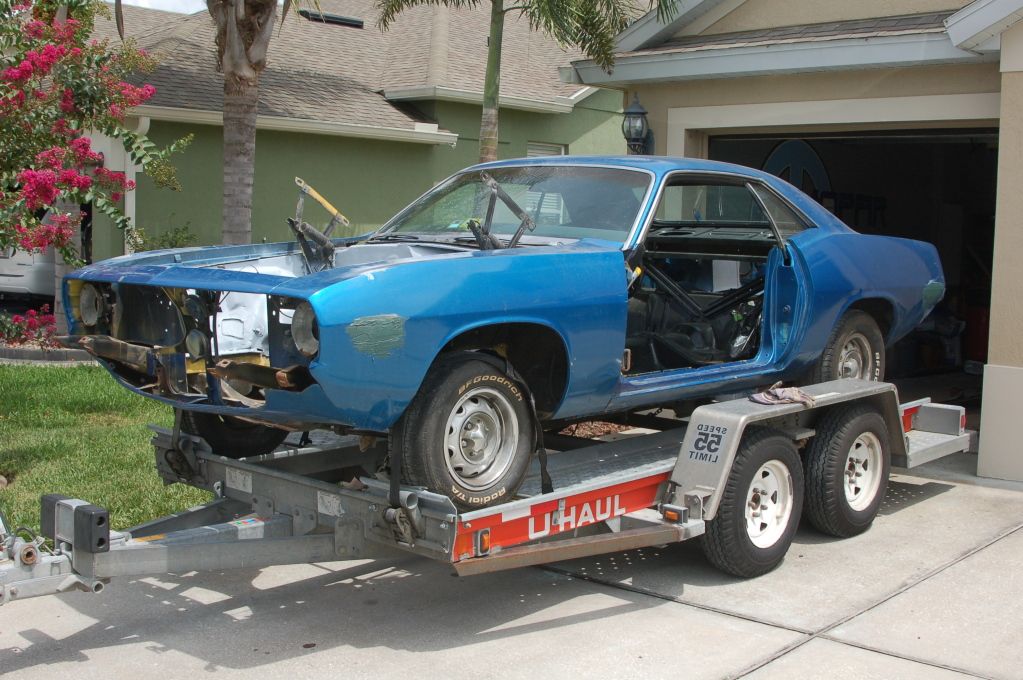
Here's the "Beast Car" (as my kids like to call it  :) ) all loaded up and ready to go:


Even had some time to finish the markers and prime them up too:
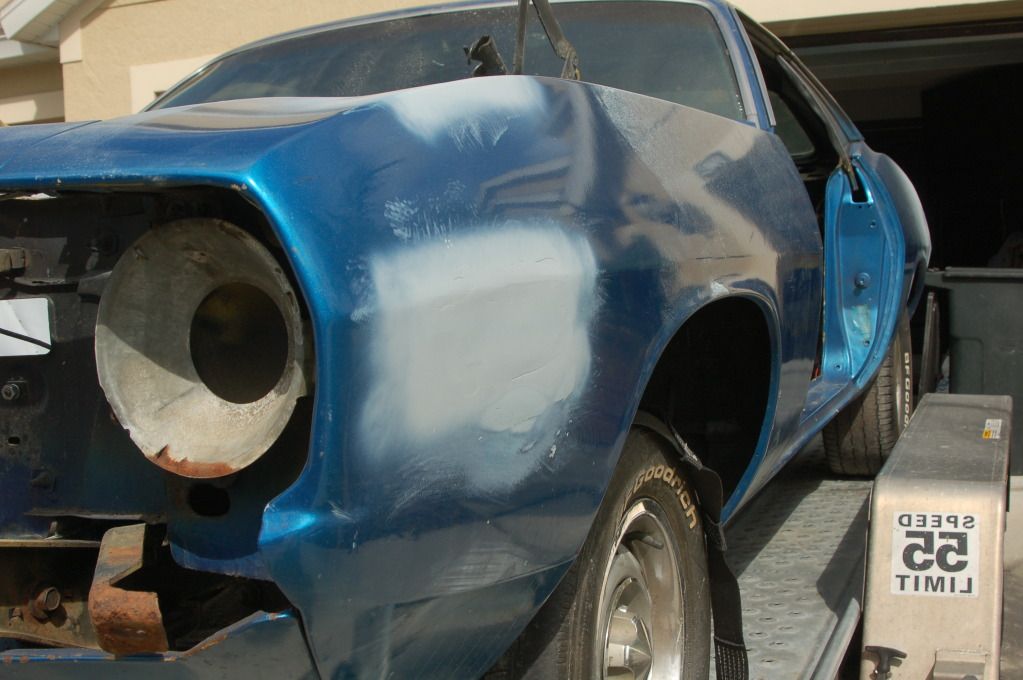

The trip went well (about an hour away from me) and I got to see what the hood and other parts looked like in person....they look great.  I meant to take some pix but forgot, as I was too concerned with getting my u-haul rental back on time.  Rob showed me the driver's door with the rot and all.....looks like I may need a new door...there's bondo 3/4 the way up the door and it appears to be the actual door rotting, not the skin.  He's gonna make it look good for now and I'll hit the internet and be sure to attend the big car show at Daytona Speedway the weekend of November 8th (the name of the show slipped my mind) to see if I can get something relativity cheap.  He noticed my sanding work and said I can come up any time to help work on the car and he'd show me how he does it.....may take him up on that offer on my upcoming day off!   :naughty:

So while the 'Cuda is out of the garage, I decided to  paint my garage floor with that speckled coating stuff...boy, I didn't know what I was getting myself into!  I have a 3-car garage...1 single and a double.  Of course I started with the single (where the 'Cuda was) but it was also the dirtiest!  Lots of grease/oil stains...so I ended up degreasing the whole thing all day yesterday.....I found a combination of letting the degreaser sit for a while and then hitting it with a wire brush (yes, by hand) and then rinsing with a pressure washer, it seemed to work fairly well.  I just had SO much grease and such on the floor that it took a long time.  After that, I let it dry and then sealed any cracks/holed that I had....that sat over night and I will etch and seal it later this week.  Pix to follow  :)
Bob

1973 'Cuda

If we never drown we'll never know how well it tastes....So tell me how it tastes and I'll know just how well you drowned.

My build:
http://www.cuda-challenger.com/cc/index.php?topic=45749.0

Offline RDF

  • Sr. Member
  • ****
  • Posts: 1840
  • The pain that greets me is the stick that beats me
Re: 440 Build Starts Today!
« Reply #119 on: September 10, 2012 - 09:07:00 AM »
With the 'Cuda gone for a bit, I decided to paint my garage floor....what a task this has been.  Prep is about 80% of the hard work.....I used 2 gallons of degreaser, another 2 liters of different types of degreaser, and about 1 gallon of chlorine in the past week to really hammer the floor and get the some of the tough grease out.  I cleaned the floor after each application with my pressure washer and even hit some of the tougher spots with a wire brush (OCD sometimes gets the best of me  ;) ).  I don't have any before pix, but here's a few after the floor was prepped and once it was applied.


The floor was still wet in some areas in this pic:


From the looks of it, it appears I put it on a little too thin in some areas....I was initially worried about how much coverage I would get from it plus the fact that once you mix it, you have to use it within an hour, otherwise is sets up and becomes useless (in the 90+ FL heat anyway).  So for the most part I'm happy but I think I'll outline the "thin" areas in a marker and when I do the other side, I will buy a little extra and go over those areas once more. 
Bob

1973 'Cuda

If we never drown we'll never know how well it tastes....So tell me how it tastes and I'll know just how well you drowned.

My build:
http://www.cuda-challenger.com/cc/index.php?topic=45749.0