Author Topic: Restoration of an origonal owner 73 Challenger Rallye  (Read 195384 times)

Offline GranCuda1970

  • Sr. Resident
  • ******
  • Posts: 5515
  • Rev 20:4. Mat 6:33 John 1:3 Mat 26:41
Re: Restoration of an origonal owner 73 Challenger Rallye
« Reply #210 on: September 28, 2011 - 12:37:26 AM »
I think mopar still uses that color my wifes truck kinda looks that shade.


Offline burdar

  • Sr. Resident
  • ******
  • Posts: 5925
Re: Restoration of an origonal owner 73 Challenger Rallye
« Reply #211 on: September 28, 2011 - 09:55:53 AM »
My dad has an 03 Dakota that is painted a similar color.  The truck is darker then the Challenger though.  The new 300's have a dark silver that may be the same.

Offline burdar

  • Sr. Resident
  • ******
  • Posts: 5925
Re: Restoration of an origonal owner 73 Challenger Rallye
« Reply #212 on: September 28, 2011 - 08:07:17 PM »
My new Accurate Exhaust system arrived today.  I hope it fits as nice as it looks.  The tips are polished stainless and don't look completely stock but they shouldn't rust. 

I've started installing the main brake line.  It's not falling into place so I'm going to take it back out and compare it to the original one. 

Offline EB3-GranCoupe

  • Sr. Member
  • ****
  • Posts: 1435
  • BP23 U0B
Re: Restoration of an origonal owner 73 Challenger Rallye
« Reply #213 on: September 30, 2011 - 07:06:13 AM »
I purchased for Accurate, and am very pleased.  Everything bolted right in place, no fuss - no muss!!  I also got the stainless tips, and i agree that they don't shine like chrome, but i think most folks won't even notice!

Offline burdar

  • Sr. Resident
  • ******
  • Posts: 5925
Re: Restoration of an origonal owner 73 Challenger Rallye
« Reply #214 on: September 30, 2011 - 10:36:14 AM »
The Accurate tips I recieved are pretty shiny.  I havn't compaired them to show chrome though.  A lot of cars have the tips sticking out too far.  The finish is more noticable the farther the tips stick out.  I think your right...most people won't look under the car and notice the tips are stainless. 


I got the main brake line installed the other night.  It wasn't fitting very well at first.  Wade(Bullitt) sent me some pictures of his original line and I was able to see that I was missing a couple bends.  I don't have the fittings tightened down on the prop valve yet though.  I'm still debating if I want to remove the prop valve, strip the "cast blast" paint off of it and leave it bare metal.

Right now I'm adding a cross brace to the rear body stands.  They don't like staying vertical so I'm bolting in a piece of ange iron to tie the two rear stands togther.  This will also give me an easy jacking point.

I'll work on the fuel lines and gas tank this weekend. 

Offline burdar

  • Sr. Resident
  • ******
  • Posts: 5925
Re: Restoration of an origonal owner 73 Challenger Rallye
« Reply #215 on: October 02, 2011 - 09:23:27 PM »
I got the fuel lines and gas tank installed this weekend.  The stainess lines needed a good deal of tweaking to fit properly.  It was a good think I had my original lines.  I set the old and new lines side by side so I could tape the vapor line to the main fuel line in the proper location.  I still have to connect the vapor line to the smaller line in the engine compartment but the rest of the clamps are all on.

The stainless tank straps wouldn't fit into the mounts on the trunk floor.  I compared them to the original straps and saw that there was more material above the notched areas on the new strap.  I had to make the notches 1/8" taller so they matched the profile of the original straps.  Once that was done, they went right into place.  The J-bolts also needed some gringing to fit into the mounts.

Before the tank went in I bolted the shocks into the the upper mount and installed the passengers side over axle hanger.

I preassembled the vapor separator onto the the new tank.  The clamps would be impossible to get at once the tank was bolted in.  I made the tank pad myself and used a picture of the original as a guide.


After the fuel line connection was hooked up I installed the muffler heat shields from Dales Cuda Shop.  Wade "Bullitt" sent me pics of where the holes in the frame were located for the shields.


Offline jimynick

  • Resident
  • *****
  • Posts: 4512
Re: Restoration of an origonal owner 73 Challenger Rallye
« Reply #216 on: October 02, 2011 - 09:44:34 PM »
What a fabulous car this is going to be! Can you tell me where you got the "vapour separator" for the gas tank? Mine's a bit holy. Thx. :thumbsup:

Offline burdar

  • Sr. Resident
  • ******
  • Posts: 5925
Re: Restoration of an origonal owner 73 Challenger Rallye
« Reply #217 on: October 02, 2011 - 10:27:57 PM »
Quote
Can you tell me where you got the "vapour separator" for the gas tank? Mine's a bit holy.

The vapor separator is the original one to the car.  There should be some pics of it earlier in this thread.  I soaked it in EvapoRust which disolved the corrotion on the inside as well as the outside.  The internal valve wasn't working before but it freed up again after the EvapoRust bath.  My father-in-law brazed up two or three pin holes and I filled in the rest of the pitting with filler.  I originaly had the separator painted with Tank Tone paint but it wasn't close to matching the new tank.  I ended up misting it with chrome spray paint.  From a distance it looks fairly convinsing now.

Offline Topcat

  • C-C.com Expert
  • ********
  • Posts: 15376
  • Member since 9/16/04
Re: Restoration of an origonal owner 73 Challenger Rallye
« Reply #218 on: October 02, 2011 - 10:46:41 PM »
Your restoration has been one of my favorites. Great work and detail you've done!
Mike, Fremont, CA.


Offline burdar

  • Sr. Resident
  • ******
  • Posts: 5925
Re: Restoration of an origonal owner 73 Challenger Rallye
« Reply #219 on: October 02, 2011 - 11:11:54 PM »
Thanks!  I can't waite to see yours come together.

Offline burdar

  • Sr. Resident
  • ******
  • Posts: 5925
Re: Restoration of an origonal owner 73 Challenger Rallye
« Reply #220 on: October 22, 2011 - 11:56:07 PM »
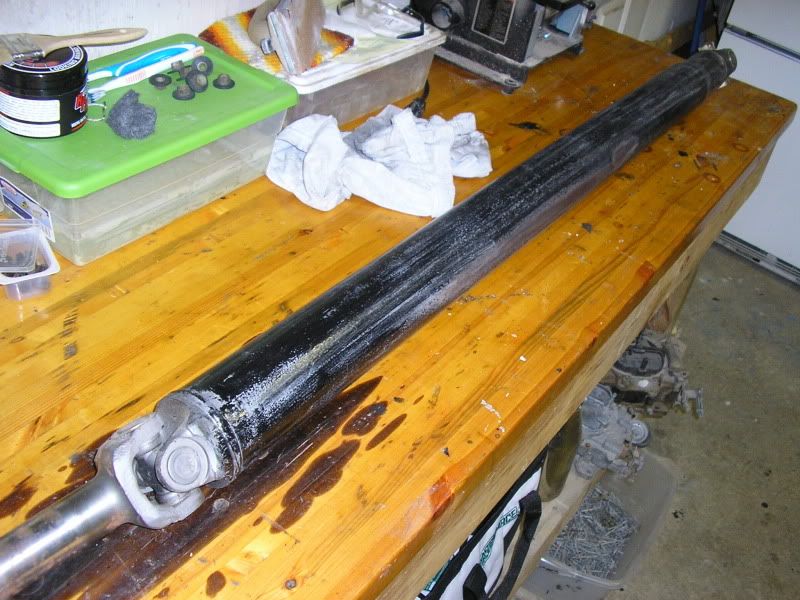
About a week and a half ago I was in the garage trying to decide what I wanted to work on next.  I saw the driveshaft sitting there so I decided to work on it.  Probably seven years ago I wire wheeled the shaft and brushed on some POR-15.  Then I sprayed it with Detail Gray spray paint.  Since then I've seen some awsome looking driveshafts restored and left bare metal.  I wanted to see how nice I could get the driveshaft to look without using any paint.  Well, it didn't turn out as nice as I had hoped since it was extremely pitted but I'll show you what I ended up with anyway.

I started by brushing on some paint stripper to remove the Detail Gray paint.  It came off easily.  Here you can see the POR-15 underneith.


Next, I sanded off most of the POR-15 with 80 grit sand paper and removed the U-joints.
 

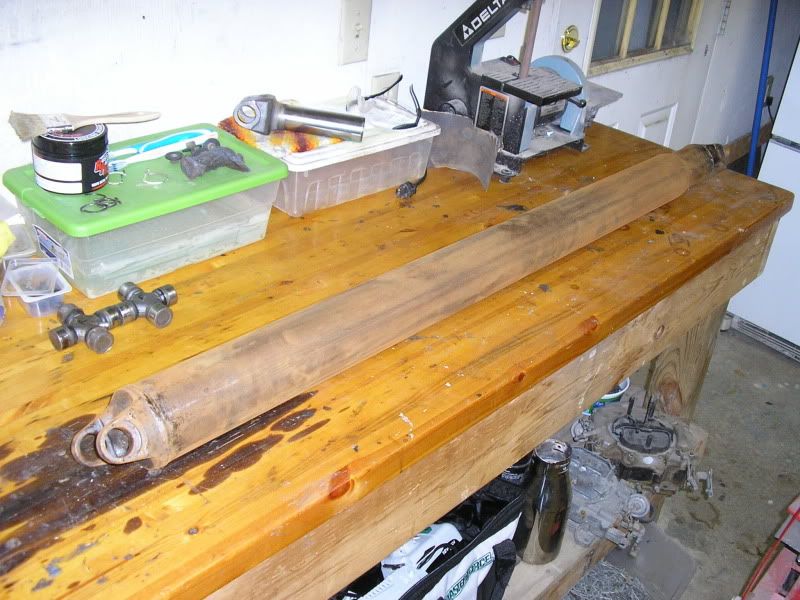
I went to the hardware store and bought some 4" PVC pipe and a cap.  I poured EvapoRust in the pipe and inserted the driveshaft.


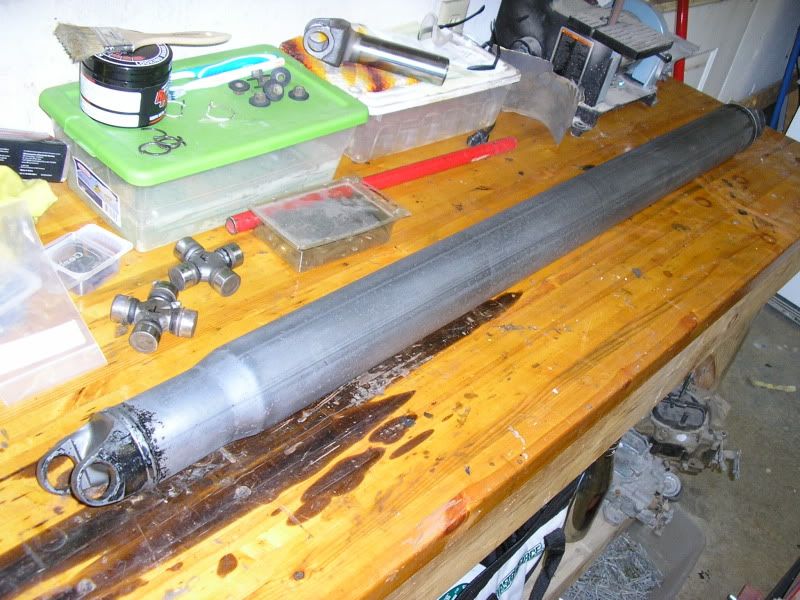
After a day of soaking, the shaft came out rust free.  I still had paint and POR-15 on the ends which required a little sandblasting to clean up.


I was shocked to find a nice looking part number still on the driveshaft.


I sanded on the shaft a little but the pits weren't coming out.  I got online and found out that driveshafts are only about a 1/16" thick so I decided to just leave it.  I lightly bead blasted the shaft to remove some of the sanding marks.  Finally, I rubbed it down with steel wool to get rid of the blasted finish.  Once the ends were cleaned up I dipped them in my black oxide solution for 30 seconds to darken them.  I rubbed them with steel wool to remove some of the darkness on the high spots. 

I took the driveshaft to my father-in-laws house and he helped me reapply the heat markings from the end caps being welded to the tube.  Just this afternoon I heated the driveshaft and applied RPM to it so it won't rust again.  I also applied some RPM to the new U-joints.  While I had the new joints appart I noticed that one of the caps was missing two of the needles. :22yikes:  I'll return that one on Monday.  The only other thing I need to do is have it ballanced.

Here's the finished product.  Yes, I did take this one in darker conditions to hid some of the pitting.  Hopefully it will look OK under the car.

Offline 73RallyeChallenger

  • Jr. Member
  • **
  • Posts: 236
Re: Restoration of an origonal owner 73 Challenger Rallye
« Reply #221 on: October 23, 2011 - 09:37:57 AM »
That looks really good! I would be happy with that. I would post pics of mine, but I do not have a camera at home today that works.
73 Triple Black 340 Challenger
70 Plum Crazy T/A Challenger - work in progress (AGAR)

Offline Grec

  • The '73 Chrysler should have made...
  • Full Member
  • ***
  • Posts: 974
Re: Restoration of an origonal owner 73 Challenger Rallye
« Reply #222 on: October 24, 2011 - 07:53:48 PM »
Great looking work, as always.
1973 Challenger Rallye
- 440 Six Pack
- A833 4 Speed, 18 Spline
- FE5 Rallye Red on Black

Offline joelson6

  • Full Member
  • ***
  • Posts: 577
Re: Restoration of an origonal owner 73 Challenger Rallye
« Reply #223 on: October 24, 2011 - 11:21:42 PM »
wow Darren, that's looking sweet. it's really coming along  :bananasmi

Offline richardsmv6

  • Jr. Member
  • **
  • Posts: 3
Re: Restoration of an origonal owner 73 Challenger Rallye
« Reply #224 on: October 30, 2011 - 07:29:01 PM »
 :D
Just wanted to say, this is the best resto thread EVER, I have a 74 360 4 speed that I am just starting on, keep up the good work!