Author Topic: Buffing and plating  (Read 1970 times)

Offline Topcat

  • C-C.com Expert
  • ********
  • Posts: 15376
  • Member since 9/16/04
Buffing and plating
« on: May 28, 2010 - 02:11:06 PM »
Need to learn how to buff trim and DIY plating?

Check out this site. It has a ton of good info on plating and buffing.


https://www.caswellplating.com/buffs/Buffbook.pdf
http://www.caswellplating.com/kits/metal.htm
http://www.caswellplating.com/kits/
« Last Edit: May 28, 2010 - 02:14:22 PM by Topcat »
Mike, Fremont, CA.


Offline 67vertman

  • Sr. Resident
  • ******
  • Posts: 5125
  • Member since 9-23-2005
Re: Buffing and plating
« Reply #1 on: May 28, 2010 - 07:13:03 PM »
Thanks for sharing Mike!

I save them for future reference and use.


Ron - Born and raised in Southern California

I got the 1970 Cuda, but still need the hot blonde to ride shotgun!

First car -1969 Road Runner 383 4sp

Current ride - 1970 Barracuda 440-6 4 sp Dana 60  (4:10)

Offline Topcat

  • C-C.com Expert
  • ********
  • Posts: 15376
  • Member since 9/16/04
Re: Buffing and plating
« Reply #2 on: May 28, 2010 - 07:15:14 PM »
I bet Jules gets his brown phosphate from this place to do his expensive hood latch assembly restorations.
Mike, Fremont, CA.


OxfordMotorSports

  • Guest
Re: Buffing and plating
« Reply #3 on: May 28, 2010 - 10:46:49 PM »
Caswell is a great company. All of their products are first rate.

Todd

Offline burdar

  • Sr. Resident
  • ******
  • Posts: 5925
Re: Buffing and plating
« Reply #4 on: September 27, 2010 - 11:14:55 AM »
I'm bringing this one back up to the top.  I bought the Caswell black oxide kit and wanted to post the results.  IMO there is no reason to ever paint a bolt again....unless it was painted from the factory.  The Caswell kit works perfectly.  The only unknown at this point is how well the sealer works.  If it does its job, the bolts will stay looking good for a long time.

NOTE...the black oxide kit is not the same thing as phosphating.  That is the process that was used from the factory.   I think it comes close to replicating that look though.

This picture shows the different stages that the fasteners I've done have gone through.  The picture didn't turn out as good as I'd hoped but still shows the process.  The different shades are easier to see in person.  The first bolt is what I started with...the second is after bead blasting.  The third picture is after a 30 second dip in the black oxide solution.  The fourth pic is a 1 minute dip...the fifth pic is a 2 minute dip.  Six pic is what the fasteners look like after coming out of the sealer.  The last one is the finished product.
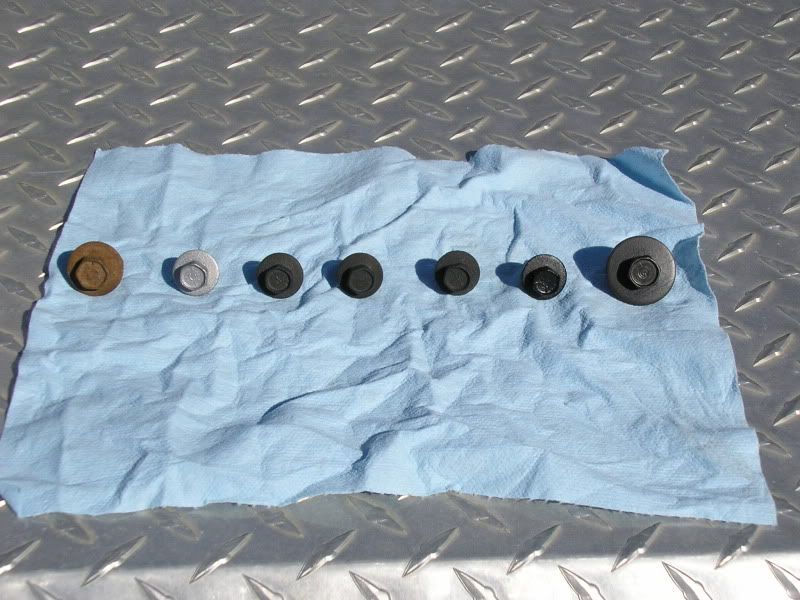
 

I've been giving averything a 2 minute dip.  I let the fasteners sit for 4 days before handling them after the sealer was applied.  The sealer takes a long time to dry.   The sealer also darkens up the finish alot.  After the initial four days, I wiped everything down with a shop rag.  Some of the black will come off and you will be left with a dark gray finish.  You can play with dip times to lighten or darken the final color. 

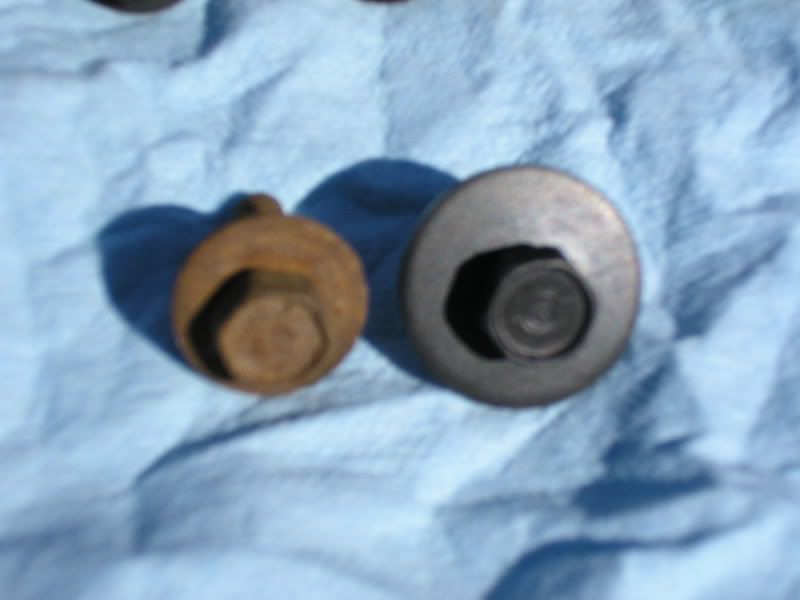
Before/After  sorry for the blurry picture
Offline Topcat

  • C-C.com Expert
  • ********
  • Posts: 15376
  • Member since 9/16/04
Re: Buffing and plating
« Reply #5 on: September 27, 2010 - 11:32:19 AM »
Those came out great. Great wintertime project.
Mike, Fremont, CA.


Offline burdar

  • Sr. Resident
  • ******
  • Posts: 5925
Re: Buffing and plating
« Reply #6 on: September 27, 2010 - 01:11:15 PM »
The main advantage over paint is that after you install the fastener, it looks as good as before the installation.  You're not going to be able to say that with a painted fastener.  You will always have to do some touch-ups.

I got enough concentrate to make 1 1/2 gallons of the solution.  I only mixed up half.  I've gotten almost everything for the car done with the 1/2 that I mixed.  It seems to be lasting a long time and hasn't lost its strength yet.

To save a little money, I redid my origonal throttle cable with the black oxide too.  After bead blasting the end...and then polishing it with steel wool, I dipped the end in the solution for just a few seconds.  The color is just a little darker than what it was after blasting.  The very end of the cable(that slides onto the carb) was held in the solution longer and now has a medium gray finish.  Not 100% factory looking but a whole lot better than painting it. 


Offline wally426ci

  • Sr. Resident
  • ******
  • Posts: 5095
    • maryland mopars
Re: Buffing and plating
« Reply #7 on: September 27, 2010 - 04:55:18 PM »
 :popcorn:
{OOI====I====IOO}
      '71 Challenger
      [O[]=====[]O]
      '68 D100

Offline 340SIX

  • Jr. Member
  • **
  • Posts: 123
Re: Buffing and plating
« Reply #8 on: September 28, 2010 - 05:45:33 PM »
This stuff works great to black phospate coat I have had great results
http://www.brownells.com/.aspx/pid=1072/Product/OXPHO_BLUE_reg_
I posted this thread on polishing an A Body fourm
Today did some challenger stainless that was dented up and in bad shape. The ones that go ontop doors,rear of fenders and rear of hood like used on SE challengers
http://www.forabodiesonly.com/mopar/showthread.php?t=51612

Offline Moparal

  • Permanent Resident
  • *******
  • Posts: 13085
Re: Buffing and plating
« Reply #9 on: September 28, 2010 - 08:27:24 PM »
If anyows anything about buffing and polishing-----------  340six   would be the buffmaster. He is know world wide for his talents :2thumbs:

Offline burdar

  • Sr. Resident
  • ******
  • Posts: 5925
Re: Buffing and plating
« Reply #10 on: September 28, 2010 - 09:42:15 PM »
I dropped a couple aluminium Challenger moldings off at a fairly well known vender at the Mopar Nats.(front grill trim and front valence trim)  They were supposed to strip the anodizing, fix a few dents and polish the trim.  I just got them back late last week and they look awful.  There are pits all over them and they are NOT polished.  They look more brushed than polished.  I'll end up buying new grill trim but the lower valence trim isn't available so I'll have to use it.  I havn't read the aluminium polishing post yet but hopefully it will have some tips so I can get the valence molding looking better.  I have some felt wheels for a dremel...I wonder if I can use that on the molding with an aluminium compound.
   

Offline 340SIX

  • Jr. Member
  • **
  • Posts: 123
Re: Buffing and plating
« Reply #11 on: September 28, 2010 - 10:51:17 PM »
I have another sixpack intake that needs polished outside{the porter did his thing on the ports and bowls when he did the 2 heads}
Thinking I should take a step by step pic thing as I go when I start on it