Author Topic: Look what followed me home today...  (Read 82736 times)

Offline whitewatersky

  • Jr. Member
  • **
  • Posts: 350
Re: Look what followed me home today...
« Reply #165 on: June 21, 2014 - 10:31:35 PM »
This is so impressive! Awesome job.


Lookin for my first 70 Challenger
Plum Crazy auto T/A Challenger


Offline Cudaragtop

  • Sr. Member
  • ****
  • Posts: 1437
  • Woulda Shoulda Cuda! Randy
Re: Look what followed me home today...
« Reply #166 on: June 22, 2014 - 12:07:29 AM »
 :iagree:

Yup. One of my favorite threads.
Trying to absorb as much as possible but it's always here when I need to go back and refresh my memory.
Thanks for all the great posts.  :clapping:
- Randy D.
1 of 88 1970 340 4-Speed 'Cuda Convertibles
69 Barracuda Fastback Project Album https://goo.gl/photos/XjsAsx4LDo7psimU8
----o00o--'(_)'--o00o----

Offline ammo

  • Jr. Member
  • **
  • Posts: 389
Re: Look what followed me home today...
« Reply #167 on: June 22, 2014 - 12:53:24 AM »
Great work
1973 dodge challenger

Offline burdar

  • Sr. Resident
  • ******
  • Posts: 5925
Re: Look what followed me home today...
« Reply #168 on: June 22, 2014 - 10:40:53 AM »
Thanks guys...Just trying to do the same thing with this car as I did with the Challenger.(Every part needs to look the best that I can make it look before being installed back on the car.)

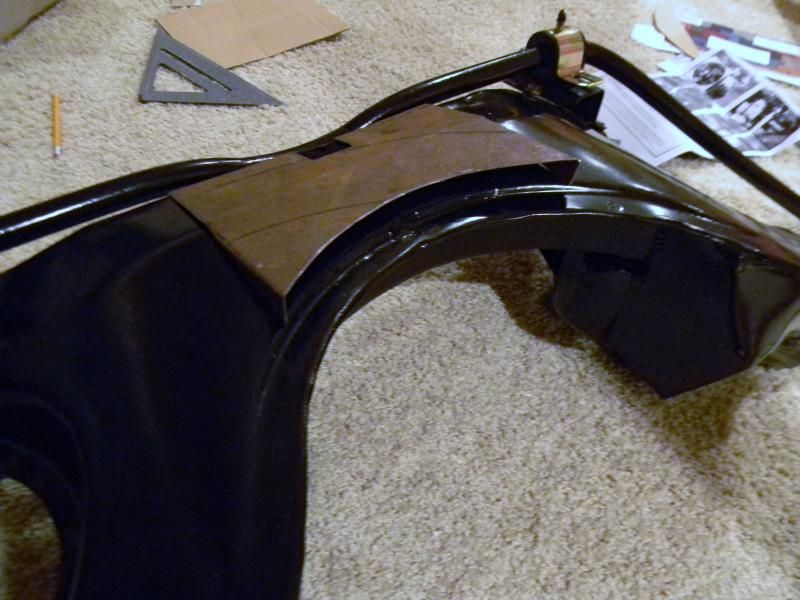
I jumped the gun a little on sending the K-member out for powder coat.  There was some pitting that I didn't know was there which the powder didn't cover.  The bottom also was dented up.  I couldn't leave it that way so it's back at the powder coaters.  I decided to make a skid plate to cover the dents on the bottom.  I could have purchased one for about $75 but that seemed steep for just a skid plate.  I made one out of cardboard first to see what it would look like.
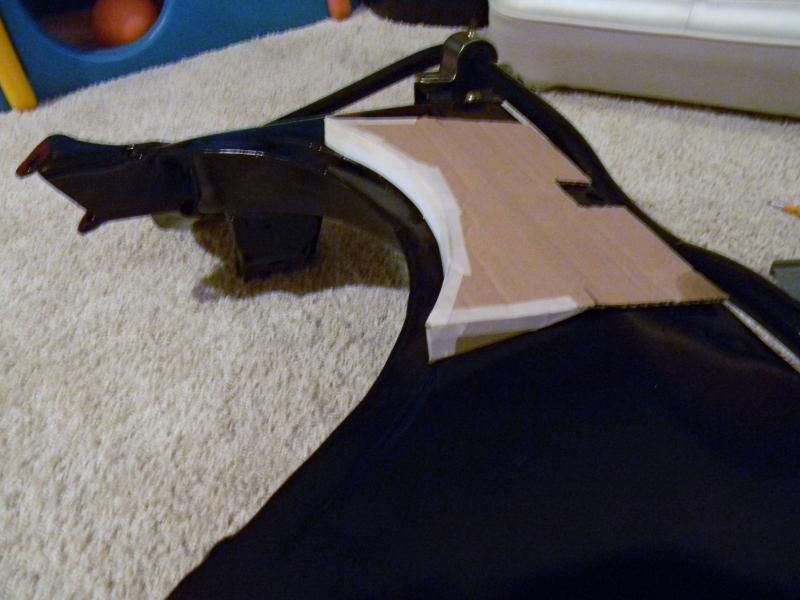

I wasn't sure how to do the curved section.  I could have cut slits in the end, bent them all down 90 degrees, and had it welded but I didn't think that would work the best.  I ended up just cutting a thin strip of metal and bent it in a curve.  The powder coater will weld it on to the skid plate for me.  I think it will look good.
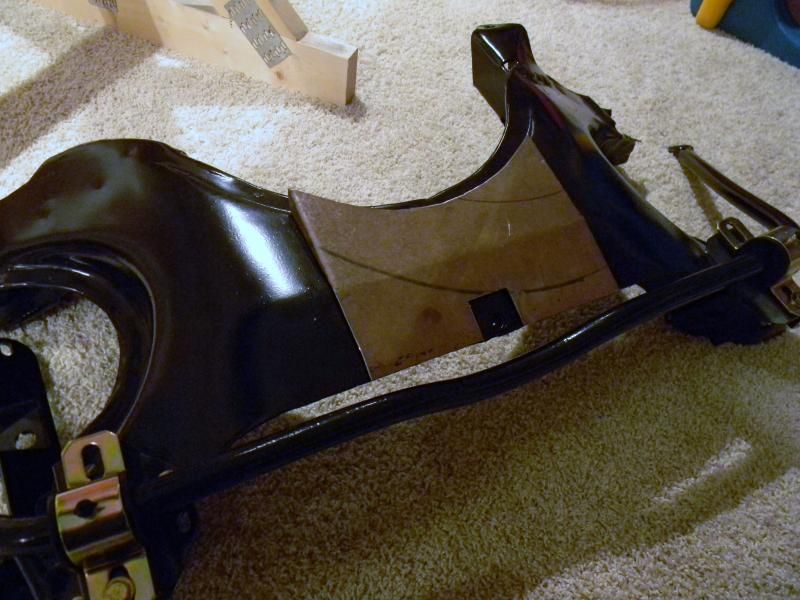


I also bought a torque strap so I don't blow out the PS engine mount.  The bracket for the strap is supposed to bolt onto the pinch weld lip of the K-member.  The lip on this K isn't wide enough though.  There isn't enough meat there to get a hole drilled.  I thought about adding a tab to extend the lip but decided against it.  I'll just have the bracket welded to the K instead.  The instructions even say that in high HP applications to weld the bracket instead of bolt it.
« Last Edit: June 22, 2014 - 10:50:16 AM by burdar »

Offline burdar

  • Sr. Resident
  • ******
  • Posts: 5925
Re: Look what followed me home today...
« Reply #169 on: June 22, 2014 - 11:01:58 AM »
Since I havn't heard from the bodyshop as to when they will be ready for the car, I decided to start mocking up a couple things.  There is a guy on FABO that is making headlight relay kits.  I wanted to add one to take some load off of the factory wiring and the bulkhead connector.  I already did away with the AMP gauge and I'll be running a bypass wire right from the alternator to the starter relay.  Eventually, I will also be adding relays for the convertible top motor. 

I recieved the relay kit yesterday so I mounted it under the battery tray. 


I set the battery tray in place to see what it would look like.  I was hoping the relays would be covered but they weren't.  I could have mounted them up and extra inch but I think they would still be seen.  I think I'm going to build a simple cover under the tray to hide them.  Just a thin sheet of metal with a 1/2" lip at the top to screw to the tray should be fine.  Maybe I could find someone to roll some beads in it for strength and looks.(Brad...are you reading this? wink, wink :lol:)


I'm also adding a PCV catch can.  I bought this one online and think it will look good in the engine comp.  I'll have to do something about the wording on the canister though. That's it for now.

Offline 4Cruizn

  • Administrator
  • C-C.com Expert
  • *****
  • Posts: 18521
  • HEMI FISH
Re: Look what followed me home today...
« Reply #170 on: June 22, 2014 - 11:02:14 AM »
Now Burdar . . . You're not building that k-frame in the house , are you?    Don't ruin that carpet!  :nono:

Offline burdar

  • Sr. Resident
  • ******
  • Posts: 5925
Re: Look what followed me home today...
« Reply #171 on: June 22, 2014 - 11:20:05 AM »
 :misbehaving:  But the garage was cold in the winter...  Between you and me, I've had to trim a couple spots out of the carptet with scissors.  Bearing grease doesn't come out very easily.
« Last Edit: June 22, 2014 - 11:22:12 AM by burdar »

Offline anlauto

  • Permanent Resident
  • *******
  • Posts: 12328
  • I'm Alan G...I'm a Mopar Addict
    • Alan Gallant Automotive Restoration
Re: Look what followed me home today...
« Reply #172 on: June 22, 2014 - 11:26:14 AM »
Don't you like building a car with "no rules"... :drunk:
I've taught you everything you know.....but I haven't taught you everything I know !
www.alangallantautomotiverestoration.com

Offline burdar

  • Sr. Resident
  • ******
  • Posts: 5925
Re: Look what followed me home today...
« Reply #173 on: June 22, 2014 - 11:52:30 AM »
The only rule is that it has to look good to me.  It would be nice if others liked it but ultimately, I'm the only one who needs to be happy with it.

Offline brads70

  • C-C.com Expert
  • ********
  • Posts: 18747
Re: Look what followed me home today...
« Reply #174 on: June 22, 2014 - 01:01:55 PM »
What about attaching the relays to the bottom of the battery tray?
Brad
1970 Challenger 451stroker/4L60 auto OD
Barrie,Ontario,Canada
Proud to own one of the best cars ever made!!!!!

My restoration thread 
http://www.cuda-challenger.com/cc/index.php?topic=59072.0
 My handling upgrade post
http://www.cuda-challenger.com/cc/index.php?topic=73985.0

Offline burdar

  • Sr. Resident
  • ******
  • Posts: 5925
Re: Look what followed me home today...
« Reply #175 on: June 22, 2014 - 01:32:29 PM »
That was an option but I'm going to mount a bus bar under there. What's the best way to mount something under the tray? The bolt heads can't stick up...the battery wouldn't still level. Do I have to weld studs on the bottom?  Maybe I'll remount the relays.  I can just use screws for now...then add the studs later?

Offline anlauto

  • Permanent Resident
  • *******
  • Posts: 12328
  • I'm Alan G...I'm a Mopar Addict
    • Alan Gallant Automotive Restoration
Re: Look what followed me home today...
« Reply #176 on: June 22, 2014 - 02:45:28 PM »
When I mounted fan relays for a Cuda I did last Fall...I welded a false bottom under the battery tray and mounted the relays with short srcews...

...no rules....
I've taught you everything you know.....but I haven't taught you everything I know !
www.alangallantautomotiverestoration.com

Offline burdar

  • Sr. Resident
  • ******
  • Posts: 5925
Re: Look what followed me home today...
« Reply #177 on: June 22, 2014 - 03:20:33 PM »
That looks good.  Here's what I did.  I can add another strap for the bus bar.


It's hidden much better now.

Offline ShelbyDogg

  • Sr. Resident
  • ******
  • Posts: 5007
Re: Look what followed me home today...
« Reply #178 on: June 22, 2014 - 03:32:38 PM »
You always want to mount your relays "cap up" or they will fill up with water and not work when you need them the most. You also want to mount them so you can get to them easily to swap out in the dark.
Rob

3 E-bodies, Megasquirt-1v3.0, Edelbrock Pro-Flo-1, Holley C950, FAST EZ-EFI; say no to carbs...yes to throttle bodies

My Pace Car restoration thread:
http://www.cuda-challenger.com/cc/index.php?topic=44869.0


Offline burdar

  • Sr. Resident
  • ******
  • Posts: 5925
Re: Look what followed me home today...
« Reply #179 on: June 22, 2014 - 03:52:24 PM »
The relays should be easily accessible under the tray.  I originally had the fuse holders attached to the relays but now I have them attached to the mounting plate.  The high beam fuse will be the hardest to access since it's up against the inner fender.