Author Topic: Look what followed me home today...  (Read 82717 times)

Offline burdar

  • Sr. Resident
  • ******
  • Posts: 5925
Re: Look what followed me home today...
« Reply #240 on: August 22, 2014 - 10:04:30 AM »
Ok, here are the progress pictures.  I'm glad they were able to get it in and out in only a month and a half.  Too many times you hear of "body shop jail".  The car isn't painted yet.  Now it's time for me to test fit everything.  I don't want to be drilling holes or find out I have to modify something AFTER it's painted.

The trunk lid was the nicest part of the car.  No major dents or filler.  I had them fill the GT emblem holes as well as the tail panel trim holes.  This car is going to be clean...without all the factory emblems to clutter it up.  I'm still deciding if I want to put the GT emblems on the fenders.


Seam sealer is done...


Offline burdar

  • Sr. Resident
  • ******
  • Posts: 5925
Re: Look what followed me home today...
« Reply #241 on: August 22, 2014 - 10:13:42 AM »
After the car was put back on my stands, the front end was assembled and adjusted.  They said everything fit a little nicer with the car off the rotisserie.  The DS fender needed a little persuasion at the front.  Nothing a block of wood and a few taps with a hammer couldn't take care of.  All the lines seem to line up which is good.  My Challenger Goodmark fenders had to be cut up to make them fit.  These AMD pieces are pretty nice.  One issue we discovered is that the new AMD hoods have a line down the center that the original ones didn't have.  Some of it can probably be hidden with bodywork but there will still be a slight line down the hood that shouldn't be there.  Luckily I'm not doing a stock restoration.


A little work will be needed to get the cowl, doors and hood to align nicer.


This is the bad side.  Some material will have to be added to the door so the contour matches the fender.


Kind of looks like a Super Stock Dart convertible.  :roflsmiley:  You can see the line down the center of the hood.


Test fit all the new side marker lights.


I gave them the go ahead to start straightening out the doors and start the filler work.  The doors were bad.


They sprayed some single stage gray paint on the floor to see if that's what I was wanting for the under side.  They also used up the rest of the Q1 paint they mixed up for the sprayouts and put that on some of the floor.  I'll get a pic of that later this weekend.  Now it's time for me to get to work...


Offline dfrazz

  • 1970 Cuda - 1968 Charger
  • Resident
  • *****
  • Posts: 4070
Re: Look what followed me home today...
« Reply #242 on: August 22, 2014 - 10:14:03 AM »
It looks like they did a great job, nice and clean.  Thanks for posting the pics, really enjoy watching this one come together!!   :cooldancing:

Offline burdar

  • Sr. Resident
  • ******
  • Posts: 5925
Re: Look what followed me home today...
« Reply #243 on: August 22, 2014 - 10:35:37 AM »
So far everything is looking good.  There's still a lot of work ahead to get it perfectly straight.  I need to save up some money before that happens.

A few days ago they had another Dart in the shop for some mechanical work.  They put the two cars side by side to check out the lines.


Offline burdar

  • Sr. Resident
  • ******
  • Posts: 5925
Re: Look what followed me home today...
« Reply #244 on: August 22, 2014 - 09:20:54 PM »
Q1 really changes colors in different lighting.  One of these pics is with a flash...the other one is without.  It looks completely different in person too.  The gray color on the floor is going to go on the underside with blue overspray.  I think a couple drops of black need to go into it though.  It should be a little darker.


Offline anlauto

  • Permanent Resident
  • *******
  • Posts: 12328
  • I'm Alan G...I'm a Mopar Addict
    • Alan Gallant Automotive Restoration
Re: Look what followed me home today...
« Reply #245 on: August 22, 2014 - 09:36:04 PM »
I'm having a 69 Super Bee painted Q5 right now. You would not believe the "flip" it has in different lighting unless you see it with your own eyes. I had two spray-outs down using two types of paint and they both acted totally differently in different lights as well.....It was hard for the owner to make the call.... :pullinghair:
I've taught you everything you know.....but I haven't taught you everything I know !
www.alangallantautomotiverestoration.com

Offline burdar

  • Sr. Resident
  • ******
  • Posts: 5925
Re: Look what followed me home today...
« Reply #246 on: September 29, 2014 - 12:24:23 PM »
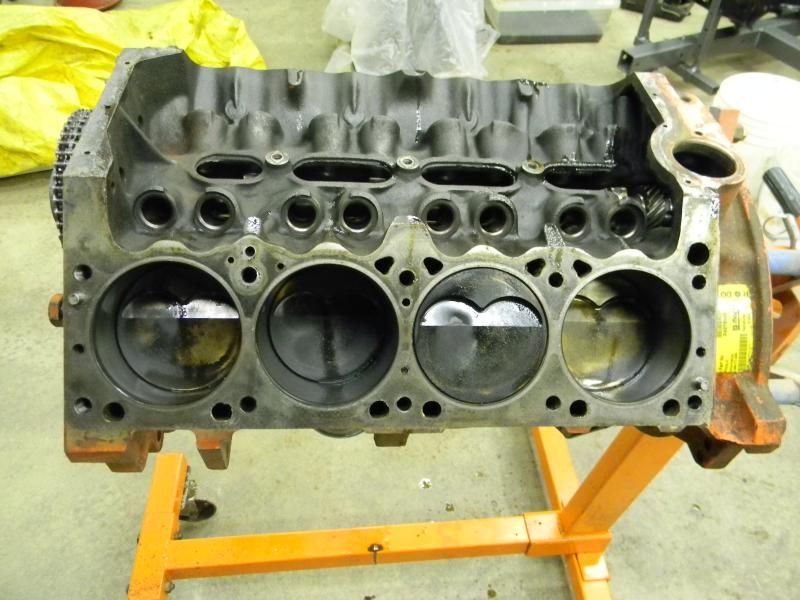
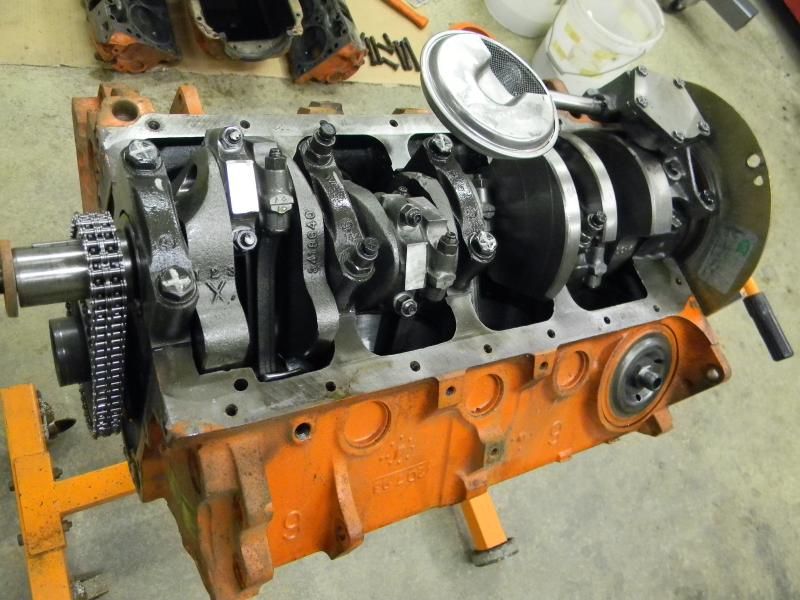
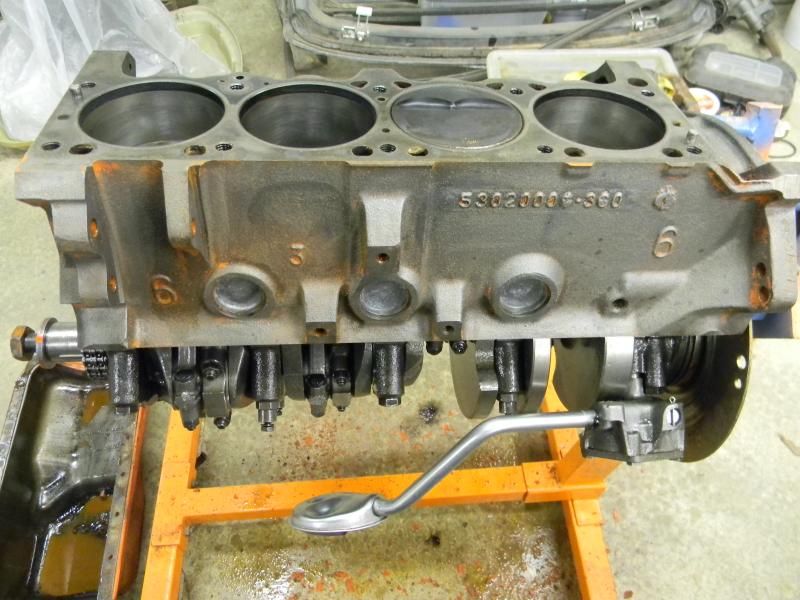
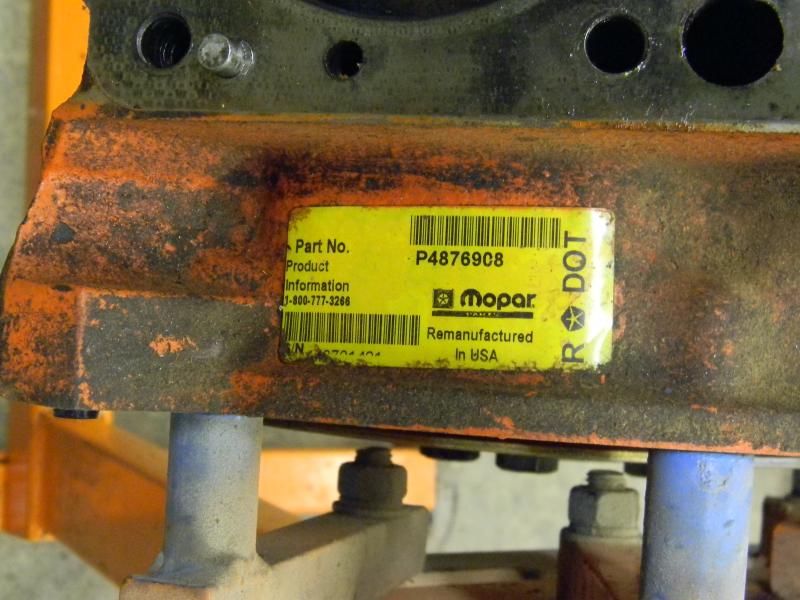
I haven't posted anything in awhile but I'm still working on some things.  I started working on the engine last month.  I think I mentioned earlier that the short block is a MP piece I bought back in 2000.  The short blocks were made from reconditioned non Magnum roller blocks.  It's the 10 to 1 compression version.  I believe there was also a 9 to 1 version.  The engine has been sitting since 2004 or 2005.   

I previously ran a Weiand X-cellerator single plane intake on the engine.  Last fall I bought an Edelbrock RPM Air-Gap for it.  I pulled the Weiand and started mocking up the intake and carb but ran into an issue.  The secondaries on the carb would hit the intake.  It looked like the intake was cast wrong.  After talking with tech support a few times, they had me send the intake in for them to look at.  They ended up sending me a new intake but by that time it was the middle of winter and I had moved on to other things. 

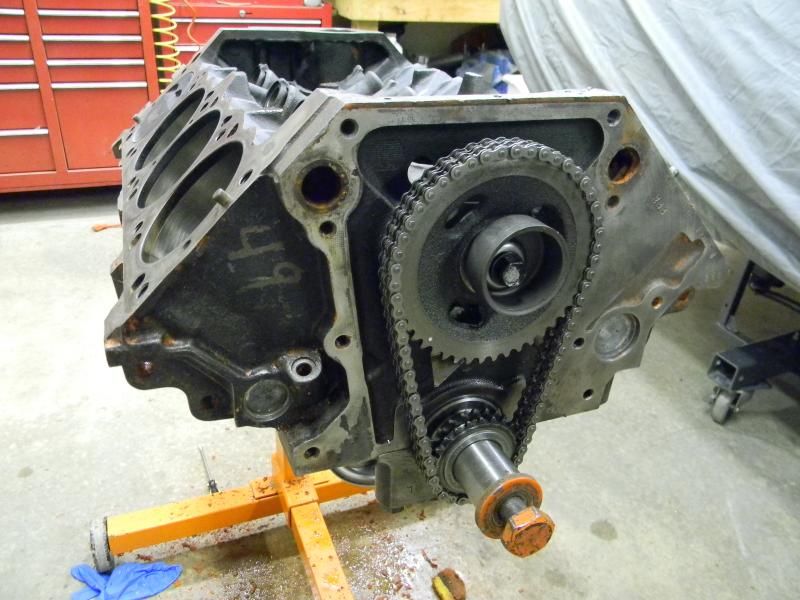
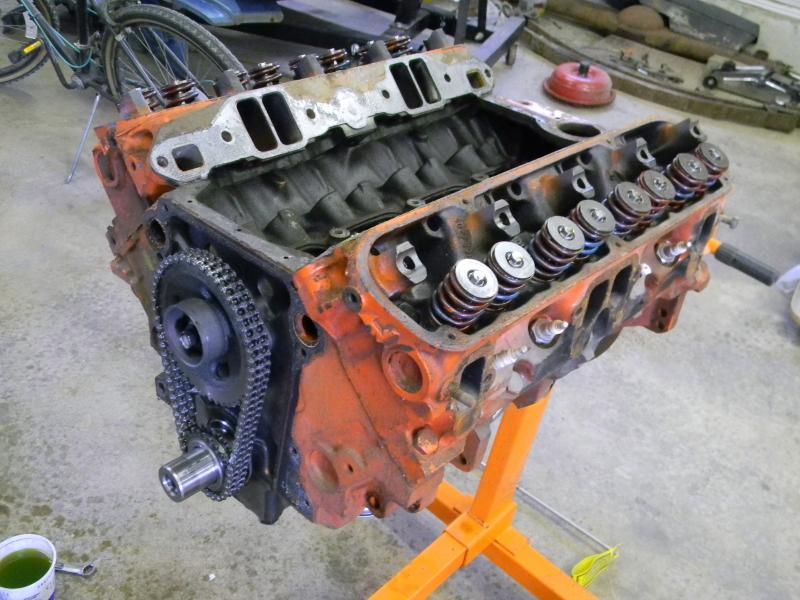
Last month I moved the engine over to my place.  I pulled the plastic off the engine and found a mouse next in the valley.  The nest was made from grass clippings so I knew it hadn't been there long.  It wasn't there last fall when I was test fitting the new intake.  I vacuumed up the nest and put the engine on the stand.  I pulled the heads, water pump and front cover.

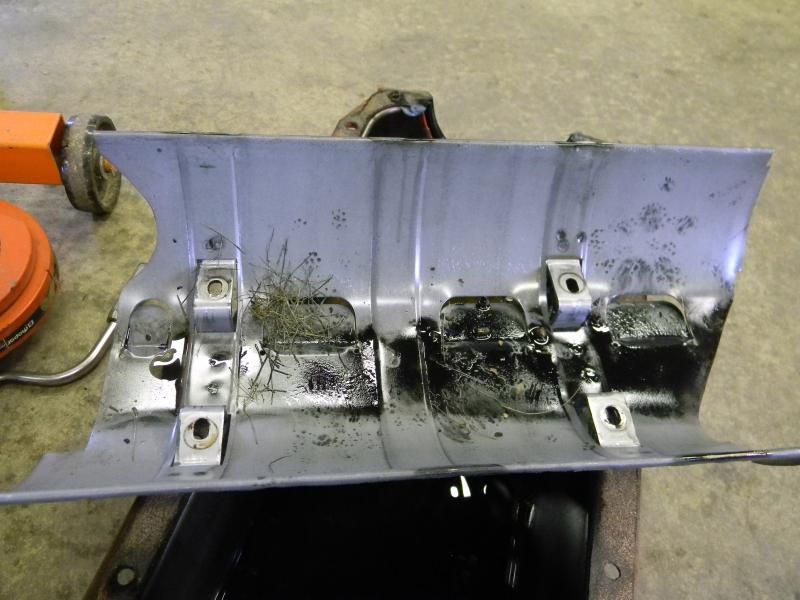
I didn't want to spin the engine on the stand incase there was crap in the pan.  I pulled the pan with the engine upright and removed the windage tray.  Sure enough, there were some grass clippings and mouse foot prints on the tray.  There wasn't much of anything in the pan though.  I think I got lucky and caught it early.

Other then the nest, the engine looked really good inside.  Everything still looked clean without any rust from sitting.
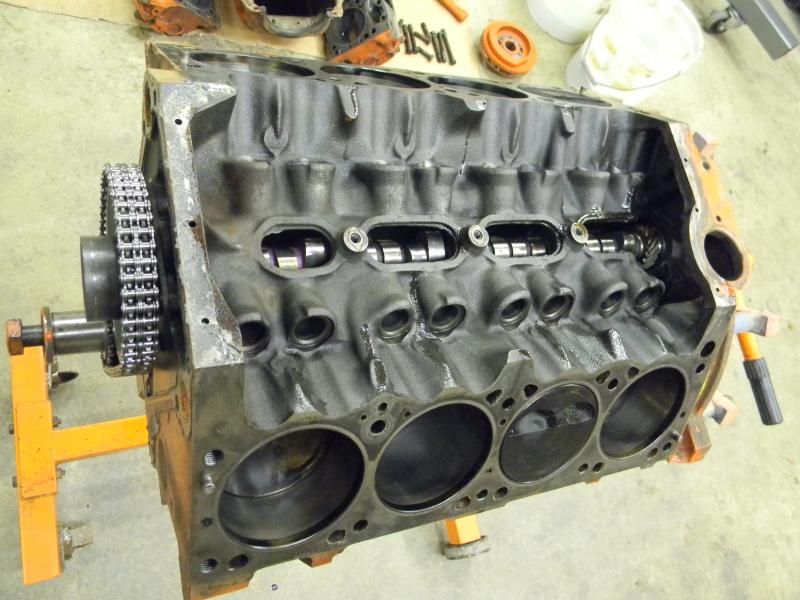


Then came the task of cleaning up the block.  There were a couple layers of orange paint and layers of dirt, saw dust and oil to remove.  What a nasty, crappy job that was.  I think it took at least four cleanings to get everything off.  Even after wearing gloves and goggles, some paint stripper would end up on my skin and start burning.  I'm glad that job is over!
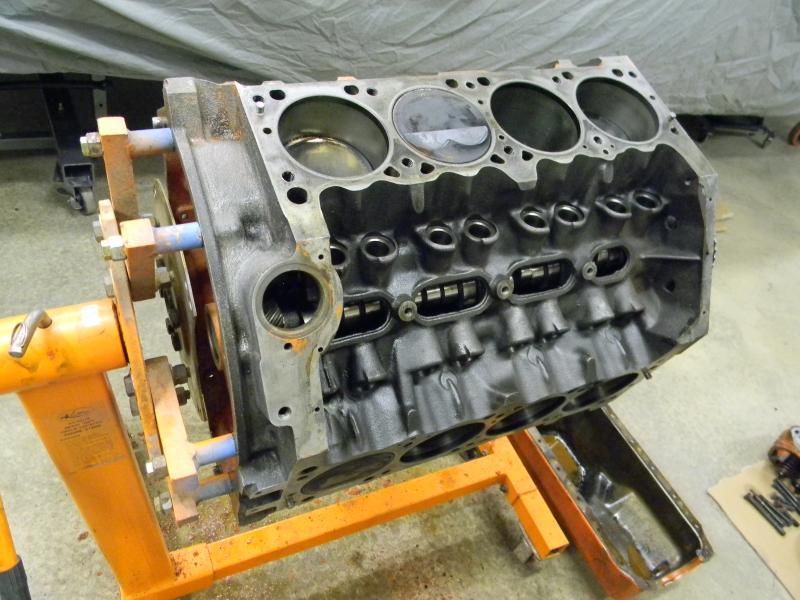


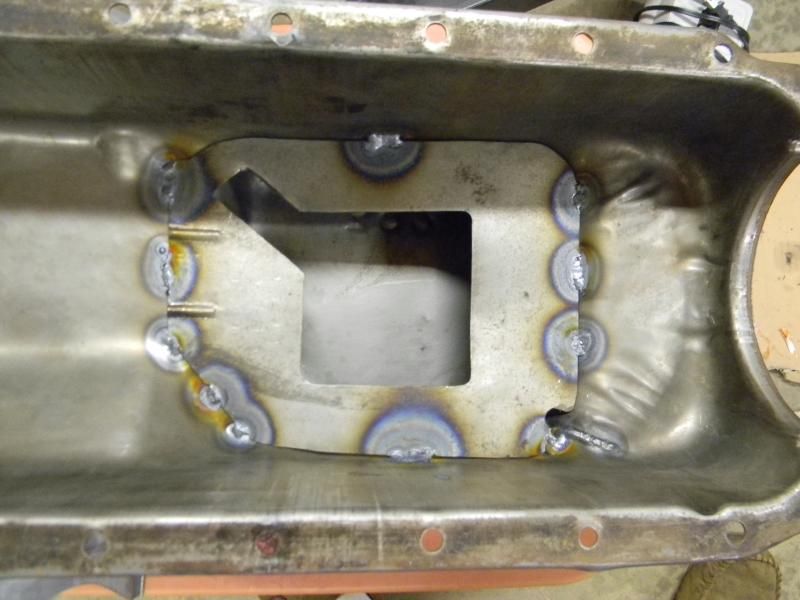
I installed the timing cover and put a new water pump on.  Then I primed the everything.  After that I moved on to the oil pan.  The pan that was on the engine had seen better days.  The sides were heavily pitted and would have taken a lot of work to refinish.  A friend of mine had a 360 pan he wasn't using so he donated it to the cause.  I saw and old Car Craft article on making a baffle for the stock oil pan.  It didn't look too difficult so I thought I'd give it a try.  I made a template out of card board and taped it onto the pan.  I test fit it a few times onto the engine to make sure it cleared the pickup tube, then I transferred the template to a piece of metal.
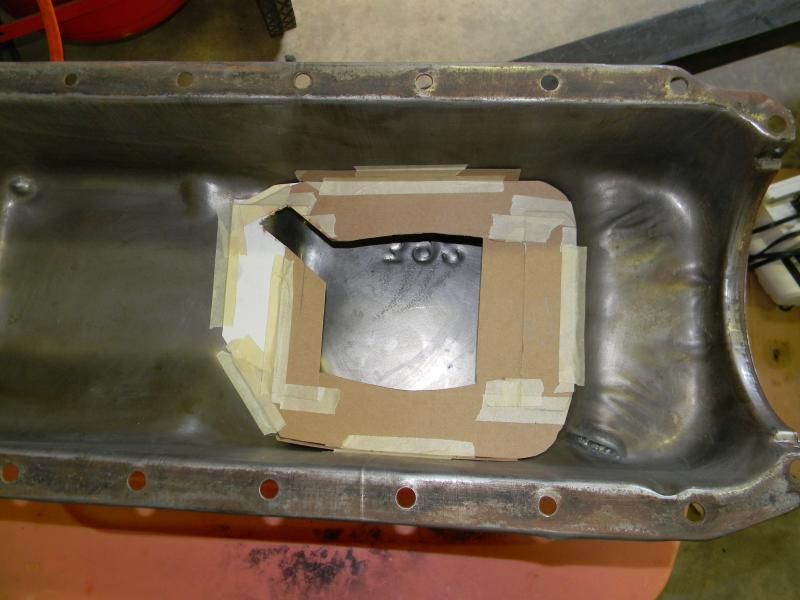

I taped the metal baffle to the pan and test fit again.  So far so good.  I had clearance around the pickup tube and nothing was hitting.
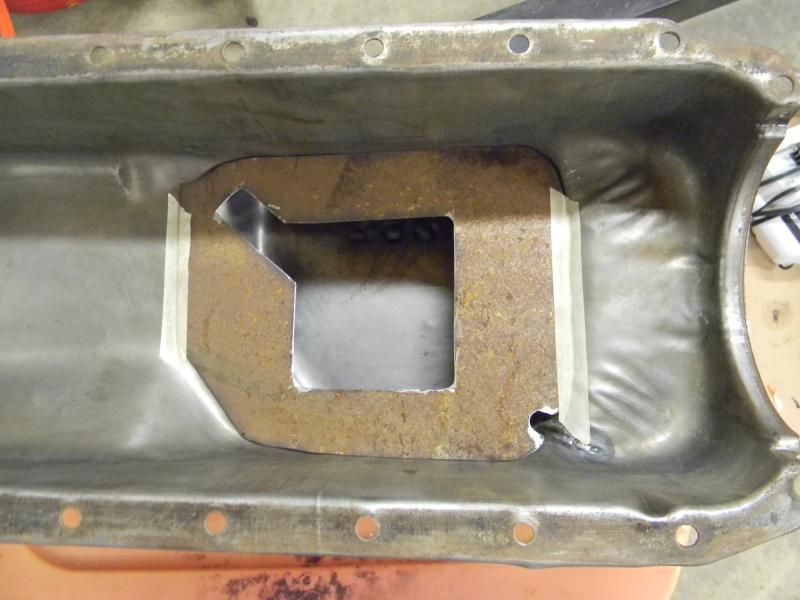
 

I soaked the baffle in EvapoRust and then added some drain back slots.
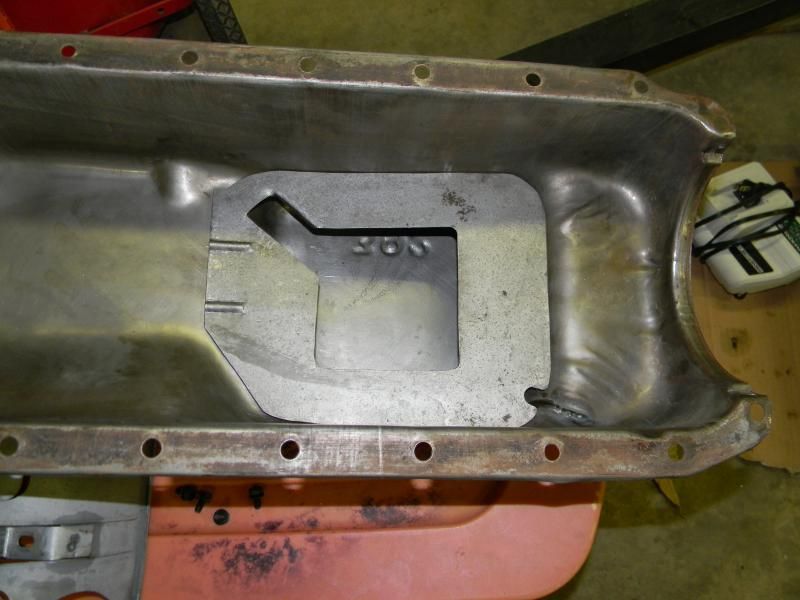

Here is the baffle welded in place.  It works really good on deceleration but doesn't seem to do much on acceleration.  I could have gotten the clearances tighter to the pickup tube if I would have had a bare block to test fit it on.  I would have been able to look down through an empty cylinder and see how close it came to hitting.  The pan isn't installed yet so I guess I could still add some metal around the back if I found someone local with a bare block I could borrow.

That's all the progress I have on the engine right now.  I need to take the heads in and have them looked at.  They only have a few hundred miles on them but I did the valve job and guides when I was in school.  I want someone to double check my work so I don't have any issues down the road.  I also need to get the intake surface of the heads milled down a little so the intake sits a little lower on the engine.  I could barely get the intake bolts started when I was test fitting things.


Offline burdar

  • Sr. Resident
  • ******
  • Posts: 5925
Re: Look what followed me home today...
« Reply #247 on: September 29, 2014 - 01:11:02 PM »
I've also been working on a bracket to mount a trans cooler in front of the radiator.  I picked up a scrap piece of 1/8" aluminum and started cutting.  I was surprised how nicely aluminum cuts on a table saw.


I bolted two vertical pieces to the rad support on either side of the hood latch bracket.  After temporarily attaching the cooler, I tried to come up with an optimal location to mount the cooler bracket.  I had planned on mounting it a lot lower but that wasn't going to work very well.  The Dart has a tall bumper and no front valance.  If I mounted the cooler towards the bottom of the opening, it wouldn't have received any air flow.  The bumper would have blocked all of the air.  I set the grill in place and decided to put the cooler up high so it would get direct air flow.  The hood latch blocks a little bit of airflow but I didn't have much space to work with.


After I had the location figured out, I drilled three 1.25" holes through the bracket on either side of the cooler.  These holes are so I didn't block air flow to the radiator.


I tried finding someone local who had some dimple dies so I could flare the holes.  I wasn't able to find anyone though.  I ended up buying a 1.25" dimple die and flared the holes myself.


I slightly polished the bracket with some steel wool and wadding cloth.  I'm not sure what finish I want on it yet.  I might polish it or I might paint it black.  I think it turned out nice.


As far as hooking up the cooler lines, I didn't really want to drill extra holes through the rad support.  Directly below the frame rails, there were some existing square holes I decided to use.  I drilled out those holes a little larger and installed some 6AN bulkhead fittings.  Now I can hook everything up with AN fittings for a clean look.  Once I buy a radiator, I can work on hooking up the other side.


I also started making an aluminum gas pedal cover. I'm probably about half way done with that.  Then I can start making a brake pedal cover.


About half done...


Offline roadman5312

  • Sr. Resident
  • ******
  • Posts: 5688
Re: Look what followed me home today...
« Reply #248 on: September 29, 2014 - 01:28:19 PM »
Your trans cooler mount is a very nice piece of work, or art should I say. Awesome.  :2thumbs:

Offline anlauto

  • Permanent Resident
  • *******
  • Posts: 12328
  • I'm Alan G...I'm a Mopar Addict
    • Alan Gallant Automotive Restoration
Re: Look what followed me home today...
« Reply #249 on: September 29, 2014 - 02:31:36 PM »
Cooler bracket looks excellent, however I think it would look better painted black, only from a front view of the finished car. :2cents:
I've taught you everything you know.....but I haven't taught you everything I know !
www.alangallantautomotiverestoration.com

Offline HP_Cuda

  • Hit the skinny little pedal on the right!
  • Sr. Resident
  • ******
  • Posts: 5268
  • Mopar or No Car!
Re: Look what followed me home today...
« Reply #250 on: September 29, 2014 - 05:05:26 PM »

Great work, can't wait to see her finished.

So what's the plan for the motor - going all out or a stock rebuild?

B
1970 Cuda Clone 440 4 speed - sublime green
1970 Cuda 383 4 speed - yellow - SOLD

Offline roadman5312

  • Sr. Resident
  • ******
  • Posts: 5688
Re: Look what followed me home today...
« Reply #251 on: September 29, 2014 - 05:08:43 PM »
Cooler bracket looks excellent, however I think it would look better painted black, only from a front view of the finished car. :2cents:

                                       :iagree:  black, powder coat would survive better thou.  :2cents:

Offline brads70

  • C-C.com Expert
  • ********
  • Posts: 18747
Re: Look what followed me home today...
« Reply #252 on: September 29, 2014 - 06:09:32 PM »
Tranny cooler bracket looks great!  I agree black maybe?
Brad
1970 Challenger 451stroker/4L60 auto OD
Barrie,Ontario,Canada
Proud to own one of the best cars ever made!!!!!

My restoration thread 
http://www.cuda-challenger.com/cc/index.php?topic=59072.0
 My handling upgrade post
http://www.cuda-challenger.com/cc/index.php?topic=73985.0

Offline burdar

  • Sr. Resident
  • ******
  • Posts: 5925
Re: Look what followed me home today...
« Reply #253 on: September 29, 2014 - 07:18:36 PM »
I'm not going to make up my mind on painting it until the radiator is in. If I leave the radiator natural, I'll probably leave it natural. If I spray the front of the core black, then I'll spray it black.

The engine made 330hp at the wheels in my old Cordoba.  Nothing crazy but not stock either. If I decide to put a roller cam in it down the road, the fact that it's a roller block will make the swap cheaper.

Offline brads70

  • C-C.com Expert
  • ********
  • Posts: 18747
Re: Look what followed me home today...
« Reply #254 on: September 29, 2014 - 07:29:45 PM »
If you could find a dimple die for the holes in your gas peddle that would really help in the "anti slip" department.
With your tranny cooler, I wonder if it would help to mount it down at the bottom of the opening to aid in rad cooling?
« Last Edit: September 29, 2014 - 07:31:57 PM by brads70 »
Brad
1970 Challenger 451stroker/4L60 auto OD
Barrie,Ontario,Canada
Proud to own one of the best cars ever made!!!!!

My restoration thread 
http://www.cuda-challenger.com/cc/index.php?topic=59072.0
 My handling upgrade post
http://www.cuda-challenger.com/cc/index.php?topic=73985.0