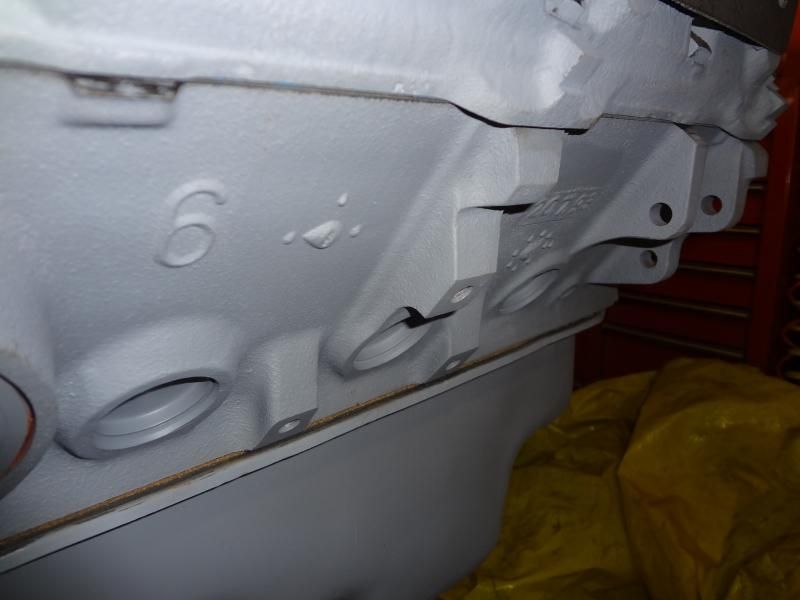
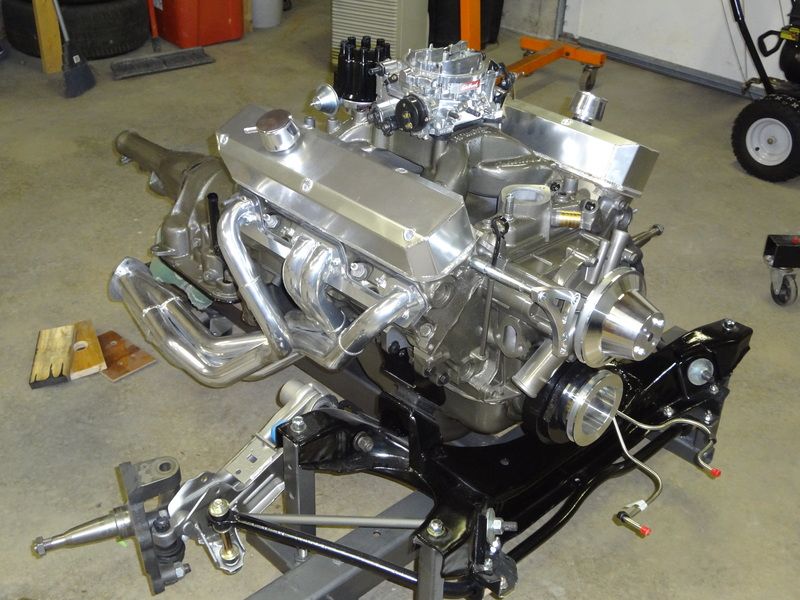
Author Topic: Look what followed me home today...  (Read 82718 times)

Offline burdar

  • Sr. Resident
  • ******
  • Posts: 5925
Re: Look what followed me home today...
« Reply #255 on: September 29, 2014 - 08:07:57 PM »
At the bottom, it would be completely blocked by the bumper. I thought it would get more airflow up high.

I thought about dimpling the gas pedal. I'm basing them off of the pedals I saw on another members Cuda. On his, there were raised sections for grip on the brake pedal. The gas pedal was smooth. My plan for the brake pedal was to not completely counter sink the attaching screws. I'd let them stick above the pedal slightly.


Offline brads70

  • C-C.com Expert
  • ********
  • Posts: 18747
Re: Look what followed me home today...
« Reply #256 on: September 29, 2014 - 09:22:53 PM »
Sounds good. Button head cap screws maybe?
Brad
1970 Challenger 451stroker/4L60 auto OD
Barrie,Ontario,Canada
Proud to own one of the best cars ever made!!!!!

My restoration thread 
http://www.cuda-challenger.com/cc/index.php?topic=59072.0
 My handling upgrade post
http://www.cuda-challenger.com/cc/index.php?topic=73985.0

Offline burdar

  • Sr. Resident
  • ******
  • Posts: 5925
Re: Look what followed me home today...
« Reply #257 on: September 29, 2014 - 09:35:50 PM »
That would work. I'm going to use button head fasteners to mount the cooler too.

Offline AARuFAST

  • AARuFAST
  • Resident
  • *****
  • Posts: 2154
Re: Look what followed me home today...
« Reply #258 on: September 29, 2014 - 09:55:38 PM »
Very impressive burdar.   :thumbsup:

1970 AAR Cuda
1970 Gran Coupe Ragtop. 1 of 66
Gran Cpe Convertible 1 yr only.

" I Want to Ride "

" I tried to be normal once...
it was the most boring
2 minutes of my life!!!!"

Offline burdar

  • Sr. Resident
  • ******
  • Posts: 5925
Re: Look what followed me home today...
« Reply #259 on: November 10, 2014 - 01:42:27 PM »
After more than three months, my fasteners are back from the electroplaters.  I had them done locally but the color came out with a yellow tint.  They weren't able to get them the correct color so I took them to another place. They turned out much nicer this time.  I got the LCA's/strut rods mounted to the K-member and temporarily put the 2" drop spindles in place.


I also got some more work done on the pedal covers.  As for adding some extra traction to the brake pedal...I'm going to insert some 1/2" rubber plugs into the holes.  The rubber will stick up about 1/8" from the surface of the aluminum.  That should give me the extra grip I need and not change the look of the pedal cover.

Offline dodj

  • Sr. Resident
  • ******
  • Posts: 6197
Re: Look what followed me home today...
« Reply #260 on: March 13, 2015 - 07:49:48 PM »
Any New pics? How is the Dart doing?
I just got back from dinner with my wife and an old friend that I haven't seen for years showed up. I asked him about his '71 440 6v 'cuda that he had back in the day and said he sold it  :banghead:, but had a '67 Dart convertible that he wanted to sell. Reminded me of this build.  :2cents:
Scott
1973 Challenger  440 4 spd 
2007.5 3500 6.7 Cummins Diesel, Anarchy tuned.
Good friends don't let friends do stupid things. ........alone.

Offline burdar

  • Sr. Resident
  • ******
  • Posts: 5925
Re: Look what followed me home today...
« Reply #261 on: March 16, 2015 - 01:18:46 PM »
I didn't really touch it for a couple months.  I decided to work on myself at the start of the new year.  I started running, working out and watching what I eat.  I'm feeling a lot better.  Now that it has started to warm up, I got the urge to work on it again.  I'm trying to get a few things done early this spring because I plan on getting the Challenger out of storage this year.(It's been in storage since Oct of 13)  Despite being in a temp controlled shop, stuff has deteriorated and it needs a lot of work.  I'll continue my Challenger thread when I get to that point.  Here's what's been done with the Dart since my last update.

My father-in-law cuts up old tires and uses them for traction around the yard in the winter.  That gave me an idea for some rubber grippers for my aluminum pedal covers.  I ground an old socket to a sharp edge and used it to punch holes out of an old piece of tire.  These rubber pieces will go in the holes and stick up higher then the aluminum.  The covers should look the same, but be safe to use.
 

If you remember, I'm going to install engine compartment braces on the Dart.  I had to make some brackets in order to mount them to the firewall.  Last fall I sprayed the brackets with a satin clear.  The aluminum did weird things underneath the clear so I stripped the clear coat and decided to polish them instead.  I had also planned on using nuts on the bottom side to attach them to the pinch weld in the engine compartment.  I test fit them but the nuts looked cheap.  I ended up making some more brackets for the bottom side of the pinch weld.  Now the pinch weld will be sandwiched in between these two brackets.  The lower bracket has threads cut into it...the upper bracket is where the engine comp braces will attach.  I think this looks much better.  I'll polish up some stainless button head bolts to attach them.

What I started with...


What I ended up with last fall...


Polished and lower bracket added...


« Last Edit: March 16, 2015 - 01:23:33 PM by burdar »

Offline burdar

  • Sr. Resident
  • ******
  • Posts: 5925
Re: Look what followed me home today...
« Reply #262 on: March 16, 2015 - 02:17:40 PM »
I had problems with the engine build last fall.  I didn't get things sorted out until after it had gotten cold.  That meant waiting until it got warmer to paint it.  I actually just got it painted on Saturday.

I rebuilt the heads myself in school back in the late 90's.  I wanted my work checked so I took them to a machine shop.  The seats left a lot to be desired so they redid those and machined the top of the guides for modern valve seals.  I also had them machine the intake face of the heads because I had trouble getting the intake holes to line up.  Machining the intake surface of the heads should have let the intake drop down onto the engine more.(The intake holes were previously too high and I had a hard time getting the bolts started.)

After the heads were machined, but before they were assembled, I took them home so I could test fit the intake and see if it fit any better.  The Edelbrock Air Gap did not fit.  The bolt holes lined up perfectly on the PS but were way off on the DS.  I swapped the heads side to side but still found the same thing. The holes lined up on the PS but not on the DS.  I tried a Weiand X-celerator  and it fit perfect.  I sent the Air Gap back to Edelbrock for them to look at but they said it measured fine. A friend of mine had an Edelbrock Performer so I tried that just to see what was going on.  That intake fit the same as my Air Gap.  The holes lined up fine on the PS but were way off on the DS.  It made no sense that the Weiand fit but the two Edelbrocks didn't.

I put the Air Gap back on the engine but removed the PS intake gasket.  The intake fit.  That told me that if I had .060 taken off of the PS side face of the intake, it should fit.  I really didn't have much of a choice.  Edelbrock said the intake was fine but it didn't fit.  Summit said they could send me another intake but I'd have to pay shipping.  It ended up being cheaper in the long run to just have the intake cut.  With .060 removed from the PS it fit like it should have the first time. 

While I was waiting to get the intake sorted out, I bought a new set of rocker arms/shafts.  I started cleaning up some used rockers from the Challenger but they were caked with carbon and nasty stuff.  New ones were fairly cheap so I went that route.  When I drag raced with this engine, I had a plate bolted in the valley to block oil from draining onto the cam.  This was supposed to free up some HP at higher RPMs.  I reinstalled it this time around.  At the very least, it should keep hot oil from heating up the intake.


« Last Edit: March 16, 2015 - 03:22:43 PM by burdar »

Offline burdar

  • Sr. Resident
  • ******
  • Posts: 5925
Re: Look what followed me home today...
« Reply #263 on: March 16, 2015 - 03:16:01 PM »
The intake situation was still being worked on so I bought a Pertronix distributor.  I don't like seeing ignition modules on the firewall on cars that didn't originally come with them.  The Pertronix seemed like a nice compact solution. 

I did some reading about Mopars and erratic timing.  I found out that there is a common problem with the intermediate shaft "bouncing".  Since the intermediate shaft has angle cut gear teeth, every time it bounces, it twists and changes the timing.  If there is any space between the end of the distributor shaft and the bottom of the inside slot on the intermediate shaft, the gear has room to bounce.  The fix seems to be a simple collar around the distributor shaft.  When the intermediate shaft wants to lift, it can't because the collar is there.  I also read about reducing the up and down play in the distributor shaft and making sure that the drive lug on the distributor fits snug into the slot in the intermediate shaft.

The first thing I did was address the up and down movement of the distributor shaft.  The play seemed excessive to what I was reading online.  I took the collar off the bottom and added another shim.  The play is greatly reduced.  There is still a small amount of movement for thermal expansion.
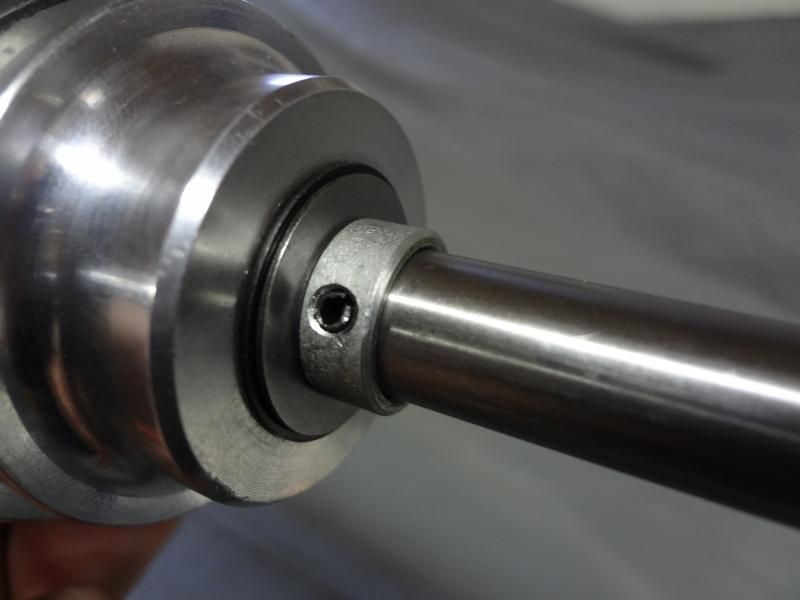

The next thing I did was to look at the intermediate shaft.  The distributor drive lug was VERY loose in the intermediate shaft.  There was some visible wear on the sides of the intermediate shaft slot so I bought a new one.  The distributor fit better but there was still too much movement between the two.  I ended up peening the end of the dist drive lug with a punch.  I did this on all four corners.  This expanded the drive lug and made it fit snug into the slot in the intermediate shaft.  The only thing left to do was install the shaft collar.
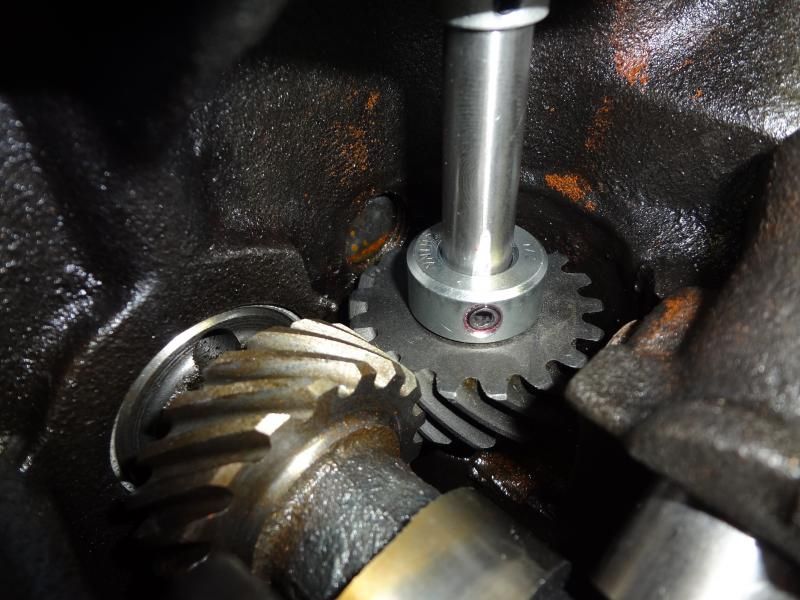

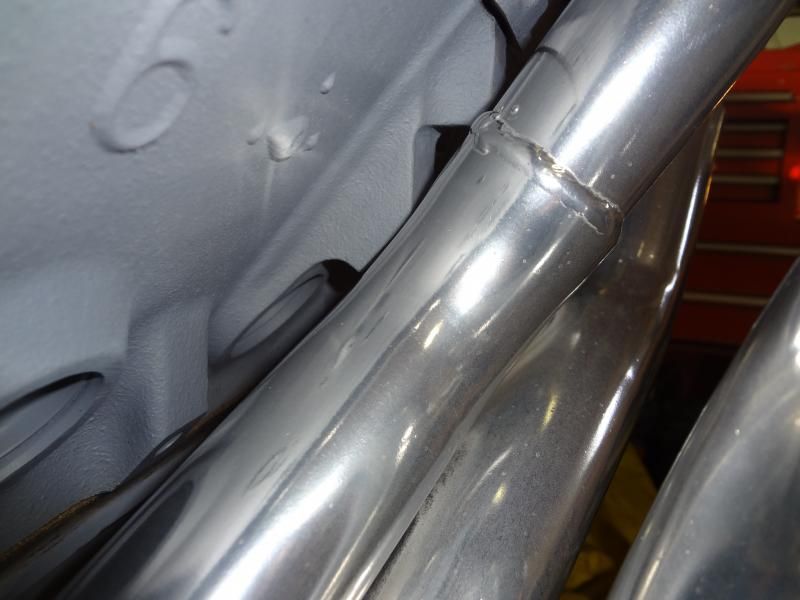
After the distributor work was done, the intake was ready to be installed.  Once the intake was on, I started test fitting the TTI headers.  I ran into a couple issues there too.  The main thing was that the block had a large boss on the side of it that interfered with the center tubes.  My block came from a truck.  Passenger car blocks must not have that boss.  A little time with a grinder is all it took to get clearance.


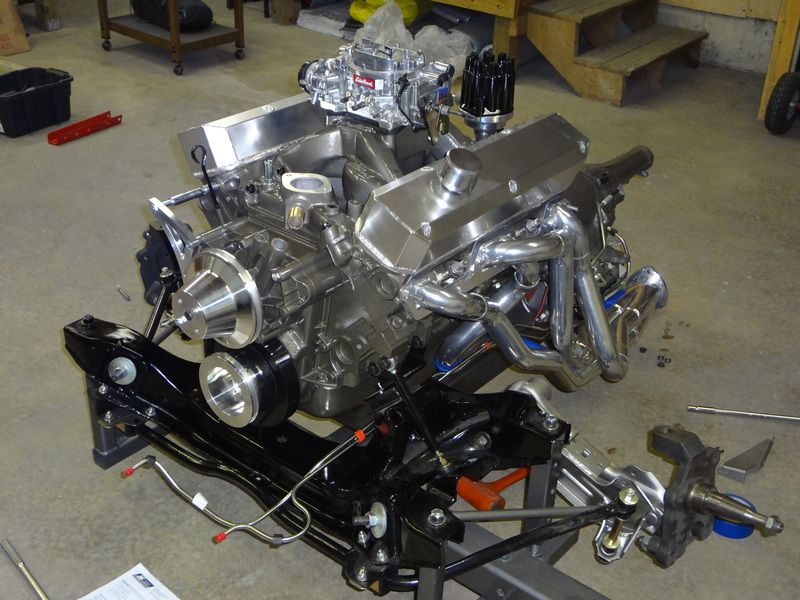
As I stated earlier, it warmed up over the weekend so I was able to get the engine painted.  Yesterday I hooked up the trans and bolted the engine up to the K-member.  I'm going to test fit the engine in the car so I can make sure everything fits.  I'm 99% sure that the headers are going to hang too low.  TTI makes a shorty header that would give me more clearance.  I also need to modify the throttle bracket some more.  The only way to get it right is to have the engine in the car.  With the engine installed, it will also give me more room in the garage while I work on the Challenger.

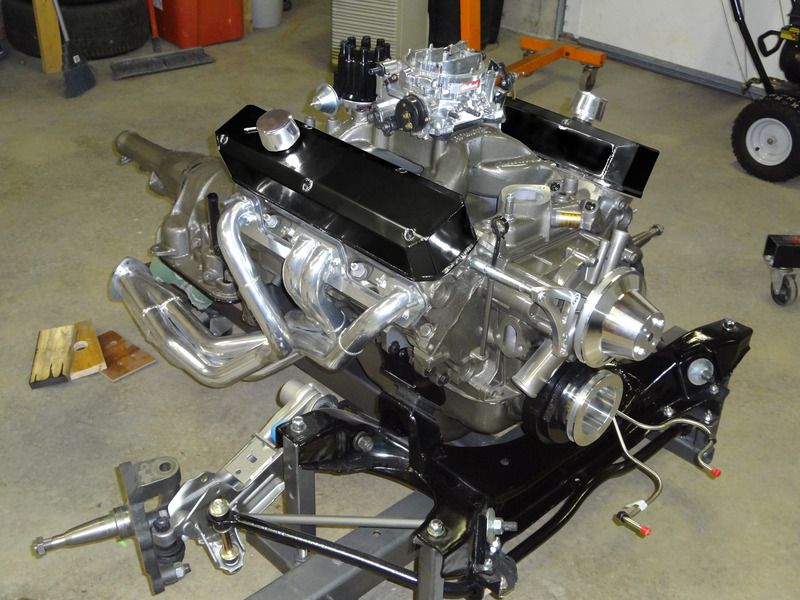
Here's what it looks like so far.  I'm not sold on the color just yet.  I think it will look better surrounded by a blue engine compartment.  I'm just really tired of orange engines in everything though.  My friend photoshoped the valve covers black for me.  I think that's the way I'm going to go.  The alternator and power steering pump will also be black to carry on the theme.  The trans lines don't clear the headers.  I think I'll have to custom make some lines out of braided hose.


black valve cover photoshop
« Last Edit: March 16, 2015 - 03:33:54 PM by burdar »

Offline anlauto

  • Permanent Resident
  • *******
  • Posts: 12328
  • I'm Alan G...I'm a Mopar Addict
    • Alan Gallant Automotive Restoration
Re: Look what followed me home today...
« Reply #264 on: March 16, 2015 - 03:18:16 PM »
I like the silver valve covers... :2cents:
I've taught you everything you know.....but I haven't taught you everything I know !
www.alangallantautomotiverestoration.com

Offline HP_Cuda

  • Hit the skinny little pedal on the right!
  • Sr. Resident
  • ******
  • Posts: 5268
  • Mopar or No Car!
Re: Look what followed me home today...
« Reply #265 on: March 16, 2015 - 03:21:23 PM »

Wow it's coming along nicely. Guess you can do a test spray and see what you think.

Keep up the good work!
1970 Cuda Clone 440 4 speed - sublime green
1970 Cuda 383 4 speed - yellow - SOLD

Offline burdar

  • Sr. Resident
  • ******
  • Posts: 5925
Re: Look what followed me home today...
« Reply #266 on: March 16, 2015 - 03:55:07 PM »
I found this picture online.  The engine color looks good against blue.  That's why I think it will look better once installed.


I really like how this engine comp doesn't have a bunch of shiny stuff.  This is why I'm leaning toward painting the valve covers and accessories black.
« Last Edit: March 16, 2015 - 03:58:18 PM by burdar »

Offline roadman5312

  • Sr. Resident
  • ******
  • Posts: 5688
Re: Look what followed me home today...
« Reply #267 on: March 16, 2015 - 04:07:52 PM »
Just a thought, powder coating will last longer and fade less . 

Offline anlauto

  • Permanent Resident
  • *******
  • Posts: 12328
  • I'm Alan G...I'm a Mopar Addict
    • Alan Gallant Automotive Restoration
Re: Look what followed me home today...
« Reply #268 on: March 16, 2015 - 08:15:01 PM »
Maybe consider your valve covers body colour ?
I've taught you everything you know.....but I haven't taught you everything I know !
www.alangallantautomotiverestoration.com

Offline daaboots

  • Jr. Member
  • **
  • Posts: 195
Re: Look what followed me home today...
« Reply #269 on: March 17, 2015 - 09:15:28 AM »
Wow... your engine setup looks amazing! I like the unfinished aluminum look of the valve covers better then black, but the body matched color looks fantastic as well.

Great job - you do top notch work!