Author Topic: Look what followed me home today...  (Read 82714 times)

Offline burdar

  • Sr. Resident
  • ******
  • Posts: 5925
Re: Look what followed me home today...
« Reply #90 on: February 25, 2014 - 11:24:37 AM »
Have I ever mentioned that I hate bodywork?  That I don't have the patients for it...and that I'm not good at it?  I think I had to redo the UCA cam bolt access covers on the Challenger 6 times before they actually were presentable. After trying to paint the alternator brackets and failing three or four times, I just paid to have them powder coated.  Well, the Dart's dash frame is no different.

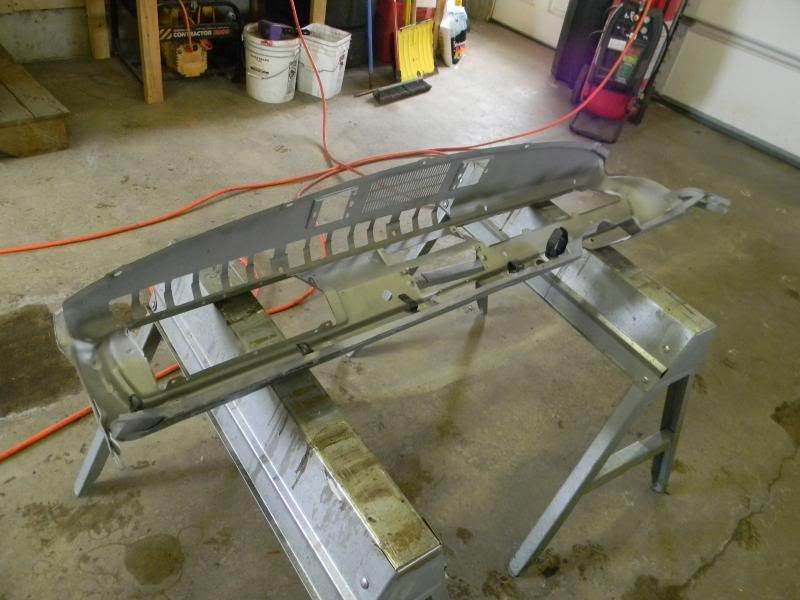
I had it blasted and saw that there was some pitting in the top.  On a Dart, the metal is exposed since the pad is very small compared to an E-body.  I filled the deeper pits with filler and sanded it all out.(I can't stand sanding filler)  I assumed the smaller pits would be hidden by the textured paint I was going to use on the dash.....I was wrong.  The top looks like poop.  Now I have to sand the top down and probably spread filler across the whole top and sand it back.  What a PITA. 

I ordered a new upper pad from Dave at Roseville today.  The car really needs the lower pads too but they aren't repoped.  They do make plastic caps for them but I don't want to do that.  I could send them to Just Dashes but I can't afford that.(maybe when the car is on the road, that can be a winter project)  I sprayed them with SEM Landau black and they look a lot better...but the foam underneath the vinyl is deteriorated in some spots which makes the vinyl wavy.


Offline wally426ci

  • Sr. Resident
  • ******
  • Posts: 5095
    • maryland mopars
Re: Look what followed me home today...
« Reply #91 on: February 26, 2014 - 07:28:12 AM »
Darren,

I personally don't mind body work. Something that I do to cut down on the amount of sanding/priming is this:

I block a paint stick (auto, not thin Home Depot) and I use that to spread the areas of filler I need. This gets it close. Hit it with your coarse paper (whatever stage you are in) for this example I will say 80 grit. Before you go to far, switch to 120 or some stage finer than you just used.

This helps me reduce the amount of times of priming and blocking over and over..... I just did the dash on my truck and it turned out pretty nice (all exposed metal)
{OOI====I====IOO}
      '71 Challenger
      [O[]=====[]O]
      '68 D100

Offline burdar

  • Sr. Resident
  • ******
  • Posts: 5925
Re: Look what followed me home today...
« Reply #92 on: February 26, 2014 - 09:27:46 AM »
Last night I sanded the top and spread spot putty over the whole area.  Of coarse the spot putty softened the underlying paint.  I ended up using paint stripper and took the top back down to metal.  Tonight I'll sand it and apply the filler.  After I sand that, I've got a little bit of high build primer left.  I should have enough to spray the area.


« Last Edit: February 28, 2014 - 09:03:22 AM by burdar »

Offline burdar

  • Sr. Resident
  • ******
  • Posts: 5925
Re: Look what followed me home today...
« Reply #93 on: February 28, 2014 - 09:05:13 AM »
My new upper pad arrived yesterday.  It looks good.  The grain pattern of the vinyl isn't the same as original but I assumed it wouldn't be.  Not a big deal since I'm not going back stock with this thing.  I have the filler applied to the top of the dash but haven't felt like sanding it yet.(I have to be in the right frame of mind for that. :biggrin:)

Offline burdar

  • Sr. Resident
  • ******
  • Posts: 5925
Re: Look what followed me home today...
« Reply #94 on: March 04, 2014 - 09:43:11 AM »
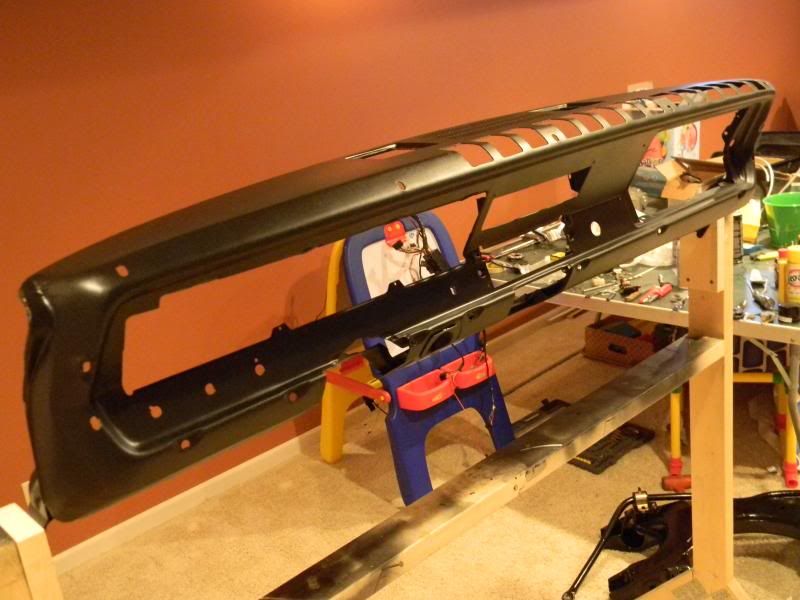
The dash is coming along nicely.  I got the frame repainted and it looks a lot better.  I also sprayed it with a satin clear.  The texture was a little too rough which made it hard to wipe dust off of it.  The clear didn't change the look of it but it made it a little smoother.  The upper and lower pads are installed as well as all the switches, heater controls, main dash harness and ash tray.  Last night I was trying to figure out where I can tap into the fuse box to power my oil pressure gauge as well as my new driving/parking lights.  I found an empty spade terminal that has "key on" power so that will work perfectly.

How do you determine what size fuse to run to an aftermarket gauge?  The instructions for the gauge didn't mention an inline fuse but I'm going to add one.  I found the wire that feeds the parking lights.  I'm going to pull that wire out of the headlight switch connecter and run it through a toggle switch to "key on" power.  I should be able to power the lights as well as the oil pressure gauge with the same wire...I just don't know what fuse to run in the wire. 5 amp?

Offline HP_Cuda

  • Hit the skinny little pedal on the right!
  • Sr. Resident
  • ******
  • Posts: 5268
  • Mopar or No Car!
Re: Look what followed me home today...
« Reply #95 on: March 04, 2014 - 12:34:09 PM »
Most gauges should have their electrical rating but you are probably pretty close. Most likely it runs on 12V but low amperage. Since all the fuses in the fuse block are pretty much 20A ones - you could put an inline 1A fuse and you should be fine. 

Better yet, use an ammeter and find out what your initial spike draw is when you power everything on and get a fuse just over that.

Here is an example of what I'm talking about:
http://www.sears.com/craftsman-digital-clamp-on-ammeter/p-03482372000P?sid=IDx01192011x000001&kpid=03482372000&kispla=03482372000P

Or you can use the cheapie Voltmeters and be fine since they go up to 10A you just have to change the position of the lines on the meter.

Hope that helps,
Bryan
« Last Edit: March 04, 2014 - 12:36:45 PM by HP_Cuda »
1970 Cuda Clone 440 4 speed - sublime green
1970 Cuda 383 4 speed - yellow - SOLD

Offline burdar

  • Sr. Resident
  • ******
  • Posts: 5925
Re: Look what followed me home today...
« Reply #96 on: March 04, 2014 - 12:48:59 PM »
The spade terminal I'm going to use is on the "input" side of the panel.  It feeds two fused circuits.(radio and heater)  I won't be drawing power through any existing fuses on the car.  The existing fuses aren't very big.

Offline HP_Cuda

  • Hit the skinny little pedal on the right!
  • Sr. Resident
  • ******
  • Posts: 5268
  • Mopar or No Car!
Re: Look what followed me home today...
« Reply #97 on: March 04, 2014 - 12:51:38 PM »

Then I would definitely find out what the draw of your components are before adding it in.

I guess you could try by trial by fire but that usually is not fun, best guess is that a 5A will more than do it for you and provide some protection.

Up to you.
1970 Cuda Clone 440 4 speed - sublime green
1970 Cuda 383 4 speed - yellow - SOLD

Offline burdar

  • Sr. Resident
  • ******
  • Posts: 5925
Re: Look what followed me home today...
« Reply #98 on: March 04, 2014 - 01:07:23 PM »
Finding out the initial amp load is a good thought.  Kind of hard to do on a bench.  Definitely something I can do once it's in the car.

The parking lights were originally powered by the headlight switch.(obviously) They had no fuse protection at all other then the fuseable link.  Now it will be powered through the ignition switch with an inline fuse.  It should be better protected then it was originally. Plus, the interior will be receiving power from two sources instead of one...when I do the Mad Electrical upgrade.
« Last Edit: March 04, 2014 - 01:09:07 PM by burdar »

Offline ShelbyDogg

  • Sr. Resident
  • ******
  • Posts: 5007
Re: Look what followed me home today...
« Reply #99 on: March 04, 2014 - 09:13:17 PM »
I measured the amp draw on my 70 Challenger Parking light circuit when hooking it up to my alarm system. I remember that all 15 bulbs only pulled about 3.3 amps. The 1 amp fuse for a couple of gauges should be fine.
Rob

3 E-bodies, Megasquirt-1v3.0, Edelbrock Pro-Flo-1, Holley C950, FAST EZ-EFI; say no to carbs...yes to throttle bodies

My Pace Car restoration thread:
http://www.cuda-challenger.com/cc/index.php?topic=44869.0


Offline burdar

  • Sr. Resident
  • ******
  • Posts: 5925
Re: Look what followed me home today...
« Reply #100 on: March 08, 2014 - 11:32:21 PM »
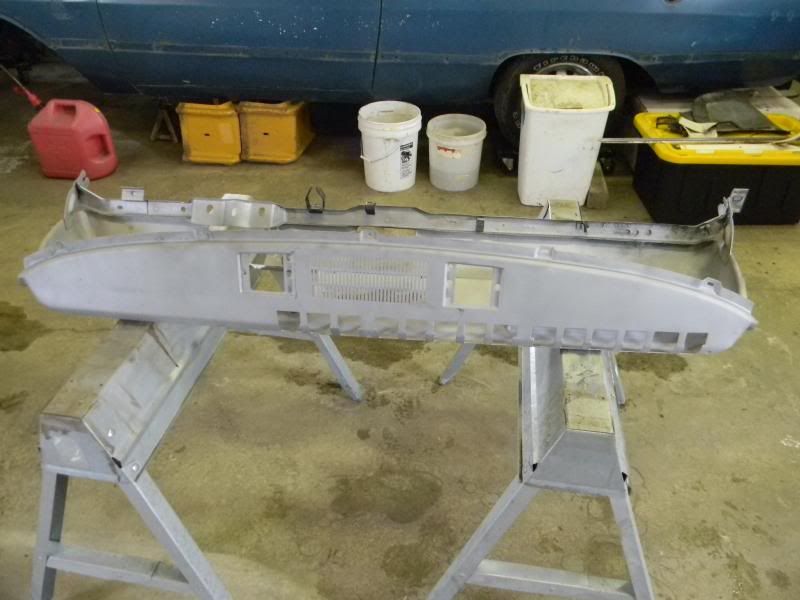
Here's an update on the dash assembly.  Right now I'm at a stopping point.  I've got some things to purchase that are pretty expensive.(radio and dash bezels)  I'm also going to redo the white gauge overlays.  They look really bad with the dash lights on.  I think I'm going to machine the raised numbers/letters off the upper panel...smooth them flat and reinstall another piece of vinyl.


Blasted frame...


Painted, stripped, smoothed, sanded and painted again...

Resprayed the two lower pads with SEM Landau Black.  The upper pad is a new BE&A piece purchased from Dave at Roseville.  It fit decent.  There is a slight hump in the middle that isn't laying flat against the frame.  I don't think it will be very noticable in the car.  The ash tray was hanging really low.  I had to add some spacers between the dash frame and the ash tray mount in order to lift it up tight to the lower pad.
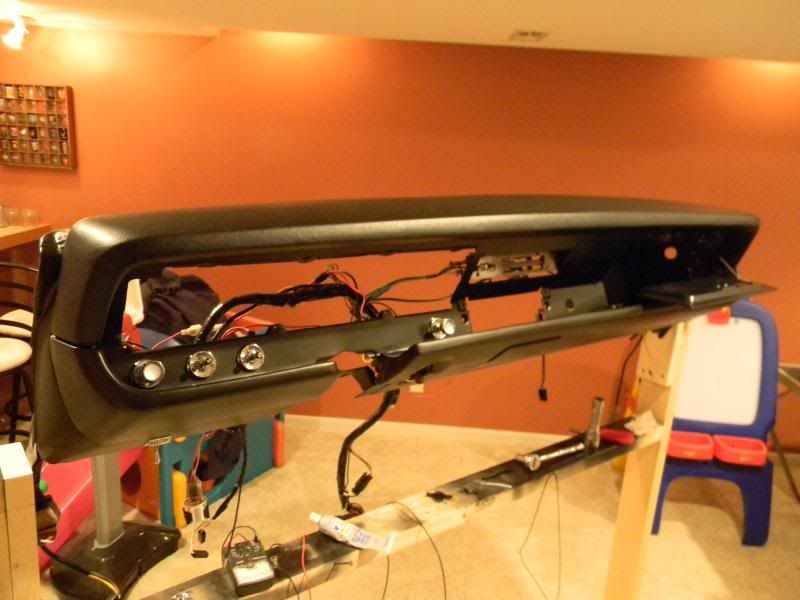

The dual speaker bracket fit nice.  There was gap between the bracket and the dash frame.  I added two layers of foam on top of the speaker bracket to take up the gap.  There is plenty of room between the speakers and the heater controls.
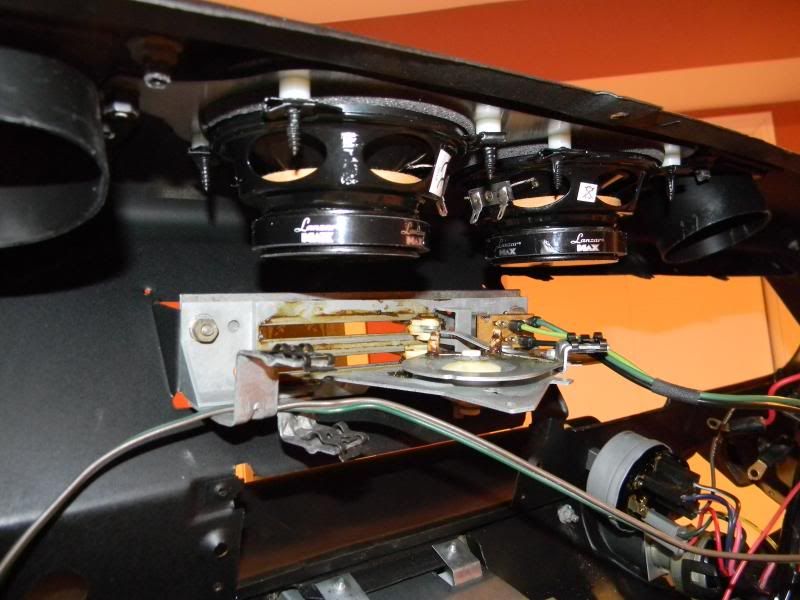

I cleaned up the main dash harness and replaced some of the terminal ends that were chewed by mice.  Overall the harness was in really good shape...just really dirty.
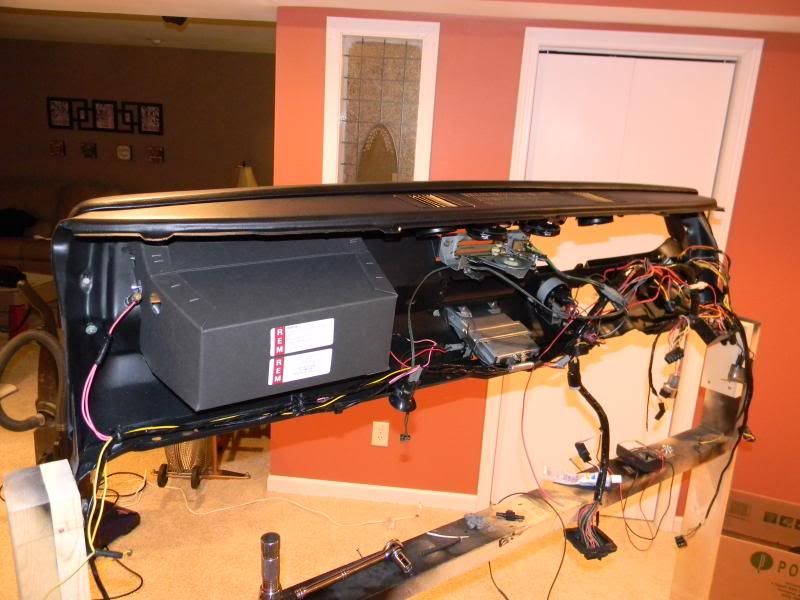
« Last Edit: March 08, 2014 - 11:36:43 PM by burdar »

Offline burdar

  • Sr. Resident
  • ******
  • Posts: 5925
Re: Look what followed me home today...
« Reply #101 on: March 11, 2014 - 06:04:23 PM »
I want to stiffen up the car but I don't want to do anything that can't be reversed.  In 74 I think, the factory added some braces from the inner fenders to the cowl.  This was to help with complaints of "cowl shake".  Any time you can triangulate something, it will stiffen it up so I though this would be a good modification to make.  I bought some braces and made sure they were going to work.  I was wondering if they would clear the washer bottle but they do...no problem. 

When these braces were added, the factory made part of the pinch weld on the cowl wider.  I'm going to have to make a couple brackets to widen the pinch weld.  That shouldn't be a problem.


Offline burdar

  • Sr. Resident
  • ******
  • Posts: 5925
Re: Look what followed me home today...
« Reply #102 on: March 13, 2014 - 08:21:42 PM »
A guy on FABO made a white overlay for the radio bezel in his 68 Barracuda.  It looked really good.  I can't believe I didn't think of it.  That will match my guages perfectly.  He sent me the layout file he created and I spend last night modifying it.  I had a strip of vinyl left over from the gauges and actually got the printer to feed it through.  Unfortunately, the ink didn't dry and it wiped right off.  Now I'm going to look into useing some glossy photo paper.  Maybe they make photo paper that is adhesive backed?  Here's what I have so far.  Too bad the ink came right off.  It was worth a try.

Offline MizzouRT

  • Full Member
  • ***
  • Posts: 540
Re: Look what followed me home today...
« Reply #103 on: March 13, 2014 - 08:42:29 PM »
Dash is looking really good!
Daily Driver: 2013 Challenger SRT 6 speed
Toy: 1970 Challenger

Offline HP_Cuda

  • Hit the skinny little pedal on the right!
  • Sr. Resident
  • ******
  • Posts: 5268
  • Mopar or No Car!
Re: Look what followed me home today...
« Reply #104 on: March 14, 2014 - 03:01:57 PM »

Amazing work there Darren.

Is the dash just held onto your stand by the two bolts? Or is there something in front holding it up as well?

Looks really good!

Oh the breeze in the hair for summer drives.... :2thumbs:
1970 Cuda Clone 440 4 speed - sublime green
1970 Cuda 383 4 speed - yellow - SOLD