Author Topic: Look what followed me home today...  (Read 82737 times)

Offline burdar

  • Sr. Resident
  • ******
  • Posts: 5925
Re: Look what followed me home today...
« Reply #150 on: May 11, 2014 - 09:40:51 PM »
The main brake line, main fuel line and front emergency brake cable came off today along with the rear end and shocks.  I have to remove the side glass and the convertible top mechanism and the entire car will be stripped.  I also installed the rear stands that I built for the Challenger.  They bolted right up to the Dart without any modifications.  The front stands will require drilling new holes.


I also started making the brackets to attach the fender braces to the firewall.  As it turns out, as long as you use WD40 as a lube, a wood blade in a reciprocating saw cuts aluminum quite good.  This is just the rough outline of the bracket.  I still have to drill holes and mill some material off the bottom side.


Offline brads70

  • C-C.com Expert
  • ********
  • Posts: 18747
Re: Look what followed me home today...
« Reply #151 on: May 11, 2014 - 09:43:32 PM »
Looking good!  :2thumbs:
Brad
1970 Challenger 451stroker/4L60 auto OD
Barrie,Ontario,Canada
Proud to own one of the best cars ever made!!!!!

My restoration thread 
http://www.cuda-challenger.com/cc/index.php?topic=59072.0
 My handling upgrade post
http://www.cuda-challenger.com/cc/index.php?topic=73985.0

Offline HP_Cuda

  • Hit the skinny little pedal on the right!
  • Sr. Resident
  • ******
  • Posts: 5268
  • Mopar or No Car!
Re: Look what followed me home today...
« Reply #152 on: May 12, 2014 - 08:03:37 PM »

Can't wait to see her stripped down and in primer ready for paint. I have a local buddy who has a GTX convert and it's a looker.

I'm sure yours will be a head turner as well!

 :2thumbs:
1970 Cuda Clone 440 4 speed - sublime green
1970 Cuda 383 4 speed - yellow - SOLD

Offline burdar

  • Sr. Resident
  • ******
  • Posts: 5925
Re: Look what followed me home today...
« Reply #153 on: May 17, 2014 - 05:56:05 PM »
The dash is finally done.  Now I can start cleaning up the engine/trans and paint them my new color scheme.  The radio came back yesterday.  I installed the white overlay onto the radio face and assembled the rest of the dash.

Radio before...


after...


before...


after...


before...


after...


before...


after...


finished...


Offline HP_Cuda

  • Hit the skinny little pedal on the right!
  • Sr. Resident
  • ******
  • Posts: 5268
  • Mopar or No Car!
Re: Look what followed me home today...
« Reply #154 on: May 17, 2014 - 10:30:18 PM »
I freakin love that white backplate on the dash, I may have to do that on my next build!
 :thumbsup:
1970 Cuda Clone 440 4 speed - sublime green
1970 Cuda 383 4 speed - yellow - SOLD

Offline dutch

  • Sr. Resident
  • ******
  • Posts: 6944
Re: Look what followed me home today...
« Reply #155 on: May 18, 2014 - 03:11:08 AM »
 :drool: :cheers:
*** Bart ***

Offline dfrazz

  • 1970 Cuda - 1968 Charger
  • Resident
  • *****
  • Posts: 4070
Re: Look what followed me home today...
« Reply #156 on: May 18, 2014 - 08:47:18 AM »
Looks better than what would have rolled off the assembly line!   :cooldancing:

Offline burdar

  • Sr. Resident
  • ******
  • Posts: 5925
Re: Look what followed me home today...
« Reply #157 on: May 20, 2014 - 10:19:02 PM »
I'm trying to think up a way to cleanly mount a trans cooler.  I don't like the plastic pins that push through the radiator.  I looked at some online pictures and think I came up with something.  This picture shows what I'm thinking of doing. 

I'll build a frame in front of the rad that I can bolt the cooler to.  It will be mounted using the existing radiator mounting bolts that stick through the rad support.  There are already some square holes in either end of the lower rad x-member.  I can drill those out larger and run the lines through....or I could attach a bulkhead fitting and hook up the lines to either end.

I can't remember off hand how the rad cooler in the radiator flows.  Hopefully the "hot" line connects to the DS.  That would make for the cleanest install.  I don't think there would be an issue with mounting the cooler vertically instead of horizontally.  How does this look?  I want to use AN fittings also.

Offline ShelbyDogg

  • Sr. Resident
  • ******
  • Posts: 5007
Re: Look what followed me home today...
« Reply #158 on: May 20, 2014 - 10:55:34 PM »
You always hook the cooler to the pressure side first then into the radiator cooler then back to the trans. This way the fluid is heated back up a little in cold weather before it goes back into the trans. Too cool isn't always best on the trans. I raced for 10 years hooked up this way.
Rob

3 E-bodies, Megasquirt-1v3.0, Edelbrock Pro-Flo-1, Holley C950, FAST EZ-EFI; say no to carbs...yes to throttle bodies

My Pace Car restoration thread:
http://www.cuda-challenger.com/cc/index.php?topic=44869.0


Offline burdar

  • Sr. Resident
  • ******
  • Posts: 5925
Re: Look what followed me home today...
« Reply #159 on: May 20, 2014 - 11:14:04 PM »
 There are a lot of different opinions on that issue. Every theory has some valid points. Is the factory pressure line hooked up to the DS or the PS of the rad?
« Last Edit: May 20, 2014 - 11:16:31 PM by burdar »

Offline ShelbyDogg

  • Sr. Resident
  • ******
  • Posts: 5007
Re: Look what followed me home today...
« Reply #160 on: May 20, 2014 - 11:37:46 PM »
There are a lot of different opinions on that issue. Every theory has some valid points. Is the factory pressure line hooked up to the DS or the PS of the rad?
You'll have to look in the manual. I always pull off a line and see which side it shoots out of. Can you spin the TQ converter to get it to pump. Engine out?
Rob

3 E-bodies, Megasquirt-1v3.0, Edelbrock Pro-Flo-1, Holley C950, FAST EZ-EFI; say no to carbs...yes to throttle bodies

My Pace Car restoration thread:
http://www.cuda-challenger.com/cc/index.php?topic=44869.0


Offline burdar

  • Sr. Resident
  • ******
  • Posts: 5925
Re: Look what followed me home today...
« Reply #161 on: May 20, 2014 - 11:53:06 PM »
Engine is out. I don't remember which line went where on the Challenger. It's not here to look at. It doesn't matter. I'll figure it out when the time comes. Just trying to come up with a plan.

Offline burdar

  • Sr. Resident
  • ******
  • Posts: 5925
Re: Look what followed me home today...
« Reply #162 on: May 26, 2014 - 08:36:27 PM »
Worked on the car all day today.  The fender brace brackets are done.


I spent the day scraping solidified oil off of the inner fenders and floor pan.  I scraped seam sealer out of the trunk and blew out as much dirt as I could from between the rockers and quarters.(it was completely full of dirt)  After it was all vacuumed out, I power washed the entire car.  It took some time, but the rocker pinch weld drains are now clear.  The car is ready to go to the body shop.


« Last Edit: May 26, 2014 - 08:39:59 PM by burdar »

Offline burdar

  • Sr. Resident
  • ******
  • Posts: 5925
Re: Look what followed me home today...
« Reply #163 on: June 16, 2014 - 11:30:01 AM »
Yesterday I grabbed one of my Durango wheels out of the shed and stuck it up under the Dart.  To my surprise, the 265 tire width fit nicely.  There is about 5/8" space on either side of the wheel well.  The 1/2" spring relocation I'm going to use is supposed to put the outer edge of the spring inline with the inner wheel well lip.  Obviously the backspacing is way off but that wide of a tire should work.  The tire is also WAY too tall.  I still want to tuck the wheel up in the wheel well more.  The tire almost hits the front and back of the wheel well.  A 35 series will probably fit up in there.  Anyway, I was just playing around.  Still, it gives me an idea of what 20's will look like back there.


Offline burdar

  • Sr. Resident
  • ******
  • Posts: 5925
Re: Look what followed me home today...
« Reply #164 on: June 16, 2014 - 11:45:51 AM »
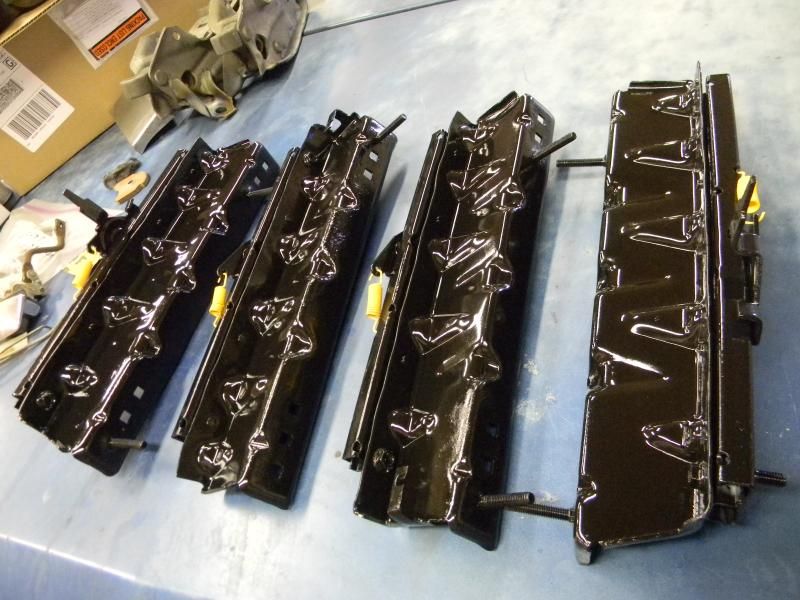
I finally got the seat frames done.  I started working on them last fall but realized one of the slider assemblies was missing so I set them aside and went on to other things.  I found a replacement slider/cage assembly so I started working on them again.  They were very rusty from the top being down for years.  It would have taken a lot of work to fill all the pitting.  I think the pitting will be hidden once the seats are in.  Most of it is on the bottom where it was up against wet carpet.

I had to drill out one rivet on each track to get them apart.  I used an allen head bolt to replace the drilled out rivets.  The worst part of the job was scraping out all the old grease.  That stuff really gets hard.  I just used white lithium grease to lube everything during reassembly.
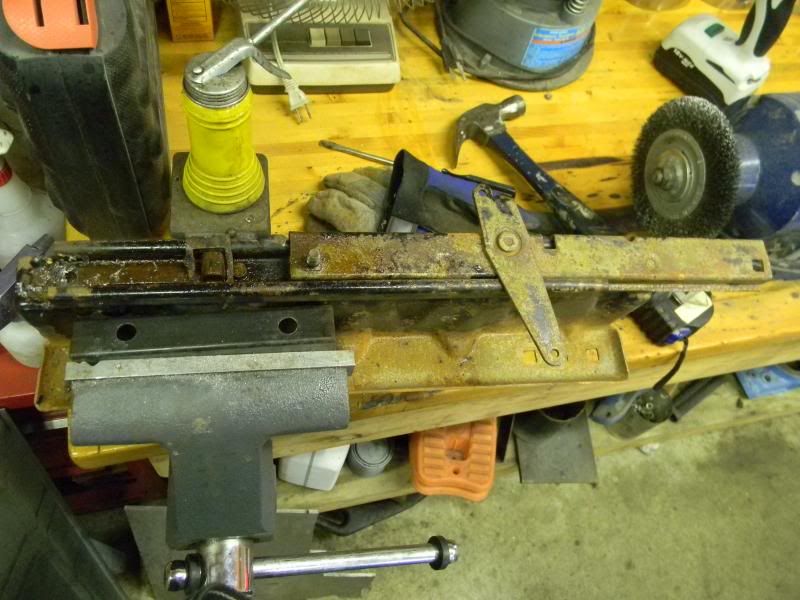


After a few soakings in acid, the rust and paint were gone.  My blast cabinet has seen better days and my compressor is on its last legs, otherwise I'd have blasted them.  I painted everything separately and then assembled.  After letting the paint sit for a couple weeks, I sprayed everything again.  I used satin black the first time but wasn't pleased with how it looked.  I used gloss this time but now it's too glossy.  Maybe they will loose some gloss over time?  The springs were just stretched out over some nails in a piece of wood for repainting.

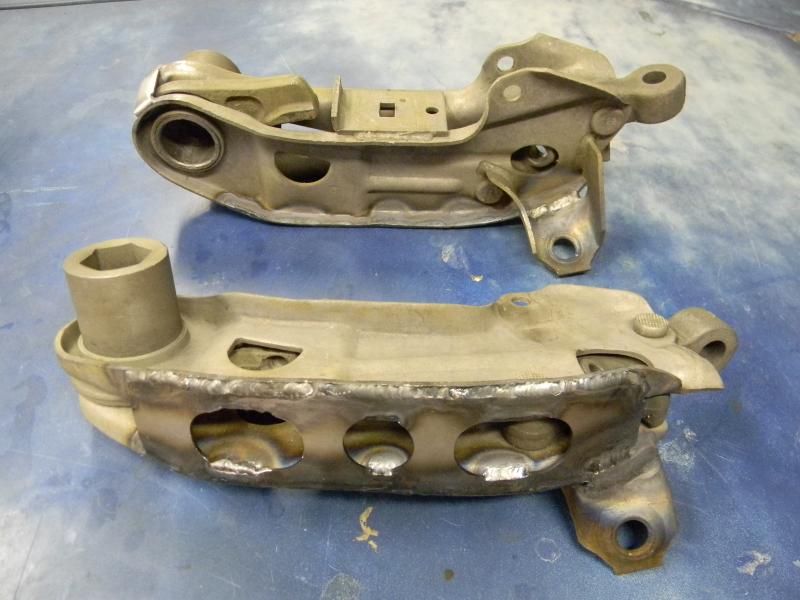
I also worked on the LCAs.  The replacement arms are off of a 72 Demon.  They were pretty clean but had a coating of surface rust on them. 
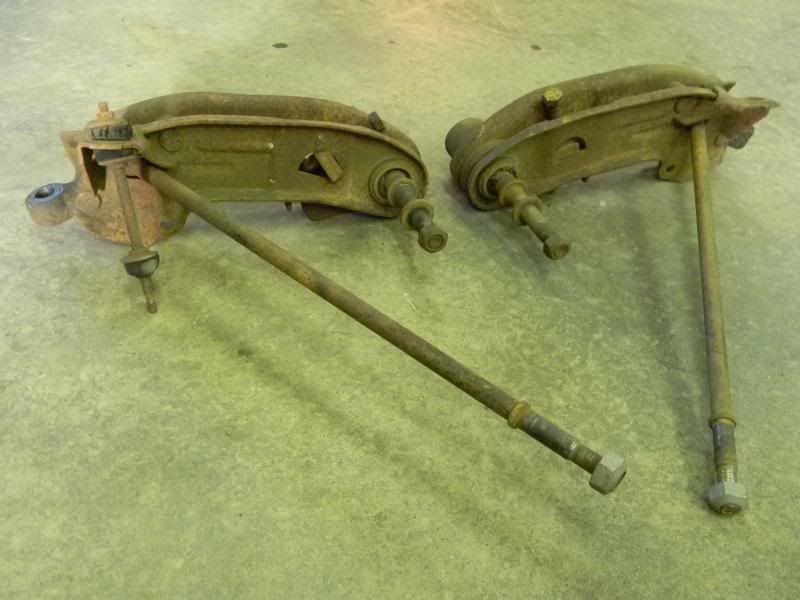

They got put in the acid too.  They actually came out really nice.  There really isn't any major pitting in the metal.  I saw traces of black paint on them too.  I don't think these were originally dipped in cosmoline. I also found one blue inspection mark after pulling them out of the acid.
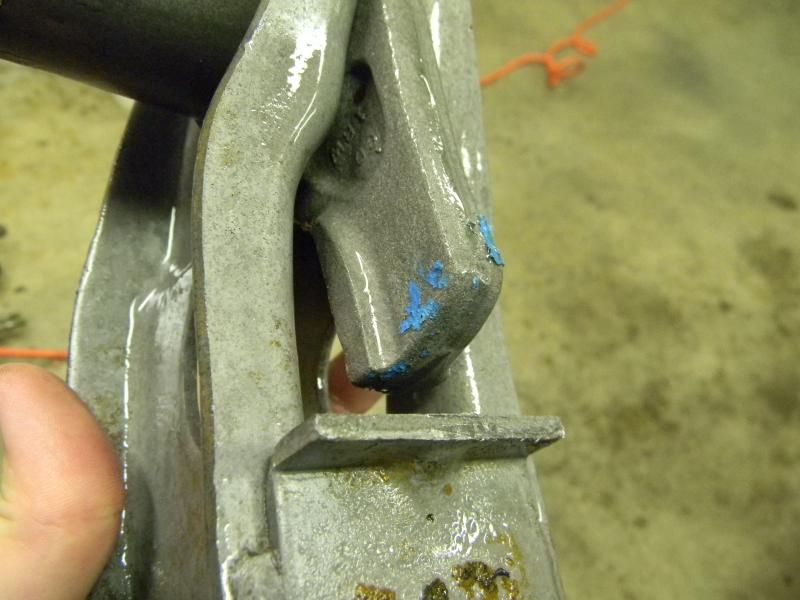

I bought the LCA reinforcing plates and had a friend install them for me.  I had him add additional welds to the sway bar tab as well.  We also clamped the torsion bar end together and welded a small strap at the end.  This got rid of 99% of the slop in the torsion bar socket.  Now it's time to get them powder coated.
« Last Edit: June 16, 2014 - 11:53:21 AM by burdar »